Desertcart purchases this item on your behalf and handles shipping, customs, and support to Seychelles.
🌌 Unlock the Universe — See What Others Miss!
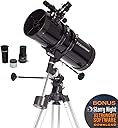
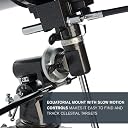
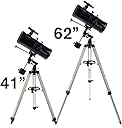
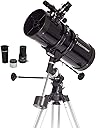
The Celestron PowerSeeker 127EQ is a powerful yet user-friendly entry-level reflector telescope featuring a 127mm aperture and a manual German Equatorial mount for smooth celestial tracking. It comes with multiple eyepieces and a 3x Barlow lens to enhance magnification, plus a free download of Starry Night astronomy software. Lightweight and portable, it’s ideal for both beginners and families seeking an affordable, high-quality telescope experience backed by a 2-year warranty and expert support.


| Additional Features | Lightweight |
| Asin | B0007UQNKY |
| Best Sellers Rank | #321 in Camera & Photo Products (See Top 100 in Camera & Photo Products) #5 in Telescope Reflectors |
| Brand | Celestron |
| Built In Media | 1-Eyepeice 20Mm, 20mm and 4mm eyepiece, 4 Mm, Barlow Lens, Finderscope |
| Coating | Glass mirrors coated with aluminum and SiO₂ |
| Compatible Devices | Laptop |
| Customer Reviews | 4.1 4.1 out of 5 stars (9,250) 4.1 out of 5 stars |
| Dawes Limit | 0.91 arc_sec |
| Eu Spare Part Availability Duration | 2 years |
| Exit Pupil Diameter | 5.08 millimeters |
| Eye Piece Lens Description | 20mm and 4mm |
| Field Of View | 2.5 degrees |
| Finderscope | Finderscope |
| Focal Length Description | 1000 millimeters |
| Focus Type | Manual Focus |
| Global Trade Identification Number | 00050234210492, 00053786283242 |
| Item Dimensions D X W X H | 33"D x 33"W x 54"H |
| Item Weight | 13 pounds |
| Manufacturer | Celestron Acquisition LLC |
| Manufacturer Part Number | 21049-CGL |
| Model Name | Celestron PowerSeeker |
| Model Number | 21049-CGL |
| Mount | Manual German Equatorial |
| Number Of Batteries | 1 Lithium Metal batteries required. |
| Number Of Items | 1 |
| Number Of Packs | 1 |
| Objective Lens Diameter | 12.7 centimeters |
| Optical Tube Length | 43.6 centimeters |
| Power Source | Manual |
| Unit Count | 1 Count |
| Upc | 050234210492 |
| Warranty Description | 2 years warranty |
| Zoom Ratio | 12 |
User
Its great for the price. Collimation is not as bad as others say
Ok so a few things, the first with collimation. This is the first reflector telescope ive owned, I read a lot of reviews about how difficult this telescope is to collimate before I bought it and decided I was up for the challenge anyway. It turned out to not be as difficult for me as others suggested it would be. I used both a chesire collimating eye piece and a laser collimator. I was afraid to take the focuser out of the tube and remove the lens to laser collimate it as many people have suggested, so I used the Cheshire collimator first and then used the laser to confirm it was collimated. Next I shined a flashlight through to focuser tube and aimed the telescope directly at the wall to see if the light came out Evenly and it did. The final test was the star test aiming the telescope at a star and two planets (saturn and jupter) and zooming out to show the crosshairs of the main tube lining up with the image perfectly. So all in all, the collimation process for this telescope isn't the monster a lot of people make it out to be in my experience. Due to the primary mirror's shape being spherical rather than curved like true Newtonian reflectors, the trick to collimating this telescope is to have the primary mirror as straight as possible rather than tilt it, then adjust the secondary mirror accordingly to line up with both the focuser tube and the primary mirror.The second thing I want to address is the view which was nice I was able to see the planets saturn and jupiter relatively clearly, but was somewhat obstructed due to the atmospheric distortion between the temperature inside my room and the outside air as its the middle of November and its already quite cold. Something I learned about reflector telescopes is in order to get the best image, the air inside the telescope must match the temperature outside. This telescope is said to max out at 300x magnification, but I was able to push it to 480x magnification using the 3x Barlow lens that comes with the telescope, another 2x barlow lens, and a 12.5mm eye piece before everything became too blurry to see. At that point I could make out a few of Jupiter's colored bands but again the atmospheric distortion hindered the view. The 20mm eyepiece it comes with is ok up to 150x magnification with the 3x Barlow lens but after that the quality drops sharply, so it wouldn't be a bad idea to purchase additional pieces, I haven't really used the 4mm eye piece because the lens is so small it would be a pain to look through so I just stack Barlow lenses with wider eyepieces.Finally the finder scope isn't too bad despite the negative reviews. Mine isn't even perfectly aligned and I had little trouble finding objects in the night sky.Also, this may be a nice "beginner" scope for budding astronomers, but I certainly wouldn't give it to a kid to put together, mainly because of its size and weight. It does take a little tinkering, time, patience, and the right tools to get the most out of it. You'll need a size 2 allen wrench to collimate it. All in all, I'm satisfied for the price I paid for it. I'm glad I ignored all the nay sayers who bash this telescope and its particular design in general.One last thing, be careful with the telescope cap for the main tube, its not as sturdy as it looks and is really the only complaint I have about this product. I've dropped it once or twice and a nice sized crack appeared in it
User
It’s a great scope, but it takes a LOT of practice and getting use to.
I think this telescope is really great for the price. The stand is kind of flimsy, but that is where they went skimpy. I haven't gotten the chance to view anything at night yet. I did set it up the other day and could see individual raindrops hanging on individual pine needles at the end of my driveway (we have a very long driveway). I was super impressed. I do recommend getting the accessory set ($30 on Amazon right now). We are going to order it since the smallest eyepiece that comes with this one is pretty much useless. That is pretty much the deal with any telescope you get though. You'll always have to upgrade eyepieces. Overall, I am very happy with my telescope. Like I said, be prepared to collimate it. Any reflector telescope is required to be collimated though. There are videos on Youtube on how to do it. I haven't attempted it yet but from the tutorials (and using a laser collimation tool) it looks pretty easy if you are handy. I am an engineer so I am really not afraid to work with stuff like this.UPDATE:I have collimated it and used it multiple times now and I am VERY impressed. I will say, the collimating means everything when using it. I recommend collimating at least every month (or after any bump the telescope takes). This will keep your views clear and your time more enjoyable.We also bought the accessory kit like we were planning. I don’t see how you can use this scope without it. We were BLINDED trying to view the moon (quarter moon at the time I believe) and had to go filters that came with the kit. The eyepieces that came with it are higher quality and much clearer than the included eyepieces.I discovered that viewing at night with lights around you ruins the experience. Just having the kitchen light on in the house ruined our views from out in the yard. Make sure it’s as dark as possible. We also learned that your views aren’t anywhere near as good if your eyes aren’t adjusted to the dark. The first time I viewed Orion’s nebula I had just walked outside and viewed it. A few nights later I set up again and waited about 20 minutes outside before viewing and WOW!!!! The difference was incredible. It went from a slightly white cloud to a BEAUTIFUL image with colors and significant detail.We also got to view the andromeda galaxy and that was pretty amazing as well. Tonight’s target is the moon, Orion’s nebula, and the 7 sisters. If you know how to use it, you will enjoy it greatly. I plan on upgrading telescopes eventually because of my experience with this one.These are the items we have bought for or upgraded on the telescope:Binoculars. Got a really good pair at Sams Club. We can see nebulas with them as well. They’re great for finding sky targets.Accessory kit. Get it. Worth every penny.A new finder scope. We got the laser dot one on amazon for about $20. Totally worth it. The one that came with it is pretty much useless.Sky maps. These help in finding what you want to see.Red flash lights. These are a must have since they will not affect your night vision. I got 6 of them for $9 on amazon.Some star apps for iPhone. Download Celestrons app. It will help a lot. I also recommend SkyView. Not as good as SkyPortal by Celestron but still good.I also feel like I should mention that the free software package you get for your PC is AWESOME. I really recommend using it.EDIT: I uploaded some pictures I took with my DSLR camera. They are a little blurry because I didn’t have a remote shutter. The camera moved some when I pressed the button. Hoping to snap a shot of Orion soon once I get a remote shutter.
User
Nice Telescope with a few Mirror Alignment Issues
This is a review specifically for the Celestron PS 127mm EQ.I got this one as a Christmas gift. It seemed like a good telescope for basic astronomy, with many nice features. But I was initially quite disappointed by the fact that the images seemed rather blurry. It took me two weeks to correct this problem, to the point where now I am finally starting to like it.I should add that the telescope had probably traveled a few miles around the globe when it got to me, but the box and packaging were in pretty good shape when it arrived.When I got it, I initially compared it to another $50 reflector, the Celestron 76 mm Discovery, and the results were very disappointing, the smaller one was much sharper. I spent hours reading on the Celestron and other sites on how to adjust collimation with a simple "hole in the cap" and got nowhere. The image was always relatively blurry. Day or night, polaris or no polaris.I later bought the Celestron 24mm to 8mm zoom eyepiece, which allows me to zoom in without changing eyepiece, and it works very well on the smaller 76mm telescope, but again blurry images on this one.After quickly becoming an expert on reflector collimation, I noticed that nothing seemed collimated properly. I guess they don't even try at the factory on this one? I decided to order a Celestron 1.25" collimation eyepiece ($30), which can be useful in aligning the optics (the two mirrors) in reflectors like this one. I tried it out on this one, and got repeatedly confused on what should be seen in what reflection when you adjust this or that. I spent entire afternoons fiddling with secondary versus primary mirror adjustments, achieving virtually nothing as far as improved sharpness is concerned. I did replace the secondary mirror alignment screws with better stainless steel ones that would not strip, they are metric m4.I then tried to collimate this thing on the North Star (Polaris) and that is, for this one, another pure fantasy. The reason is that Polaris is faint, and every time you move a mirror by a tiny bit (as explained in the Celestron instruction) the star just darts out of view in the eyepiece. More frustration and still no luck in getting this thing in focus.Lastly, I ditched all the Celestron recommendations on day and night collimation (using either the celestron collimation eyepiece or the "ring pattern" for out of focus point sources) and did instead the "EYE-DOCTOR TEST" :I wanted to see how sharp I can get this one, when there is no wind, no shake, no atmospherics, no moving planet, no mist etc. So I placed the telescope at one end of a long corridor in my house, and a nice clean printed envelope with some sharp text on it at the other end. With this method (which I seemingly invented, as it is not described anywhere in the instructions nor on the Celestron site) I was finally able to adjust (by very small increments) the three screws on the secondary mirror till I FINALLY got a nice sharp picture of the writing on the letter. Note that this last procedure did NOT require the collimating eyepiece! Just the regular 4mm eyepiece that comes with the telescope. Success!As a by product, I found that in fact in the end all three eyepieces work rather well, down to the 4mm which is a bit faint, the 20mm with the 3X Barlow is better.Now I can finally see the main two stripes on Jupiter and the Orion Nebula with some clarity. In conclusion:Plusses : Potentially sharp optics and large aperture. Reasonable price. Sturdy mounts. Useful eyepieces.Cons: Imo optics needs to be carefully aligned by the method described here. Mine was definitely NOT aligned and, initially, as a result disappointingly blurry.EDIT: After a few more weeks of use (February 2014), I spent some time using the Celestron collimation 1.25" eyepiece ($28 here on Amazon). My conclusion is that it is a very useful, if not essential, tool for this telescope. To avoid any further issues due to my previous messing around, I first screwed in the secondary mirror (by loosening up the three alignment screws, and pulling in the secondary mirror all the way in until it barely touches the mount), and later pulled out the primary mirror as well(by pulling out all six screws until the whole unit comes out, then reinserting the mirror after making sure the secondary was pointing the right way, straight to the back). Then, using the Celestron collimation eyepiece with its crosshair, I carefully adjusted the secondary and primary orientations (three screws for each mirror) until all the crosshairs overlapped perfectly. In other words, the crosshair in the eyepiece has to overlap perfectly with its reflection through mirrors 1 and 2, and back to the eyepiece. This takes time and patience. After having done that, the image quality seems pretty good and rather sharp. I went down to about 8mm, I don't recommend getting lower than that. The best setup for this one is the 20mm eyepiece, either by itself or with the included 3x Barlow (which then gives 20/3 = ca. 7mm). I also got some Ploessel eyepieces, but they will do you no good if the mirrors aren't aligned first.PPS. I found (April 2014) that the best way to collimate this (Bird-Jones or catadioptric design)telescope and get nice sharp images is to remove the focusing lens at the bottom of the focusing tube (takes 10 mins), align the secondary and primary mirrors with an inexpensive LASER collimator (mine is an LK1 $30 from seben dot com, takes another 10 mins to do this part), put the corrector lens back in and reinsert the focusing tube (don't touch the lens with your hands, takes around 5 mins). With this method the results are guaranteed to be reproducible and consistent. The images are then consistently sharp.PPPS. The other day (June 2014)I talked at length to a very nice and helpful person at Celestron technical support (Will?). He suggested to check the following thing. The secondary (smaller, flat) mirror is oval-shape and mounted right under the focusing tube, held in place by three (outside)-plus-one (center) screws. Now put a focusing cap (just an eyepiece cap with a small 1mm hole in the center) at the (top) end of the focusing tube. Then make absolutely sure (after you take again very carefully the correcting lens out of the focusing tube) that the inside of the focusing tube and the secondary mirror, as viewed through the focuser, are perfectly concentric when you view them through the hole in the cap. That is, the secondary mirror has to be perfectly centered when viewed from the top of the focusing tube. Note that the secondary mirror is oval shaped, but will look like a perfect disc when tilted at about 45 degrees. On mine this required several turns on the (secondary) center screw. After this is done, make also sure that the tilt on the secondary mirror is such that you can see the center of the primary mirror (on mine I put a black pen mark at the dead center). Now re-align the secondary and primary mirrors with a laser (in my case), with the cap with a hole, or a cheshire eyepiece. Then put back the correcting lens in the focuser, and you are done. The end result is that on mine it improved the sharpness a bit (I did the eyedoctor test again). I was also able to see more detail on Saturn with a standard 9mm eyepiece, will try taking a few pictures soon.PPPPS: This telescope really shines (due to the light gathering abilities of it's fairly large mirror) when you want to look at fainter objects. Recently we had good viewing conditions and I had a chance to look the the Great Cluster in Hercules (M13), the Lagoon Nebula (M8), the Omega Nebula (M17), and two more star clusters in the same general region (M4 and M62). I took some fairly nice pictures of these objects with a Sony HX200 camera (30x zoom) mounted piggyback on the telescope, using the Celestron motor drive for the 127EQ and long 30sec exposures at 800ISO. See the pictures I posted on the right. I was surprised how well the telecope mount, equipped with the Celestron $30 clockdrive, works when taking long exposures.PPPPPS: It's October, seven months after I did the laser collimation, and everything is still fine and exactly the same. That tells me that the collimation on this one only needs to be done once, maybe if it gets out of whack during shipping. After that there's no need - unless you bump it or drop it badly. At least that's my experience.PPPPPPS: It is end of February 2015 now, and I had some very good views of the great Nebula in Orion M42. The scope is still perfectly collimated since almost a year ago, last time I did the collimation with a laser. Again, the message here is that if you spend the time to collimate it properly and don't bump it after that, it will stay sharp almost forever ... Btw I love the $32 celestron R/A single axis motor drive on these telescope, and in my opinion it is a very worthwhile investment. Objects stay in view for almost an hour w/o adjustments.
User
Great Scope!!!
This scope catches a lot of flack in the forums and here. Let me demystify some of the bad reviews.1) CollimationThis telescope can be collimated easily by eye, if you want to collimate with a laser, you'll have to remove the corrective lens in the focuser tube. If you love to tinker knock yourself out however, this isn't the most powerful scope you can buy so, eye collimation is more than enough to be happy.2) The finder scope is unusableWhile I agree, it's not the best finder scope out there and lining it up with the telescope can take a long time but, it is possible with time and patients. It's also replaceable so if you don't like it, get another one. (note: it is a scope and not a finder, the image is reversed in the finder)3) I can't see anything out of this thingYou need to collimate the scope and line up the finder scope, the instructions are in the manual for eye collimation (tip: back the focuser tube all the way out when you collimate, doing this will let you see both the secondary mirror and the primary, also note, this went through shipping and if it arrived with all the mirrors aligned and ready to go, get a power ball ticket because you'd be the luckiest person on the planet4) The Barlow is uselessPlease google and youtube what a barlow is and how to use them, it's not a true lens and once you find out its true purpose, it'll make more sense5) The 4mm lens is uselessSee my comment on the barlow, using the barlow with the 4mm will tame things a bit, also, get a lens and filter kit with a 15mm and a 9mm lens.6) The Telescope doesn't stay put on the tripod.The counterweight on this telescope is not for looks, you need to use it to balance the telescope on the eq mount. when the counter weight is properly balanced, you can put the telescope in any position on the right ascension axis and it'll stay put. The Telescope itself also has to be balanced front to back in the mounting hoops (youtube it, there are a billion tutorials on how to do this.) One last comment on this issue is, do not try to push the telescope into position with the clutches locked, use the controls on the tripod to position the scope, if you need to make big adjustments, loosen the clutches (should be OK because your telescope is balanced) position the scope to the general area of viewing, lock the clutches and use the controls to fine tune. If you push the scope around with the clutches locked you're manhandling the gears that the controls are attached to and you can push them out of whack, don't do this.Here's the deal, this is a marvelous telescope for UNDER 200 American green backs!!! When properly set up, balanced and overall ready to view, it's a great scope and it's a lot of fun. Buying upgrades for the scope will add to your viewing pleasure. Yes you can see our planetary neighbors, the moon looks fantastic, in a dark place, you can see some deeper space stuff.Is this a good scope for beginners? Yes I think it is, backyard astronomy is not a plug and play out of the box and looking at Jupiter kind of deal. A telescope is a pretty sensitive thing that takes a little love. If you're just starting out and collimation, calibration and generic tinkering is not your thing, this may not be your hobby, heck aside from sitting on the couch, I don't know what hobby doesn't require a little hands on setup and tinkering.Finding stuff in the sky is hard, small movements at the scope have a huge impact on where you're looking in the sky, youtube is your friend, so is google.
User
buy only if this is the best you can do for budget
I have two competing thoughts about this telescope. First let me add that I am an experienced amateur astronomer for decades. I have a 12" Dobsonian, but I purchased this for a second home that has an amazing view of the south sky over the ocean and thought it would be fun to add it to our condo.First thought....SHAME on Celestron for building such a substandard instrument. Everything about it is not just passing the benchmark, rather everything about it is just SHORT of the benchmark! Why all the plastic? Would it add that much more to provide metal parts for the most critical components? The mount barely passes as usable, everything about it provides too much tolerance and non ergonomic maneuvering. The price point is cheap, i get it....you get what you pay for...in my case I paid $120 as an open box item....frankly i would have returned it if I paid full price.Second thought: I suppose one could make an argument that there are families out there where $200 or less, thats all they can afford, and if this is what it takes to get someone's interest peaked and into the sciences then mission accomplished.Having said that, its going to take PATIENCE to deal with the usage of this telescope. When you find an object you will undoubtedly marvel at the sight of Jupiter, the moon or Saturn, or the nebulae in Orion belt. This may be all it takes for someone to take an interest in science and move on.The clarity of the moon and Jupiter was adequate. I was pleased with these objects and though it barely passed grade, its hard not to marvel at these objects. Locating and aiming in on other objects is going to take a lot of patience.Bottom line, I nearly want to cry over the quality of the mount, the description of "German" is an insult to German engineering. I recall when I was 12 years old getting my first 4.5" Tasco telescope, the mount moved like a fine tuned instrument. Mind you back in those days that telescope would probably be the equivalent of a $1000 in today's money. This one is Walmart chinese made quality, probably best sold in the toy department.Reluctantly I would say get it if this is your best budget, but if you can afford more, then you need to spend at least another $200 at the same size to get something of quality.UPDATE: after several weeks of using the item, I'm more favorable to the purchase now. I had an opportunity to have perfect visibility in the sky and used it to see Saturn and Jupitor. I have not culminated the scope yet the images were crisp and large enough to see the rings of Saturn and the bands of Jupiter. The mount is the weak link, you have to be very careful not to contact the telescope in any way because of vibrations. Once you adjust the spot scope you must not touch it because its very cheap and easily moves out of position. The mount does not easily adjust while tracking the object.Overall, if you have a lot of patience, it will provide entry level excitement. If you have the budget reach higher but if this is your $ limit I'm sure you can make it work. Have fun
User
REACH FOR THE STARS!!
I have no comparison for this other than the more simplistic Refractor Telescope my father got me as a kid...so now the circle continues, as I got this for my own son. This is the type I always dreamed of getting as a kid, but back then these were in the $500 range and easily too much for my parents growing up. The price point on this for what it offers is awesome, and I selected this after about 6-8 hours of reviewing specs, feedback, and much contemplation. It was this or the 114mm longer tube version, and I opted for this in the end (I figured this had a little more power and it looked more portable than the longer tube of the 114, since we have to go somewhere to view the sky due to the forested yard we have). We have taken it out twice now, & I was NOT disappointed, HOWEVER, a few pointers will definitely help if you're thinking of getting this, to give you the best success chance possible:1) What i read about was VERY true--buy a telecope for the tube itself, NOT the eyepieces it comes with. After MUCH searching I decided upon a zoomable eyepiece to buy along with this:http://www.amazon.com/Celestron-93230-24mm-1-25-Eyepiece/dp/B0007UQNV8I figured this would be a nice way to avoid having to replace eyepieces (it comes with a 20mm and 4mm, and comparing those to this zoomable one is night 7 day difference...the quality and the versatility of the zoomable blows the stock ones out of the water). Its especially nice to start in the 24mm (24x) place, align everything, find your target & focus, then zoom in on it (even with the barlow for additional zooming power), refocus slightly and then enjoy the sight! We successfully located and watched both mars & saturn on our first 2 attempts (using only the free google skymap app for Android to help us locate the planets). What they say about the rings of saturn are so true...you will never forget the first time you see them. It IS a bit small, but you can make them out if everything is in focus and you dont touch the the telescope once everything is in view (until the planet moves out of the field of view, in which case the fine-tune movements of the telescope really shines!). All in all, buy this telescope NOT for the eyepieces, but for the tube itself, which is one of the bets values from everything I have seen. If you pair it with any non-stock eyepiece you will not be disappointed! If you choose not to go with this zoomable one I mention here (that the only additional thing I got for this when I first bought it), even though the price is very reasonable currently @ $51, I'd recommend the 9mm one from Celestron (currently about $20). The stock 20mm eyepiece is "ok" but the stock 4mm I found utterly useless. At least the 9mm aftermarket eyepiece gives you about a 2X zoom vs. the stock 20mm. And then you have to decide if the stock 3X barlow (see next) is worth using at all either.2) BARLOW. Had no idea what this was before I bought this or started researching info about telescopes. Basically its a zooming piece for your normal eyepieces. The stock version that comes with this is "ok" but I dont have anything (yet) to compare it against. Lets just say it "works" to some extent, but all the reviews I read about said this one sucked...to go after an aftermarket 2x or 3x. From all the reviews and research I've gathered, and now using the stock version, I'd say I'd have to agree in all likelihood. Due to this, and since my son seems to have really enjoyed our first 2 outings, I decided to take the next step & get a combo 2x barlow that also serves as a T-adapter to allow for photography! At only $45, that seems like a really good deal, especially since the 3X barlow I found from Celestron was around $80. The 2x combo can be found here:http://www.amazon.com/Celestron-Adapter-Barlow-Universal-T-Ring/dp/B00009X3UVI can't say for sure how this will be, but I can tell you it certainly cant be worse than the stock 3x, which seemed very cheaply made (again you buy the telescope for the mirror & tube). Paired with the zoomable aftermarket 8-24mm eyepiece mentioned above and I think itll be a slam dunk. Plus it allows for adapting for use with a digital camera (well possibly non-digital as well, but we have a sony DSLR that should work with the T-adapter for the model we have, which was only about $10...for $55 I get an aftermarket 2x barlow that adapts to allow a DSLR...pretty decent!).3) Other accessories: I have not chosen to get any more than I have listed here, but there was 1 have to mention that I may have to invest in at a later time. One of the concerns about the Newtonian scopes (this is one) was the possibility of having to correct/adjust the mirrors. I chose not to buy the collimator (adjusting tool) out of the box, but was prepared to buy either the cheaper $20 one or possibly the more expensive but from all I can see, more worth it, laser-optics one for about $70. Thankfully it seems my scope did not need it out of the box, but I suspect the lower star reviews that say it didnt work out of the box either had the rare scope that needed it from the get-go, or else the more likely scenario, is that the patience needed to align the finder mini-scope on top of the tube, with the eyepiece view (using the 20mm or in my case, the much better zoomable 8-24x eyepiece, which allows for a much wider field of view than even the 20mm stock) was probably the major factor in most of the low reviews. Having done my research I knew it would require patience when using (see more on that below) and it paid off hugely when you have a 6 yr old and an 8yr old wildly ecstatic with waiting a half-hour to get Saturn's rings into view...see below for details).3) With the accessories out of the way, lets talk about SETUP & USE. First, for setup, I was very meticulous about it and very careful, but from opening the box to final setup & cleanup, I was done in an hour. NO TOOLS were required. Just a touch of patience and carefulness. Seemed very reasonable to me.4) USE: as I mentioned we have taken this out on 2 outings already (have had it less than a week) and both times were widly successful. I have to say that its really useful to have google's free skymap with you when you use this, or even another product I got from Amazon, called Stellarium. Both are good apps and do things a little differently. Together they made finding the planets a breeze and helped us find, focus, and enjoy the views VERY quickly. Both mars & Saturn were easily found using the apps, mars being the easier one to figure out even without the app, due to its orange-tinge color.First, we aligned the mini-scope on top (finder scope) using a distant cell tower as a target (rem the images are UPSIDE DOWN, which when viewing stellar objects is not a big deal). Once we had this aligned (took about 5-10 mins) we located mars, and due to the patience of doing the finder scope, we saw mars in the unzoomed 24x eyepiece ON THE FIRST TRY. So do not skip this step if you can!Now, when we first viewed mars it was a huge fuzzy, hazy blob, with the crosshairs intersected it (in the eyepiece, not the finder scope). I knew we had to focus. So in less than 30 seconds we had it focused and viola! The orange "star" (aka, mars) was seen! The kids were ecstatic! But i told them this was just the beginning :). I zoomed in with the zoomable eyepiece and we could actually make out the slightly crescent shape of mars. But the real goal was saturn's rings! One of the kids had to use the restroom but they said they'd hold it till we saw saturn. I was up against the clock now. but in my 30 mins of use thus far I knew we could do this!In less than 5 minutes later I had saturn in view at low power with rings clearly visible! Kids were in awe (as was i!) and we even tried the 3x barlow (stock). For this, i found that zooming in past about halfway was not very useful. the image was a bit fuzzy. the 3x barlow at 20-24x was good though. I later discovered that this was probably the upper end of the scope's ability to magnify, roughly 250-300X maximum without image distortion/loss. Thus, going back to the barlow section eariler, is why I think a 2X barlow will be great, using the maximum zoom of the eyepiece (8mm).FURTHER THOUGHTS: I hope you have enjoyed my "journey" described here and maybe help someone else decide if this telescope or Astronomy endeavor is worth it and which one to go after. The more expensive motorized ones are probably worth it if you are really into Astronomy, but I could nto afford them (they start around $300 for 114mm scopes, which is pretty reasonable), or the $250+ Dobsonians (non motorized but even more powerful than this one) are a good option too. But i suspect with the low-cost additions I already have ordered noted above, this scope will do just find for now. Plus they have an motorized addition for this thats only around $35, but it does not auto-track. If you align everything properly reviews have said it does help a lot. Thats something else I may invest in down the line. All in all, for under $200 starting, I got this scope & the aftermarket zoomable eyepiece which I almost call a must. For around another $50 you can get an aftermarket barlow that even opens up some astrophotography (but I am sure thats going to take a lot of patience to be successful from what i have read). Good luck and REACH FOR THE STARS! :)
User
This telescope is being sold as a great scope for beginners with very easy set up
This telescope is being sold as a great scope for beginners with very easy set up. It is neither of those things. I have been trying for a couple of months to collimate this telescope and nothing appears to work. Yes, I removed the lens from the focuser and used a laser collimator to align the mirrors. Images remain blurry no matter which eyepiece I use. Yes, I made sure the laser collimator was properly aligned before starting. There is a long and informative post on this site that explains in great detail how to collimate this telescope. None of the procedures outlined worked for me. If you decide to buy this telescope despite what I have written here then I wish you the best of luck with it.Update 01/01/17: I am slowly getting this scope into alignment. If you're new to Newtonian telescopes and you're going to insist on buying one of these I urge you to get a collimation tool. I bought a laser, but I probably would have been better off with a Cheshire.You cannot be afraid to take this telescope apart, because you will be doing it a lot before you actually get to the point where you can take it outside and see things. It is a time consuming process because the nuts are not welded to the large tube. The first thing you need to do before proceeding is take out the lens at the bottom of the focuser. You can do this by extending the focuser all the way out and removing the three screws holding it to the tube being careful not to drop the nuts. After removing the lens reinstall the focuser and retract it until it hits the stop. If your telescope was like mine, you will notice that the small secondary mirror is WAY forward toward the primary mirror instead of centered on the focuser. At this point on page 26 of the instruction manual it will tell you "DO NOT loosen or tighten the center screw in the secondary mirror support". Ignore this instruction. Move the mirror back toward the spider (or forward away from the spider if your mirror is out of alignment in that direction) until the secondary mirror looks round and is centered below the focuser. You will have to loosen and tighten all four screws to accomplish this task.This is the point where helpful people on the internet, particularly two guys in Australia on YouTube, were a huge help. As I said, I bought a laser collimator. What you need to do is remove the spider (this holds the secondary mirror) and then remove the primary mirror, being careful not to touch or drop the mirror. I found the primary mirror to be mounted very close to the center (I was eyeballing it, but still). There are four holes for the screws that hold the mirror mount to the tube. They appeared to be equidistant from one another (again, eyeballing it), so I got some string and tied two pieces across the opposite holes. I then took a felt tip marker and placed a dot where the two strings intersected. Then I removed the strings and placed a plastic adhesive paper hole reinforcer on the mirror making sure to place the marker dot in the center of the hole reinforcer. Trust me, you won't see any of this stuff when you get ready to look at the heavens. I then used the adjustment screws on the mirror holder to snug it down to the rubber spacers on the mount. When you're done, the locking screws will stick out. Now put everything back together.Isn't this fun? Remember, this telescope is being marketed to first time users looking to get into astronomy, hence the reason my rating is still and will always be one star.Here is where the collimation laser comes in. I had attempted several times to collimate this telescope without that little paper hole reinforcer I told you to put on the primary mirror, because I didn't know it was supposed to be there or how helpful it would be to have it there. After making sure the laser collimator was true (easy, and luckily it came from the factory not needing adjustment which is probably the only break I got in this process) install it in the focuser with the target area facing the back of the telescope toward the primary mirror and turn it on. I used setting 3 on mine, which allowed me to see the laser clearly in the primary mirror. BEFORE you look down the tube looking for the beam on the primary mirror, stand to one side and move your hand over the opening of the telescope. If you see a red dot on your hand be EXTREMELY careful looking down into the tube. The spot where you see the dot is the dangerous place, so definitely don't look there. Your next task is to move the three screws on the secondary mirror to move the laser beam to the center of that paper hole reinforcer. Get it as close as possible. Next, move to the back of the scope and loosen the three lock screws on the primary mirror. Then move the three adjustment screws (good tip here from someone else on the internet: adjust these screws by TIGHTENING them. Loosen them only if you really have to) to center the laser beam on the target of the laser collimator.When you have finished this task you're done, right? Nope. Look down the front of the tube again and see if that beam is still centered in the primary mirror. It wasn't for me and I had to adjust the secondary a second time and then readjust the primary again. Then it was centered. So now you're done because lasers are really accurate, right? Nope, but you are a lot closer than I was the first few times I tried my hand at collimation. Next, take the focuser back out, replace the lens you removed, and reinstall the focuser.Now you have to take the scope outside and aim it at a star. Use an 8 mm eyepiece, or use a combination of Barlow and eyepiece to get close to 8 mm. The manual will tell you to find Polaris and center it in your eyepiece. Why? Because Polaris appears stationary to a ground observer looking through a telescope. All of the other stars appear to "move" (actually, you're the one moving along with the surface of the earth as it rotates on its axis, but most people don't care about the physics - for them the stars move). The problem with Polaris is that in light polluted skies it can look pretty dim, and where I am in Afghanistan (Kabul) that is a real problem along with all of the dust and smoke in the air. So I picked a brighter star which complicates things because of the apparent motion, but allows you to easily see what it is you are supposed to be looking for next so for me it was worth the extra effort involved. In any case, center the star you picked in the eyepiece (this won't last long if not Polaris - see what I mean by "extra effort?) and defocus until you see a circular glob of concentric circles. They probably won't be concentric yet which is what you're going to fix next, but if they are, stop because you're done.Something worth noting here: allow your telescope to cool down (or heat up) to the outside ambient temperature before looking at the glob or attempting further collimation. You're wasting your time if you don't follow this step.Now go to the back of the telescope and loosen the lock screws. Making sure the star you picked is still centered in your eyepiece move the adjustment screws until the circles on that glob of light are concentric. As you adjust a screw the star will move away from the center of the eyepiece. Make ONE small adjustment and then recenter the star in your eyepiece before making another. Remember to try make adjustments by TIGHTENING screws as opposed to loosening them. Another hint: looking on the glob, when the circles are not concentric you will see widening spaces to one side. Adjust the mirror in that direction then recenter in the eyepiece. Take your time doing this. Not getting it right is not an option if you want to use this telescope and it will take time unless you are naturally good at this sort of thing. I'm not, it take me quite a few hours over a couple of nights to get it OK and I still have some work to do on it.All of my detrimental comments aside, I am enjoying learning about and using this telescope. Would I recommend it to a beginner like me? Absolutely not! If you are a beginner and want to look at things "out of the box" get yourself a refractor and spend as much as you can afford on it. Believe it or not, I had a lot more fun with the Celestron 70 mm travel scope than I had with all the headaches I've gone through with this one. Easier to use, easier to maintain, no collimation required. I did have to upgrade the tripod and add a small finely adjustable tilt thingy to get around the pain of pointing it at what I wanted to see and keeping it pointed there, and that cost more than the telescope itself but it was worth every penny. Is this telescope better than the travel telescope? Hands down, once you get it at least somewhat collimated as mine is now, but it is a huge learning curve!
User
Great scope for the beginner and avid user
The price was great for this scope especially if you are not sure yet if you want to get into this hobby or if you want to give it as a gift.you will hear good things and bad thing about this scope but here is my experience with other scopes and this one.I have had a more expensive scope in the past and quite honestly this one was very comparable to the expensive model. there are plenty of upgrades out there for this scope that will make this scope pretty competitive for the price. the only draw back is the base it is shaky but that can be resolved in two ways either purchase a more stable tripod or base or get some foot stabilizers for it which is cheaper than a new tripod.the other drawback is the finder it is very cheap and yes you will want to replace it. with a better one if your gonna get extremely serious about star gazing. it will give you a general direction in the sky but you must remember the image will be backward to the image from the actual scope and can be frustrating at times. I usually use the hole under the finder scope for a finder and thats just about as accurate if not better. as i said this scope is entry level and highly upgradable. so if you want a great scope you can turn this into one as you are financially able to. but for the price it works rather well. and you are not limited to eye pieces either by brand. as long as the aperture is the same size or you buy the sizing apertures you have endless eye pieces to use by preference or brand. this scope also has a camera mounting point on it so if you want to take pics with your camera you can piggyback mount it on the scope itself. Now if you want to use the optics from the scope itself just purchase the T connector and aperture size for your camera and whala you can use the scope as your camera lense. and you can get some amazing pics with this scope. Plus you should calibrate the mirrors on any scope that is shipped to you or if you travel with it to any location before you use it. Thats where you get the comments that say they got the scope and they have a fuzzy image or it won't focus right. and then they are upset and call it a cheap scope. luckily my mirrors were not too badly aligned and it was a quick fix. if you don't know how to align them take it to a shop or take the time to learn how. plenty of resources online. All in all this is a great scope for the price and i recommend it especially if you're a novice or want to get into the hobby cheaply and easily without the sticker shock and the upgradability is nice.
User
Très satisfait
Très satisfait de ce télescope ! En tant que débutant, je le trouve vraiment adapté pour se lancer dans l'observation du ciel. Après un petit temps pour comprendre les réglages et bien le prendre en main, il devient très agréable à utiliser. La Lune est magnifique, avec une image nette qui permet d'observer de nombreux détails. Je n'ai pas encore eu l'occasion de l'essayer sur les autres planètes, donc je ne peux pas me prononcer à ce sujet. À noter également que l'image observée à l'œil est bien plus nette et impressionnante que ce que peut restituer un smartphone en photo. Pour un premier télescope, je le recommande sans hésiter !
User
Great first telescope
Great 1st telescope but it's hard to collimate and the mount is not very sturdy with a lot of backlash
User
Excelente telescopio
Tenía dudas si comprar este telescopio u otro, porque comentaban que era difícil de utilizar, pero si estudias un poco como alinear la montura ecuatorial del telescopio a polaris (estrella polar) es muy útil esta montura ya que te permite dar seguimiento a las estrellas con facilidad.La calidad del telescopio es buena con relación al precio, aunque si me gustaría que fueran de mejor calidad las perillas y del buscador (Finderscope), ya que es muy pequeño y un poco complicado de usar ya que las imagenes están invertidas.Si pretendes sacar el telescopio de la caja sin estudiar previamente como alinear la montura ecuatorial, resultará casi imposible enfocar algun objeto en el cielo. Recomiendo leer primeramente como alinear la montura ecuatorial y si cuentas con un laser (de color verde) es muy sencillo localizar objetos en el cielo.Tengo unas semanas con el telescopio, he conseguido observar a Jupiter (con sus 4 lunas más grandes), Marte (con una de sus lunas) , Venus, la nebulosa de Orion, las Pleyades, la luna, entre otras estrellas.Si tienes poca experiencia en localizar estrellas en el cielo, Celestron te da una suscripción a Starry Night (Edición básica) programa para PC o MAC, la cual te muestra en tu computadora las estrellas visibles en el cielo del lugar donde te encuentres y permite localizar de manera rápida constelaciones, estrellas, planetas entre otros. También existen otras aplicaciones para Android como SkyPortal (de Celestron), Star Walk 2, Skymap (de Google), entre otras.Les recomiendo una nueva aplicación que encontré que se llama Stellarium, funciona con Windows, MacOS, Linux, Android, iPhone y también se puede utilizar desde un navegador web, tiene muchas funciones pero lo mejor es que es GRATIS.Había leído que antes de comprar un telescopio recomendaban la compra de unos binoculares para localizar las estrellas y constelaciones. Yo compré el telescopio primero y he podido observerbar varios objetos, pero,estoy por comprar unos Celestron Skymaster 15x70 para ayudarme a localizar más objetos en el cielo para después poder observarlos a detalle con el telescopio.Para concluir, recomiendo en gran manera este telescopio, llegó una semana antes en excelentes condiciones y bien colimado. La calidad con que puedo observar los objetos es muy buena, se pueden ver con gran claridad los crateres de la luna y demás astros. Recomiendo el uso de un laser para localizar las estrellas ya que como mencioné el buscador me resulta complicado de usar. Si pueden adquirir unos binoculares 10x60, 12x60 o 15x70 serán de gran ayuda para explorar el cielo, para después observar a detalle con el telescopio. También recomiendo una brujula y nivel para alinear correctamente el tripie y la montura ecuatorial.Disfruten del cielo.Amós 5:8
User
Awesome view of moon
Nice and in good condition received. But i am suggesting that take with motor setWhich focus automatically
User
大変きれいに観察できました。
三脚もしっかりしていて安定は良かった。まだ、月の観察のみですが土星を観察するのが楽しみです。この値段では大変安いと思います。
Trustpilot
2 months ago
3 weeks ago