Description
⚡ Unlock your maker potential with pro-grade CNC precision!
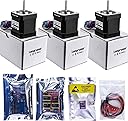
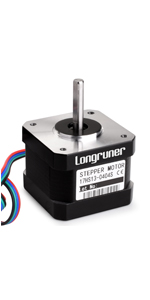
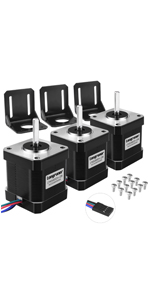
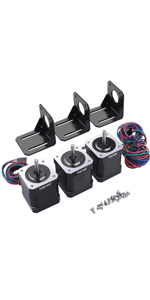
- ROBUST NEMA 17 MOTORS - Premium 1.7A stepper motors with 59Ncm torque ensure consistent, powerful performance.
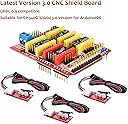
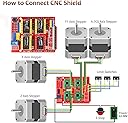
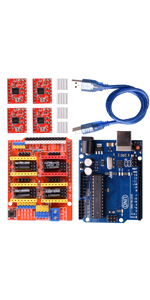
- PRECISION 4 AXIS CONTROL - Latest CNC Shield V3.0 supports X, Y, Z + customizable 4th axis for complex projects.
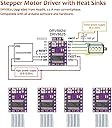
- HIGH POWER STEPPER DRIVERS - DRV8825 drivers with aluminum heatsinks deliver smooth, reliable motion up to 2.5A per phase.
- COMPLETE DIY KIT FOR MAKERS - Includes shield, drivers, motors, endstops, cables & mounting brackets — everything to build your CNC or 3D printer.
- PLUG PLAY ARDUINO COMPATIBILITY - Seamlessly integrates with Arduino IDE and GRBL 0.9 for fast setup and flexible programming.
The Longruner Professional 3D Printer CNC Kit (LKB02) is a comprehensive DIY solution featuring the latest CNC Shield V3.0 with 4-axis support, high-performance DRV8825 stepper drivers with heatsinks, and powerful Nema 17 stepper motors. Designed for Arduino IDE and GRBL 0.9 compatibility, this kit offers a premium, plug-and-play experience for both beginners and pros aiming to build or upgrade CNC routers and 3D printers.