🔄 Seamless Service, Unmatched Reliability!
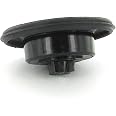
The Irritrol 2400T Globe NPT Threaded Connection valve features a user-friendly threaded bonnet design for easy maintenance, a robust SANTOPRENE diaphragm for leak-proof performance, and a full stainless-steel metering system for consistent operation. With multiple configurations available, it’s the perfect choice for any professional irrigation system.

D**M
Replaced Toro part
Worked great
B**R
Sprinkler Valve
All I needed was the top of the assembly for repair. After 15 years they wear out. Worked great.
A**R
Parts fit in old valve body.
My original in-line valve was a 1” NPT (National Pipe Thread) Hardie 2400T. Irritrol must have bought Hardie and kept the same valve and just renamed it a 1” NPT Irritrol 2400T In-Line Valve. The “In-Line” means the water flow comes into and leaves the valve in a straight line horizontally. The “T” means the connection is threaded, not a glued slip connection. My valve just started leaking after being buried for over 22 years. I could diagnosed that the diaphragm needed to be replaced when the lowest sprinkler head on the zone was constantly weeping (leaking) even when that zone was not active. I found that for just a few dollars more, I could buy the entire 2400t valve instead of just the diaphragm. I removed all the parts from the new Irritrol 2400T and installed them in the existing Hardie 2400T valve body after removing the old parts. They were a perfect match. This saved me from having to dig up and remove the existing valve body and rebuild the whole piping manifold. I installed the new diaphragm, spring, bleed screw, jar top and dome, and solenoid into the existing valve body. It worked perfectly and saved me a lot of digging and extra work. No more leaking sprinkler head.
T**Y
Replaced six irrigation control valves in an hour
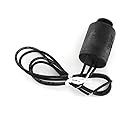
While out of state visiting family, one of my six irrigation control valves got stuck "on" and released 19,140 gallons of water via sprinkler zone 3 in ~1.5 days before a neighbor cut the water to my system. Once I returned home I inspected the valves and found a 1/2" pebble underneath one of the valves which likely played a role in it malfunctioning. I then removed the pebble and replaced all six valves to obviate a recurrence. Some notes:- I'm the second owner of a house that came with a Virtualrain 27666 sprinkler controller (company is now obsolete so no website or customer support exists), but the sprinkler heads receive water from PVC pipes connected to six Irritrol Systems 2400T valves (two in one in-ground green irrigation control box and four in another). These valves are powered by 24 VAC (low-voltage) from the controller which steps down 120 VAC (high-voltage) via a transformer that plugs into a garage outlet. Before performing maintenance on the valves, I turned off the controller and sprinkler water supply. I did that by turning a handle perpendicular to the water flow in the basement of my house. Another option was to turn the ballcock perpendicular to the water flow below the external pressure relief valve assembly.- If the valves hadn't actuated, then I would have diagnosed a solenoid issue. The solenoid is the electrical component of the valve and looks like a D-sized battery. When my controller's timer actuates it sends 24 VAC to the solenoid. Within the solenoid is a coil that magnetizes and lifts a hex plunger at the bottom of it. Once the plunger is lifted water flows through the valve to the sprinkler zone's heads. Once the cycle is over, power is cut to the solenoid and the plunger falls and stops the water flow.- Since one of my sprinkler zone heads was stuck "on" and didn't turn off after the programmed cycle was over, then it was a mechanical issue with the valve. At this point the sprinkler zone couldn't be shut off via the controller, even if it was unplugged and the battery removed! Mechanical issues include a worn valve diaphragm (recommend replacing every 15 years), clogged thin tube that feeds water through the diaphragm and cap to the flow control tube (juxtaposed with the solenoid's plunger), or debris (e.g., a pebble) within the valve.- To replace the solenoid just untighten it counterclockwise. Snip the two wires atop the solenoid with wire cutters. One colored (e.g., red/green/brown/black/blue/orange) 18-gauge wire connects with the controller's 24 VAC power supply. The other wire connects to the common (ground) wire which is white (connect one wire from ALL solenoids to the common wire!). Use a crimp tool to strip the common wire (copper) ~1/2-inch. Twist new solenoid wire (mine came pre-stripped) around the common wire, then insert into a weatherproof wire nut (they have silicone within) and twist the same way.- Instead of cutting out a PVC sprinkler manifold (series of valves) then having to glue a new one in, I just replaced the "guts" of the malfunctioning valve with the same OEM guts (i.e., solenoid, manual ON/OFF switch, bleed screw (allows for manual operation), flow control, cap, threaded bonnet, spring, diaphragm, seat seal). I also used a large paperclip to manually clean any debris obstructing the existing hollow tube.- Once complete, slowly turn on water to your sprinkler system then slowly turn the external pressure relief valve ballcock parallel to water supply and open the exit ballcock to the sprinkler lines. Then plug the controller's power supply into an outlet, turn on the controller, and run a 1-minute test cycle for all sprinkler zones ensuring all sprinkler heads pop up and spray.- Fwiw, I spent $136 total for six irrigation control valves and $10 for a box of 25 small weatherproof wire nuts. Thus my total cost for parts was $146. It took me ~ one hour labor to replace all six valves. The only difficulty I had with the valves was unscrewing four of the six bonnets as they were secured very tightly.- Btw, at the bottom of my Virtualrain 27666 controller/timer is a terminal control box with different colored wires connected to push tabs. COM1 or COM2 is the white common (ground) wire. Other colored wires tell me which zones they are connected to. So if you know which zone is malfunctioning, you can identify it at the controller by its wire color then trace it to the irrigation control box. Then you can just fix that valve rather than all of them if you want.
R**I
valve
I fixed my sprinkler with this works well. thank you.
C**.
Did the job - all I needed was solenoid and diaphram
Instead of changing out whole valve, I just swapped out the guts. 15 minutes later everythign was working fine again.
J**Y
used the internals
I attempted to clean the original since it was just leaking but that just made it worse.I purchased this one and swapped the internal parts, leaving the body of the valve inline. Swapping the entire vale would have been a real difficult and time consuming task.The repair worked great. No issues after 3 months of use.
D**C
Perfect for retrofitting old valves with new tops
I had two in-place old Richdel valves that used the older Orbit solenoid that is no longer available. The solenoids were damaged by a gardener (whacked off the wires), which made the valves unusable. I had a choice to cut out the old valves (which were in sleeves, so hard!) or replace the tops that use the more modern solenoids.Ordered these Irritrol valves, which had the same screw-on valve tops. They also shared the inside diaphragm, spring, and plastic seal. I was able to swap out all the internal parts and the top with solenoid, so I have a brand new valve without having to cut out the old one.This works for the valve styles that use screw-on tops, not the ones with screws that secure the top to the valve body.Saved me several hours of work. Nice sprinkler hack.Still miffed that Orbit no longer supplies the old solenoids, though.
Trustpilot
2 weeks ago
1 month ago