


Desertcart purchases this item on your behalf and handles shipping, customs, and support to Seychelles.
🔗 Connect with confidence—tow smarter, not harder!
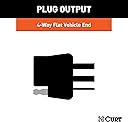
The CURT 56016 is a vehicle-specific, plug-and-play 4-pin trailer wiring harness designed for select Mazda 2, Mazda 5, and CX-9 models. It installs easily without cutting or splicing, delivering reliable power through advanced surface mount technology. Equipped with a weather-resistant rubber dust cover, it ensures long-lasting, secure trailer light connections for tail, brake, and turn signals—perfect for professional-grade towing setups.


| ASIN | B001GMX9KE |
| Best Sellers Rank | #586,619 in Automotive ( See Top 100 in Automotive ) #965 in Towing Hitch Wiring |
| Brand | CURT |
| Brand Name | CURT |
| Cable Type | custom |
| Connector Type | Plug-in |
| Customer Reviews | 4.7 out of 5 stars 262 Reviews |
| Global Trade Identification Number | 00612314560165 |
| Included Components | Custom Wiring |
| Item Dimensions | 9 x 6 x 3 inches |
| Item Type Name | Mazda 2 Hatchback, 5, CX-9 |
| Item Weight | 0.69 kg |
| Item dimensions L x W x H | 9 x 6 x 3 inches |
| Manufacturer | Curt Manufacturing |
| Material | Rubber |
| Material Type | Rubber |
| Model | 56016 |
| Number of Items | 1 |
| Part Number | 56016 |
| Recommended Uses For Product | trailer wiring |
| UPC | 612314560165 |
| Unit Count | 1 Count |
| Warranty Description | One-Year Limited Warranty |
C**B
Works great, but a lot of work installing.
This custom wiring harness works great. I've use generic wiring adapters in the past to make separate amber turn signals work with two filament trailer lights, and they have been a poor compromise. This kit plugs in to the car's existing wiring harness and does a fantastic job. You will have to remove the driver's side rear side panel, open up the passenger side rear side panel, and remove all the threshold trim on the driver's side, and at the hatch. This is necessary in order to run a wire from the vehicle's battery to the unit and to the passenger side lights. I ran a snake through the gap between the fender and the frame inside the driver's door and came out just inside the frame under the hood. Then i removed the plug on the A pillar, punched a hole in the plug to run the wire through, then fed the wire straight through a smaller hole inside the driver's foot well. This hole is hard to notice, because there is a major wire group right over it. That was the hard part. just make sure you don't snag a wire inside the fender with your snake. The wires to the side marker light are very small and easy to break. Ask me how I know. But they are easy to repair. On the rear side of the light fixture is a tab that you can press to release the catch, so you can remove the fixture to repair the damaged wire. You just need something thin to push under the edge of the fixture. All in all a great product. Just be aware that the installation will be moderately difficult and lengthy.
S**C
Worked Perfectly for 2011 Mazda CX-9
Surprisingly this was very easy to install and works perfectly. Follow the YouTube videos on installation and you’ll be done in 30 min. However, if your trailer has a bump break you will want to buy the 6-prong adapter as well to connect to your reverse lights to prevent the break from activating on reverse.
O**S
Easy to install and provide clean factory-look
Absolutely perfect, super clean plug and play install. Worth it vs splicing into tail light harness. All wires are long enough to make it where they need to be, and on my wife’s 2012 CX-9 I was able to almost entirely hide the power cable by running it along the drivers-side under the car where there are a lot of trays that the wire can be tucked in, and the green cable to reach the passenger side easily hides too. A little extra time and you can make it look like the car came from the factory ready for towing.
M**T
Works great for 2011 CX-9
The connectors on this unit were a perfect match for my 2011 CX-9. The only slicing required was cutting into the 12V supply line for the passenger side accessory outlet, which is a much better option than running a wire all the way to the engine compartment to the battery. Took a while to install this, because of how many panels had to come off. In the CX-9, the side panels are held on by about 10 cargo hooks bolted through it. Remove these with a 10mm socket. Remove the trunk and skid plate along the bottom of the hatch. I installed the unit on the driver side, used a self tapping sheet metal screw for the ground, and ran the battery cable wire to the passenger side 12V outlet. The double sided tape is useless, either buy some 3M outdoor tape or I just tucked it into a spot where it stayed put (there is a small area stuffed with foam, I kind of jammed it partway in so it didn't bounce around.) For the 12V outlet, cut the hot wire and splice in the new cable using one of the supplied butt connectors. Make sure you pull the fuse under the hood to avoid shorting. It is listed as "RR outlet." You will need another butt connector, they give you 2, but you need 3 to use the included fuse. Do not go without the fuse, if the trailer wiring shorts out it could damage your cars electronics. I left the flat trailer connector in the area of the jack, so once I put it all back together, I just open the jack compartment and pull out the cable. This keeps it clean and dry until it is needed. Just run it out to the trailer and close the door on it, it will not damage the wire. I have used this method on 3 cars over the years (all hatchbacks) and have never had a problem.
D**N
Installed in about an hour with the help of YouTube
Could have use a little bit better instruction to follow but there was a video on YouTube that helped me through it got it installed in about an hour
J**E
Worked perfectly for our CX-9, but there were a few issues to note
Installed this on a Mazda CX-9 Sport FWD. The instructions were pretty lacking, but I'd already done my research on how to remove the inside panels to get access to all the necessary connectors. Instead of running the power wire all the way to the battery, power is always running to the rear 12V outlet so I tapped into that instead by soldering the short "fuse" wire in the hot wire going into the 12V. After getting everything connected and routed, I did find that my voltmeter was reporting voltage to the 4-flat leads even without the key on or the engine running (this was the not the case with the factory-installed wiring harness tested for comparison). It must be an extremely low draw, because when tested on a trailer in pitch black, there wasn't any glow from the lights until the car lights were turned on like normal. I just wanted to mention that for other folks to be aware of. Pros: Easy to install. Took about two hours with lots of double-checking and testing. Worked perfectly when hooked up to my trailer. Cons: Instructions were lacking, so I'd watch the install videos on eTrailer beforehand if want to brush up on the process. The leaking voltage caused some unnecessary heartburn as well.
S**D
Great product, challenging install
This worked great in my Mazda5. It is a challenge to install. My hands and forearms are almost too wide to fit behind the panels of the car. It took a while before I could convince myself that the panel would bend enough and I could make it work. I would recommend watching a few YouTube videos before starting and one while installing. In addition allow for extra time. You want to take your time and get it right. Once it was installed it worked great.
A**R
Comes with everything to install
I've never done this before and wired my car and about an hour. The instructions it comes with are confusing so I just looked up a U-Haul how to video. This thing comes with everything you need to install zip ties silicone and also actors for the power chords. The only thing you really need is to have a screwdriver and a pair of pliers to crimp the electrical wire but together. My trailer lights all works and I have a 17 foot vehicle and ran this out the hitch with about a foot and a half. The cord is nice and long. Works as expected. The only thing is the sticky pad it comes with two mount the inverter box with is not sticky at all you'll need to have your own double-sided tape if you want to use that way of mounting. I just use a zip-tie on both sides of the converter box to Anchor
G**O
Great product
I have used these before. This was put in a Mazda 5 van and works perfectly! It was no more difficult or easy to install than any others.
M**Z
Funciona bien en Mazda CX-9 2008
Funciona para Mazda CX-9 2008 y otros que no traen paquete de remolque de fábrica. No hay que hacer Cortes a los cableados originales. Buen producto. Muy importante por seguridad.
P**S
Worked perfectly!
Nice easy install. Everything fit perfect. It says to run a power cable under the car to the battery, I tapped into the power on the 12v accessory outlet in the back hatch. Made it even easer. Very happy.
S**H
Fits 2012 Mazda 5. Easy to install
Easy install on my 2012 Mazda 5 GS. Everything plugs in easily. The hardest part of the install was running the wire to the battery under my carpet. Comes with everything you need to install other then basic tools.
R**Y
Great quality. Easy instructions
Works perfectly on my 2008 Mazda CX-9. Great quality. Easy instructions. Video on Youtube is very helpful.
Trustpilot
4 days ago
1 week ago