


🚴♂️ Ride Smart, Capture Every Moment!
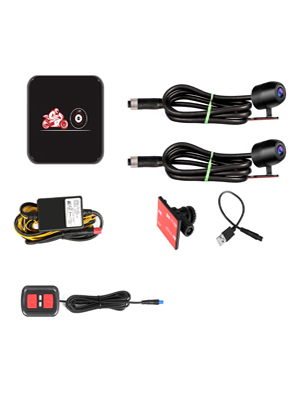
The VSYSTO No Screen Motorcycle Dash Cam features dual 1080P front and rear cameras housed in a waterproof metal shell, ensuring durability and high-quality recording. With WiFi connectivity, loop recording, and G-Sensor technology, this dash cam is designed for the modern motorcyclist who values safety and clarity on the road.


J**E
IMAGEN ESTUPENDA
Relativamente sencillas de instalar, lo que me ha sorprendido es la calidad de la imagen de este modelo en concreto.
L**I
Ottimo prodotto
Ho acquistato questa doppia dash cam con gps, senza shermo sul manubrio, perchè ho il navigatore e il porta telepass sullo scooter e non volevo anche il monitor da montare perchè lo spazio sullo sterzo è già bello e impegnato. Ho già due dash cam in auto, anteriore e posteriore fatte installare dall'eletrtrauto con alimentazione sulla batteria, acquistate sempre qui su Amazon e, visto che ne ho constato l'utilità e l'importanza su strada, ho deciso di metterle anche sui miei due scooter. Per questo, ho fatto già montare il primo apparato sulla mia Vespa GTS 300 ed ho chiesto direttamente all'Officina Piaggio che mi ha venduto lo scooter di fare il lavoro ed hanno accettato. Non ho eseguito di persona il montaggio perhè, rispetto alla moto, su di uno scooter è più complicato e vanno smontate diverse plastiche per poter passare i cablaggi e, per la parte anteriore, è stato praticato anche qualche foro. Per il resto le telecamere funzionano benissimo, i filmati sono nitidi, anche su fondo sconesso sono perfettamente stabili, registrano anche l'audio e il gps e l'app funzionano a dovere anche se all'inizio bisogna farci un pò la mano per capire come funziona tutto, soprattutto in app. Al momento ho inserito una microsd da 128 gb per le registrazioni. Sono veramente contento dell'acquisto perchè, almeno in questi primi giorni, il prodotto mi semba validissimo e sta funzionando tutto a dovere.
H**T
Bij snel accelereren stopt de opname
Bij snel accelereren stopt de opname
G**O
So easy even me, an old lady with no wiring experience could install this!
Easy peasy installation folks! This company makes it easy, includes everything required, provides quality, solid material including the wiring and DVR unit. Instructions are totally understandable. tons of wire and length included.Including a USB cable to plug into a power pak for a power source before actual installation is genius. You just can't go wrong buying this, the price for what you get in return is great - video quality is outstanding just as so many other reviews state. I couldn't NOT buy it considering the excellent reviews everywhere, so when it was offered with a $20 off coupon I bought!I've got no wiring knowledge whatsoever, and especially on a Harley. So I started by getting to know my Harley wiring system and how it works and what connections were available. I took off the seat and side panels, dismantled under the seat wiring and harnesses, plugs etc. down to expose the battery. Gas tank removed with help, that is NOT a one person job especially when it was plumb full.I ride a fat-hipped 3 wheel factory Harley-Davidson trike, a 2017 Freewheeler. First thing I learned was that I needed an electrical harness to wire this into, then plug that harness into an existing plug (the 325 deutsch plug located on the right side under the side panel). If you have a different year and/or bike you may need a different HD adapter harness but the one I required was part #69201599A. This harness gives you 3 different ends you can connect with, 2 with plugs and one of them is wire to wire and includes the heat shrink connectors.The bare yellow wire from the camera wiring connected to the harness wiring - you connect it to the wire that powers ignition in the harness I think it was blue and purple, but the instructions with the harness tell you for sure. The black wire and the red wire from camera connected to the bike battery terminals. The wire ends going to the battery were just bare wire and no round tab connector that fit over the battery post so I had to find a couple of those rings and sodder them on the wires first.Speaking of wire - note in the photos in the seat area where all the wires are visible the wire with silver on it coming out from under the tank connects front cam to the DVR. The silver is a heat tape to protect that wire since it runs under the tank which is directly above the engine (if you are familiar with the M8 engine you know she runs hotter than hell). I covered the wire from the start of it under the tank to the point you see where the seat would hide it. It came with a ton of wire, each camera has a sturdy protected length with a screw connector on the end and each also had a matching extension.An important thing to consider when installing is the location of that connection point in the wires if using the extensions so you can easily disconnect the camera unit. I ensured the connection between the camera connector and the extension wire was accessible under the nacelle. That'll make it an easy disconnect between the wire and the camera itself in future if needed. If I hadn't thought of that beforehand, the connection would have ended up under the tank, completely un-accessible unless I took the tank off again.Zip-tied extra wiring & slack from the front cam in a neat bundle up under the nacelle after leaving some slack so wire to camera mount doesn't bind when turning hard left or right. Then I found the perfect use for the bell bag that came with my bell, perfect size and soft velvety material to slide over the camera for protection when the bike is in storage :) I stole hubby's bell bag for the back cam. I used the sticky back mount that came with the kit to mount the front cam. It is solid, not moving or loose at all.Back wiring was a short distance to go. There was a small gap between the frame and the seat so the back wire came through there without danger of crimping or crushing. There is also a crease in the body panel right there. I might use clear 3M to run it in the crease on the exterior in future. I stole a metal wire clip with sticky back from some previous HD installation to keep the wire tucked on the edge under the seat.Made sure all connections to the DVR unit itself were on top and handy for quick removal. A simple twist off of the metal connectors, pull the plugs and it is fully disconnected. The kit came with excellent quality sticky back pieces for mounting the DVR but I used 3M outdoor Velcro instead to mount the DVR to the frame as well as the power box. Then I zip-tied the power box to the frame for good measure. The underside of my seat provided a lot of extra room since a good deal is hollow under there so I could mount the 2 boxes, don't think that would have been possible with the factory seat though.I was sitting on the fence over whether I wanted to mount or have the button box visible, but I decided I should have it visible as it is an indicator when the unit is powered up. I mounted it on top the side panel using the included sticky-back. It is very solid, i have no doubt it will hold. Its just so cheap looking. I'll have to remember to unplug that wire when removing the side panel, but I planned ahead for that too - made sure the plug is right on top and used a small piece of electrical tape to hold it in place on the frame where it crosses the frame out on top the side panel.Spent hours of searching through Amazon for a gadget that might work as a mount for the back camera. It paid off, and the gadget is perfect for this purpose! I am absolutely thrilled with the back mount system I came up with. Makes it highly portable, quick to move too. Cheap! It cost me $10 here on Amazon. It is meant to be a flashlight bicycle handlebar mount (universal handlebar flashlight mount by Olight). It has good solid silicone straps in various sizes you can change out, depending on your application. The curved diameter on top is exactly that of the camera. I believe how it is made will go a long way in reducing vibration and therefore smoother videos as a result.The app works flawlessly, connects quickly and you can review and save front & back videos separately to your phone. I’m a bit of a camera buff and have quite a collection of various brands and most have app issues, so I was impressed this worked right out of the box. At first I thought it wasn't obeying settings I made on the DVR itself once disconnected, but after resetting it and testing a few days later its fine and retains them.So, what's not to like? Well, the missing rings on the bare wire ends to the battery, but that's not a biggy. Not sure about the camera mounts. Solid for sure with the sticky back but not enough turning flexibility with them for mounting positions. Just plastic, nothing outstandingly tough about them. I highly dislike the bright green arrows on each camera body, but I understand why they put them on. I intend to use a black marker over the green arrow so it isn't as noticeable. I also don't like that the DVR says hello and goodby when it turns on & off. Probably there is a setting for that I haven't found yet.Co. support is pretty decent. This is the second time I bought this. First time it was a P6F model and it was hooped. So was the USB cable that came with it. I tested the cable and contacted them, they said they were sending another one, the USB cable that is since I didn't know yet the DVR was hooped. They answered very quickly and were attentive and stayed in contact. Unfortunately my time for return was running out & no usb cable yet so day before deadline I wired it directly to my vehicle but got a BSOD on the DVR so I returned it and waited before purchasing again. This one is B6 model, other was a P6F. Difference is beyond me since I used the same button from the previous order to order it again but got a different model with slightly different parts, although the DVR looks identical. No matter, it works and works well.Anyway, thanks for reading this lengthy review, if you found it helpful at all, by all means click the button below to say so!
R**L
Good quality
Great camera, good quality of recording,easy to instal
Trustpilot
2 months ago
2 months ago