🚀 Upgrade Your Desktop, Elevate Your Workflow!
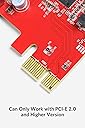
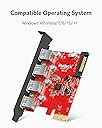
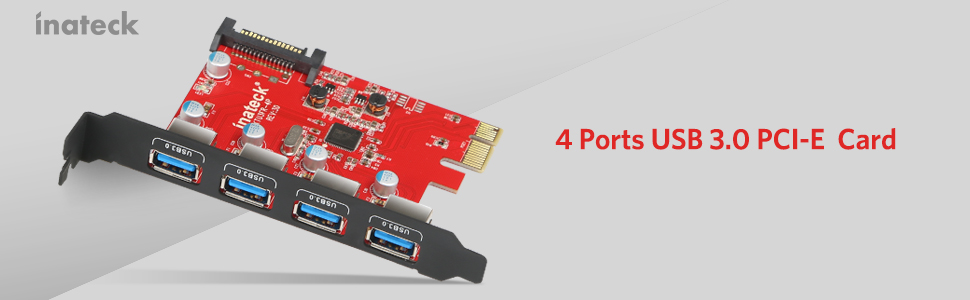
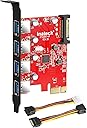
The Inateck Superspeed 4 Ports PCI-E to USB 3.0 Expansion Card is designed for desktop PCs, offering four USB 3.0 ports with transfer speeds up to 5Gbps. It features a 15-pin SATA power connector for reliable power supply and is compatible with various operating systems, including Windows XP through 10. With easy installation and backward compatibility, this expansion card is perfect for enhancing your connectivity options.

| ASIN | B00B6ZCNGM |
| Brand | Inateck |
| Built-In Media | 1 x PCIe Card |
| Compatible Devices | Desktop |
| Compatible devices | Desktop |
| Customer Reviews | 4.4 out of 5 stars 4,400 Reviews |
| Global Trade Identification Number | 06957599305020, 06957599311274 |
| Hardware Interface | PCI Express x4 |
| Hardware interface | PCI Express x4 |
| Item Type Name | Inateck SuperSpeed 4 Ports PCI-E to USB 3.0 Expansion Card - Interface USB 3.0 4-Port Express Card Desktop with 15 Pin SATA Power Connector KTU3FR-4P |
| Item Weight | 0.11 Pounds |
| Item weight | 0.11 Pounds |
| Manufacturer | Inateck |
| Mfr Part Number | KT4001 |
| Model Number | KTU3FR-4P |
| Number of Items | 1 |
| Operating System | Windows |
| Style | PCIe to USB 3.2 Gen1 |
| Style Name | PCIe to USB 3.2 Gen1 |
L**O
Prima USB3.0 Interface Karte mit guter Ausstattung und kompatibel zur Oculus Rift CV!
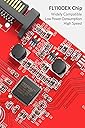
Ausgangslage: Ich besitze einen Rechner (Windows 10) der zwar von seiner Rechenleistung her noch up to date ist, aufgrund eines älteren Motherboards jedoch leider keine USB3.0 Unterstützung bietet. Da ich mir gerade eine Oculus Rift VR Brille geholt habe und diese mindestens 2 USB 3.0 Anschlüsse benötigt, habe ich mich nach geeigneten Erweiterungskarten für meinen Rechner umgeschaut. Diese Karte hier habe ich leider erst in zweiter Instanz entdeckt, zuerst hatte ich mein Problem durch den Kauf zweier!!! USB3.0 Karten der Firma Logilink (Typ PC0054A) geglaubt gelöst zu haben. Grundsätzlich funktionierten auch die Logilink Karten problemlos im Betrieb mit normalen USB 3.0 Geräten. Trotzdem erzählte jedoch die Konfigurationssoftware der Rift mir das die USB Anschlüsse nicht kompatibel seien, bzw. ggf. nicht die maximale Leistung und Geschwindigkeit bereitstellen könnten. Da habe ich dann mal ein wenig genauer nachgeforscht und herausgefunden das die Sensoren der Rift ein spezielles Feature der USB 3.0 Schnittstelle nutzen um Latenzzeiten in der Signalübertragung zu reduzieren. Dieses Feature nennt sich Multiple Transaction Translation(MTT). Der Chipsatz auf der Inateck Karte (Fresco Logic FL1100EX) unterstützt nämlich genau dieses Feature und bietet nebenbei noch einige andere Funktionen die "State of the Art" sind. Lieferumfang: Die Ausstattung ist reichlich, ich würde Sie als vollständig beschreiben. Für den aktuellen Preis der Karte hier auf Amazon (reduziert von 29 auf 19 Euro) ist sie sogar super und über dem Durchschnitt der anderen USB Karten. Lieferumfang: 1 * -Eine Erweiterungskarte PCI-E auf 4 x USB3.0 1 * Treiber-CD, 2* Montageschraube, 1 * Anleitung, 1 * 4pin auf 2x15pin Kabel, 1 * SATA Strom-Y-Kabel SATA Buchse an 2x SATA Stecker Einbau: Der EInbau an sich ging völlig unproblematisch. Die Karte belegt einen freien PCI-E Steckplatz. Der muss natürlich mindestens im Rechner vorhanden sein. Die beiden Logilink Karten mit je 2 USB 3.0 Anschlüssen raus, die Inateck Karte rein. An dieser Stelle seien noch lobend die beiden Adapter und Befestigungsschrauben erwähnt die sich im Lieferumfang befinden. Der der Inateck Adapter unter anderem auch die Battery Charging (BC) Specification Revision 1.2 (Charging Downstream Port (CDP)), und China Charging YD/T 1591-2009 Standards unterstützt, bietet er auf seiner Platinen einen zusätzlichen SATA Powerconnector um die USB Anschlüsse beim LAden von Smartphones, Tablets etc. entsprechend mit Leistung zu unterstützen. Dazu schließt man entweder direkt einen freien SATA Power Connector von seinem Netzteil an die Adapterkarte an. Hat man keinen freien SATA Power Connector mehr, oder nur noch einen, so kann man den entsprechenden, mitgelieferten Y Connector nutzen, der aus einem Anschluss 2 macht. Für die, die nur einen der älteren 4 pol Power-Anschlüsse haben, liegt ein zweiter Adapter bei, der diesen auf 2 x SATA Power konvertiert. Das fidne ich sehr lobenswert,d a viele Installationen manchmal an solchen Kinigkeiten wie fehlenden Adapterkabeln etc, scheitert, die man dann mit viel Geld und Glück einzeln irgendwo nachkaufen muss. Also noch den internen Powerstecker draufgesteckt und fertig ! Die Karte wurde automatisch erkannt und eingerichtet. Die Treiber CD wurde zunächst nicht benötigt. Test: Der Gerätemanager (siehe Fotos) zeigte den Controller an, der zunächst scheinbar mit Microsoft Standardtreibern installiert wurde. Es gab keine unbekannten Geräte mehr im Gerätemanager. Ein erster Test mit externen USB Festplatten und Sticks zeigt auch das der Controller funktionell zur Verfügung stand. Geschwindigkeitstests ergaben das prinzipiell auch normale USB3.0 Übertragungsgeschwindigkeiten für die besagten Geräte zur Verfügung stand. Leider meldete die Geräteverwaltung des Oculus Setups für das Headset und den Camerasensor immer noch ein Problem mit den neuen USB 3.0 Anschlüssen. Diesmal jedoch mit dem interessanten Hinweis das man ggf. mit geupdateten Treiber von Fresco Logic ggf. eine bessere Performance errechen könnte. (Zuerst schaute ich auf der mitgelieferten Treiber CD nach, diese beinhaltete jedoch leider nur Treiber bis maximal Windows 7 64 bit. Schade, und das obwohl Win10 ja nun doch schon einige Tage auf dem Markt ist. Also ab auf die Herstellerseite und nach Windows 10 Treibern gesucht. Ich bin statt auf die Website von Inateck direkt auf die Website des Controllerchipherstellers (Fresco Logic) gegangen, da man dort oft die aktuelleren Treiber bekommt. In diesem Fall war es aber das selbe Treiberpaket in der Revision 3-0.3.6.8.0 welches auch Inateck auf seiner Website anbot: Hier der Downloadlink (Wählt des Paket des USB 3.0 Hostcontrollers) https://support.zoho.com/portal/frescologic/helpcenter/articles/latest-drivers Schritte: 1. Ladet das o.a. Treiberpaket runter und installiert es 2. Entfernt danach die USB 3.0 Controllerkarte aus dem Gerätemanager 3. Startet die neue Hardwareerkennung neu, oder startet alternativ den Rechner neu Dann wird der Controller nämlich mit den Herstellertreibern installiert und kann dann scheinbar mit allen Features arbeiten. Daraufhin gab es keine Meldungen mehr im Oculus Device Center. Alles prima. Als weiteren Test habe ich versucht mein Samsung S6 Edge an einem der USB 3.0 Ports zu laden, gleichzeitig mit einem IPAD2. Funktioniert absolut problemlos und exakt so schnell wie es mit den Ladegeräten ebenfalls dauert. Fast Charge / Quickcharge 2.0/3.0 werden jedoch nicht unterstützt. Das wäre wohl auch zuviel des Guten. Weitere Performancetests und Benchmarkorgien des Controllers möchte ich euch ersparen, da ich nicht weiß ob meine Festplatten/Sticks hier überhaupt das aktuelle Maximum bringen (könnten) oder nicht. Jedenfalls liefen auch meine USB2.0 Geräte problemlos, sogar eine steinalte Hewlett Packard Digitalkamera mit USB 1.0 wurde ohne Mucken erkannt. Fazit: Ein prima Möglichkeit seinen älteren Rechner (Freien PCI-Express Bus vorausgesetzt) um (weitere) 4 USB 3.0 Ports zu erweitern. Der Lieferumfang mit den beiden Powerdapatern, Treiber CD, Anleitung und zweier Schrauben für die Befestigung ist als sehr gut zu bezeichnen. Im Verhältnis zu dem aktuellen Preis von 19 Euro (29 Euro vorher) ist sie mit 4 Ports sogar verhältnismäßig günstiger als einige anderen Karten. Der verwendete Chipsatz unterstützt die maximale Performance und alle Features der USB 3.0 Spezifikation, unter anderem auch das Multiple Transaction Translation(MTT) das die VR-Brille Oculus Rift für eine optimale Performace der Tracking-Sensoren und der Erfassungskamera benötigt. Alles in allem ein prima Dapter zu einem guten Preis. Leider befanden sich auf der mitgelieferten Treiber CD keine Windows 10 Treiber, die sich aber im Paket über die Inateck/Fresco Logic Seiten problemlos herunterladen ließen. Von einer automatischen Installation von Windows 10 mit Windows Standard Treibern sollte man sich nicht täuschen lassen (siehe Bilder), danach stehen nicht alle Features wie Multiple Transaction Translation(MTT) zur Verfügung. Treiber direkt vom Hersteller besorgen und nachinstallieren !
D**N
Top.
Fait bien le job. Marque connue qui propose en général de bons produits.
A**S
Works Great on a Mac Pro
I purchased the Inateck 4-Port USB 3.0 PCIe card for my Mac Pro. Yes, for a Mac. Nothing on the product description indicated that it would work on a Mac but I had seen a YouTube video using the Inateck card on a Mac Pro and figured it was the same and would work. The Inateck card was cheaper than some of the other options (which had more reviews) and what convinced me to get the Inateck was the fact that it CAME WITH CABLES. No need to purchase additional cables since they're provided in the box. Unlike the YouTube video, Inateck listened to the reviewers comments and provided 2 separate, short cables, that don't have all the clunky extra connectors on them. (For the record, you don't actually NEED to connect this card to a Power Source in the computer ... technically it needs it to be able to provide power the specified power to the USB device, however, most USB devices that you're connecting this to will have their OWN power source (like a Powered Hub or a Powered External USB hard-drive). So for those of you nervous about connecting the card to a power source, don't worry. Installation in the Mac Pro was a breeze. I had an open SATA hard-drive bay inside my Mac Pro and an open PCIe port. Inateck included 2 cables with the USB card ... a SATA to 4-pin Molex connector (the "old school" connectors that go to a power supply ... or to a DVD bay) and SATA "Y-cable" (SATA to SATA). For the Mac Pro I used the Y-cable. Note that you will need to connect this SATA cable to an open SATA port on the motherboard. The Mac Pro has 4 easy to install Hard-Drive bays. Normally you'd slide a hard-drive into the bay and it would mate with the SATA connector but for this installation you'll need to use one of these open SATA ports. I plugged the Inateck card into an open SATA port in my 4th hard-drive bay. Note that the SATA connector for a hard-drive is basically broken into 2 sections: POWER and DATA. The only part of the connector you need here is the 15-pin POWER section. Inateck provided a cable with the POWER section. *However*, you need to know that the cable provided by Inateck will NOT fit properly out of the package. You need to modify the cable slightly. I was a bit apprehensive to do this at first but once I did it, I laughed at how simple it is. The Y cable with SATA on all ends will need to be modified. Take the end of it that has only 1 connector, this is the side that goes onto the motherboard (either one of the "Y" ends will plug into the Inateck card). The connector has a plastic nub on either end, so it would fit in a normal SATA Power connector, however you'll have to cut one of these ends off to fit on the Mac Pro. You're not cutting the connector, its pins, or its wires, you're simple cutting off the plastic nub so the connector will fit onto the Mac Pro's motherboard. First, make note of which orientation the connector must mate. You'll see that one side of the connector meets the edge of the connector in your computer. The other end would normally have the DATA section of the cable but the Inateck cable doesn't have the data section and instead it has a square end of plastic. You need to cut this part of plastic off so that the SATA cable will mate on the motherboard of the Mac Pro. I used a pair of scissors and a file to get the plastic end cut off. Once you've done this simple modification you can use the cable for installation. To install in the Mac Pro: 1) Unplug the computer and touch something metal to ground yourself. 2) Unlock the case and take off the side door. 3) Lay the computer down. 4) There are 2 spring-loaded finger screws covering the available PCIe slots. Remove the 2 screws and take off the lock holding down the open PCIe cards. 5) Insert the Inateck USB card into an available PCIe slot (I used slot 3, for example). Make sure it's nice and snug in the PCIe slot NOTE 1: The Inateck card doesn't use the entire length of the PCIe connector. Don't worry, it still fits. NOTE 2: For some reason the 4th PCIe slot on the Mac Pro won't work. The computer will recognize the card but no power will be provided to your devices. This is a known issue and I found multiple references online to this. DON'T plug the card into the 4th PCIe slot. 6) Take one end of the SATA "Y-Connector", the side that has the "Y" with 2 of the same connector, and plug one of those into the Inateck card. 7) Take the other end of the SATA connector, the side that you cut the plastic off, and connect it to an available SATA POWER port in your Mac Pro (available hard-drive bay). 8) Put the PCIe cover back up using the spring-loaded finger screws. 9) Close up your computer 10) Power on and Enjoy. I ran a speed test using a Seagate 3 TB drive I picked up at Costco and was very impressed with the speeds. The "Disk Speed Test" I ran (by Blackmagicdesign) clocked read and write speeds in the 150-170mb/sec range (averaged around 160mb/sec). Pretty impressive! Glad it works on the mac, even if it's not advertised to. I did NOT need any drivers to make this work on the Mac. I'm using Mac OS X 10.9.1 (Mavericks) and the drivers are built into the computer. USB 3.0 drivers are included in Mac OS X 10.8.2+.
T**N
supports PCI passthrough in VMware ESXi
works fine. supports PCI passthrough in VMware ESXi (DELL) server
J**Y
fonctionne parfaitement
Installation facile et connectique multiple bien étudiée. Les 4 ports USB3 fonctionnent bien simultanément et tous mes disques Western Digital de plusieurs To sont reconnus. Les copies et déplacements de fichiers sont très rapides. Ma clé USB Sandisk extrême 64 Go est reconnue. Attention de bien raccorder cette carte PCI-E à l'alimentation par le connecteur SATA 15 broches, le connecteur pouvant sembler être enfoncé mais pouvant se trouver de travers par manque de place dans le PC. Attention aussi de bien télécharger les derniers pilotes en ligne sur le site d'Inateck et de bien choisir la version appropriée à l'installation (64 bits ou seulement 32 bits selon le cas). Je recommande ce produit au prix modéré. Je remercie aussi le service commercial et technique d'Inateck pour son souci de résoudre les problèmes rencontrés par les clients en cas de fonctionnement non satisfaisant, et sa générosité. Je recommande donc cette carte sans restriction.
Trustpilot
1 month ago
1 day ago