

Desertcart purchases this item on your behalf and handles shipping, customs, and support to Seychelles.
🎯 Spray Like a Pro, Finish Like a Boss
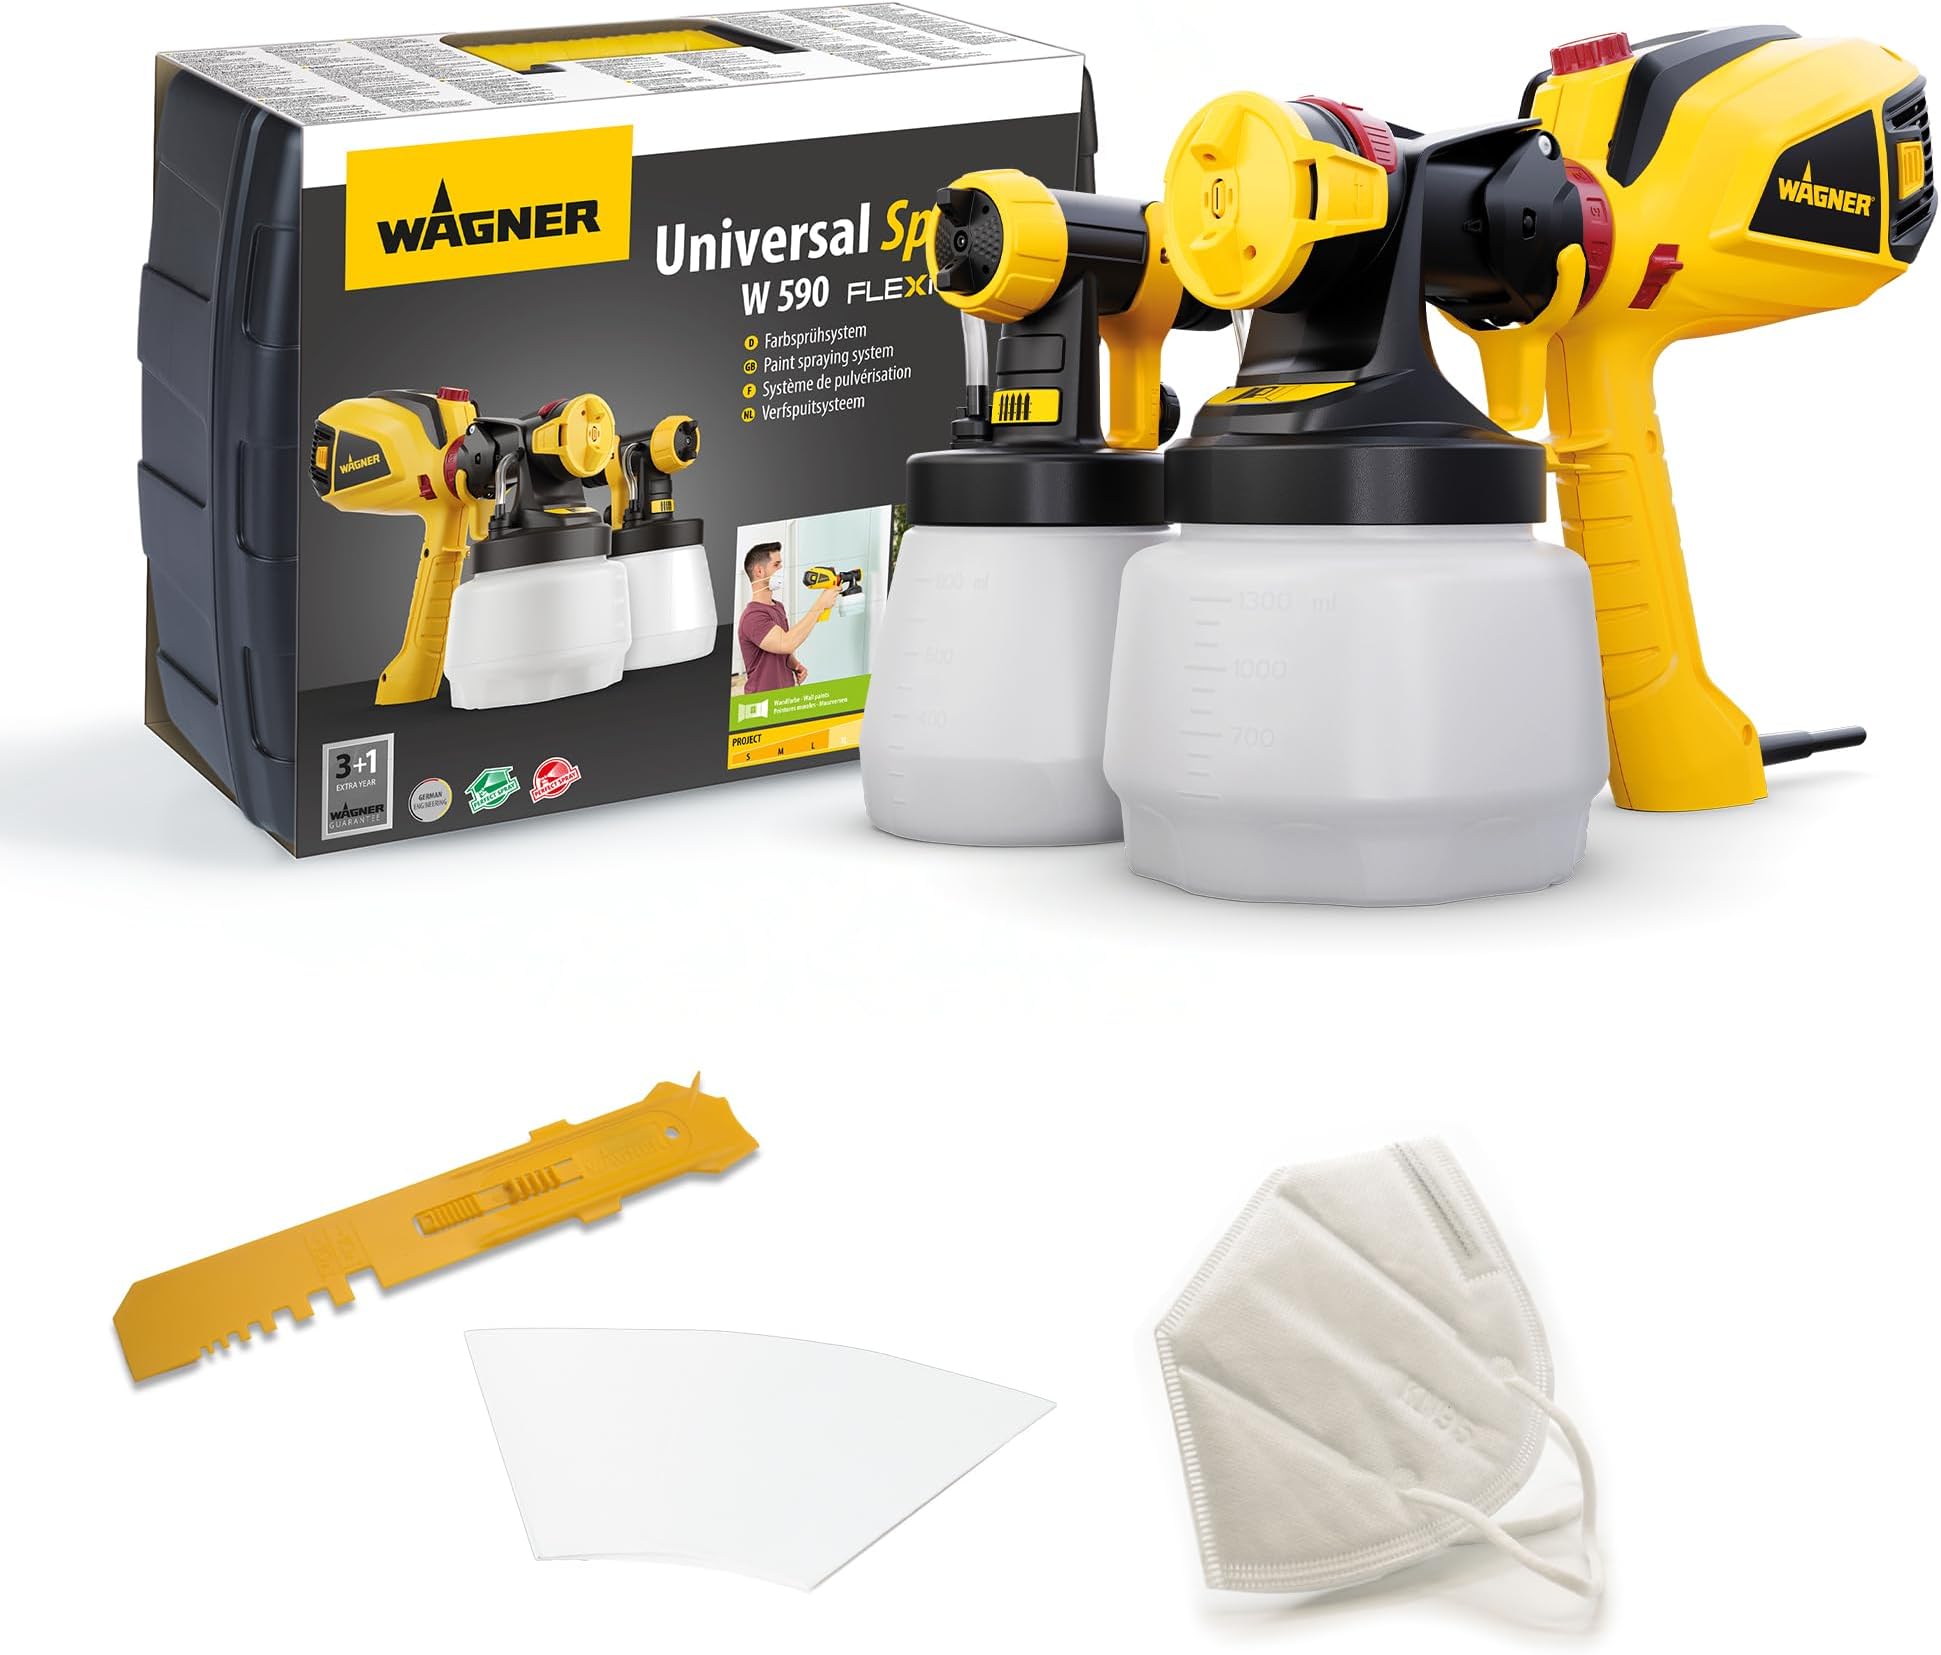
The WAGNER W 590 FLEXiO Paint Spray System combines a powerful 630W X-BOOST turbine with patented i-Spray nozzle technology to deliver flawless, uniform paint application on a wide range of materials—from latex paints to varnishes. Featuring dual spray attachments and stepless air and paint volume control, it adapts effortlessly to both indoor and outdoor projects, covering up to 15 m² in just 6 minutes with a large 1300 ml container. Designed for professionals and DIY enthusiasts alike, it ensures precision, speed, and versatility in every spray.
| Customer reviews | 4.2 4.2 out of 5 stars (2,867) |
L**A
Perfetta ma pulite gli ugelli
La pistola è perfetta. Ci ha permesso di imbiancare senza lasciare traccia di passate di rulli o pennelli. Spruzza in maniera omogenea e regolando bene l'ampiezza e la quantità di vernice si riesce ad avere anche un buon effetto coprente. Un CONSIGLIO importante: Pulite sempre gli ugelli. Fate in modo che la vernice non si asciughi nei fori perché questo ne compromette l'utilizzo e vi toccherà smontare e pulire bene con acqua limpida e perderete tempo. A me è capitato che si seccasse la vernice in un minuscolo foro di sfiato che si trova nel serbatoio, difficile da vedere soprattutto se è sporco dall'utilizzo, e che non spruzzasse più. Solo leggendo le istruzioni ho intuito che fosse un foro abbastanza importante e che andasse liberato. Ho usato un'ago per stapparlo e poi da lì tutto ok. Usate gli strumenti giusti e consigliati per pulire (che non sono inclusi) perché comunque ci sono componenti delicate. Ha diverse impostazioni di regolazione, sia di getto che di quantità di materiale da spruzzare. LEGGETE BENE LE ISTRUZIONI perché soltanto così potrete usarla al meglio senza compromettere e rovinare la pistola, vi viene spiegato anche come, in che direzione e a che distanza bisogna utilizzare e spruzzare. In sé è un buon prodotto.
J**N
Worked perfectly for my job, not all jobs....
I've painted dozens of houses. I remodel houses for a living. I am going to try and write a review to help everyone decide whether this works for them or not. I had to spray the outside of four buildings with many different panels and crevices. I would highly recommend it for this sort of job. I only taped off the windows, didn't have to worry about overspray and went to town with three long days. If you have a job like this I definitely recommend it. The cleaning takes about 45 minutes but for me it worked great every time. SIEVE THE PAINT YOU OR IN EVERY TIME AND IT NEVER CLOGS. I just used wire screen. I would not recommend this for an inside job unless it was empty with concrete floors that can get messy. Covering floors, furniture and windows would take as much time as just rolling. I'm healthy and have painted many times though, for a few others that might not be the case. BUT TRUST ME ON SIEVING THE PAINT. As it dries you get little bird on the inside and have to take apart the whole mechanism. Never happens with clean paint.
N**D
ممتاز
لم اجربه للان لكنه من شركة معروفة جدا لا يحتاج هواء جودته عاليه ووصلني في شنطة بلاستيك للتخزين والحماية اشتريت معه خيمة الطلاء بشكل منفصل وانتظرها حتى استخدمهم معا سمعت عليه مدح كثير جاري تجربته مطابق للوصف
I**L
La misma marca con 2 obciones, según para quien la vaya a usar.
Este modelo Wagner w590 flexio a mi entender fué el que más me convenció a la hora de decidirme entre otros modelos por las prestaciones, potencia y que todo está en un maletín bastante curioso para poder tener todo a mano. No he llegado a probarlo ya que al coger la turbina me resultó muy pesada y más aún si se llena el depósito de pintura con más de 1 litro. Además también había pedido el prolongador para llegar bien al techo sin tener que subirme en escaleras. Para mi resultaría del todo impensable poder sostener todo ese peso sin que terminara con el brazo y la espalda muy dolorida y sin poder terminar el trabajo por ello. Si no estás acostumbrado a coger peso y sostenerla durante un tiempo más o menos largo, no te lo aconsejo. Pienso que es muy buena opción para personas con brazos bien fuertes. Lo devolví sin ningún problema (muchas gracias a Amazon) y cogí el modelo Wagner w890 flexio que tiene la turbina en un maletín que a la vez hace de almacenaje de los dos depósitos que lleva. Sólo tienes que sostener una pistola ligera con el depósito de pintura y si quieres el prolongador. También tiene el tubo del aire muy largo que hace que no tengas que mover para nada la maleta, al menos en un espacio de 6 m a la redonda. Si tuvieras que moverlo, no pesa y es muy manejable. Tiene un saliente en el asa de la maleta para poder posar la pistola con el depósito sin que te tengas que preocupar donde dejarlo y que no vuelque. La verdad que ha sido un acierto total y pinte el techo de unos 10m* en unos pocos minutos. Con el otro cabezal que viene con su depósito pinté un cajón en menos de 1 min. La limpieza es rápida si eres cuidados@ en verter la pintura en el depósito y que no te manches las manos para no manchar la pistola y demás. Un truco... yo forré la manguera con film transparente flexible y también la parte superior de la maleta. Así si cae el polvillo de la pintura, no se te ensucia y siempre lo tienes impecable. Hice lo mismo con la pistola. La segunda compra ha sido un acierto total y estoy muy contenta ya que me quita mucho trabajo con un ahorro de tiempo cosiderable y queda de una sola pasada perfecto. Recomendable 100%
N**Y
Awesome with practice
This is a review for the Flexio 690 after ~2 years, I can't comment on the other products. First things first, any review that says this is a bad product doesn't know what they are talking about. Period. I had my 4 bed, 3 floor house renovation sprayed top-to-bottom by the pros (on fresh plaster skim) which cost nearly £8k. With the 690 I can now get as good a result as them, and in some cases better. However... and the however is a big one... the reason the pros cost so much is because spray painting well is *hard* and takes a ton of prep and loads of practice. If you aren't prepared to put in the time & effort to learn this, then do yourself a favour and don't buy this (or any similar) product. If you are prepared to make the effort, then the results can be spectacular and well well worth it. Below is pretty much everything I have learned from using this over the last 2 years from re-spraying rooms and kitchen cabinets to furniture and aluminium trim: Firstly, the 690 kit doesn't even come close to what you will need to do this properly, don't think you can just pull this out of the box and start painting the front room. Don't try and skimp on this, either invest in the kit or don't bother. I learned this the hard way. The Flexio 690 kit itself comes with: 1x Compressor 1x Hose 2x spray heads (1 large, 1 standard) 1x detachable handle 1x large (1800ml) paint holder 1x standard (800ml) paint holder 1x stirring stick You will also need the following: 2x 800ml containers with lid (standard head): https://www.amazon.co.uk/gp/product/B000FFR4NG 2x 1300ml container with lid (large head): https://www.amazon.co.uk/gp/product/B08JQBQY5W 1x Viscosity jar: https://www.amazon.co.uk/gp/product/B00J8D0LTA 1x Pack Paint filters (don't buy the cheap rubbish): https://www.amazon.co.uk/gp/product/B013NQDO1Y 1x Pack Microfibre cloths: https://www.amazon.co.uk/gp/product/B07TVDJVR9 1x Protective coveralls (you don't want be doing this in shorts & a t-shirt!): https://www.amazon.co.uk/gp/product/B008PQKR7C 1x Respirator mask: https://www.amazon.co.uk/gp/product/B07WG74YQK 1x Shoe covers: https://www.amazon.co.uk/gp/product/B086KYXX5G 1x Tack cloths: https://www.amazon.co.uk/gp/product/B0048DYVCI 1x Dust sheets: https://www.amazon.co.uk/gp/product/B00IEAFZRG 1x Some awesome masking tape: https://www.amazon.co.uk/gp/product/B084B8351C 1x Brown paper for masking: https://www.amazon.co.uk/gp/product/B07WQGWFWP 1x Scalpel with sharp blade 1x large bucket 1x Bottle brush set: https://www.amazon.co.uk/dp/B086D7SX8K 1x non-abrasive scouring pad Some Amazon cardboard boxes in large sheets Whether you are painting walls & ceilings or furniture etc there are 4 key phases to getting pro results - Prep, Dust Control, Painting, Clean-up 1) The spray will land on *everything*, you must mask and/or seal anything you aren't painting. This includes around/under door frames and other voids. 2) Dust control is absolutely critical, the turbine produces a large airflow that will kick up any dust left on any surface. 3) Sweep and thoroughly vacuum the room/area, especially at wall/floor junctions and in between floorboards etc 4) Get a damp (with water) microfibre cloth and wipe down *every* surface you will paint. Especially wall and ceiling junctions. Yes do the ceiling too, dust from decorating sticks to everything! It will all ruin the finish. Now to prep the paint. (Assuming this is water based) A quick note. Always, always mix around 1/3 to 1/2 more paint than you think you will need, for 2 reasons: Firstly, neither of these 2 guns spray well on the last dregs in the container, you will get splatter. Secondly, diluting paint can very subtly change the shade (especially dark shades), if you need to revisit and touch up you'll want exactly the same mix. You can just stir it back into the tin when you know you're completely finished. 1) Fill your large bucket full of water 2) Take one of the extra containers your purchased and fill it 2/3rds full of your paint 3) You will need to dilute it to spray. The turbine is *not* powerful enough to spray paint directly from the can. The exception here is something like Polyvine Decorators Varnish which is almost like water. 4) Start with about 10% volume of clean water, stir it in well 5) Once mixed, take your viscosity jar (You did get one right?) and dunk in into the paint container to the top. Pull it out and start counting 6) The paint will slowly flow out of the jar, the speed based on the viscosity. It should empty in 30-40s. 7) If it takes longer, add more water and repeat. 8) Eventually you want something like single cream. 9) Once you are practised you can watch it run off the stirring stick and you will use this less. 10) Now pick the spray/container you will paint with, place the paint filter in the container mouth and pour in your now diluted paint *Never ever* try and spray with unfiltered paint. Ever. Just don't. The smallest particles will clog the nozzles. Dilute/mix first then filter into final container. 11) Immediately place both the stirring stick and the mixing container into the bucket of water. 12) Place the lid *not* the spray gun on the final container with the paint. 13) Fill your last container full to max with clean water. (this is why you want 3 containers, one for paint, one is dirty, one has clean water) and attach the gun. 14) Now get suited up, coveralls, shoe covers and mask 15) Transfer all your kit into the space you will paint in, along with one of the cardboard sheets and the damp cloth Painting 1) Turn the air up the compressor to Max. I only turn it down if I start to get overspray from a particularly runny/watery paint 2) With the clean water in your gun, run some test spray on the cardboard. You want a super fine mist 3) Now walk around the room/area and spray the floor, the floor should be damp 4) Now spray into the air around you, and wait for it to settle (don't use all of it, we will need in a bit) 5) This will capture the last of the dust in the air and stick it to the floor 6) Now swap the container with water for the container with the paint, put the lid on the water container. 6b) If you are painting furniture/wood etc, use the tack cloths now to wipe down the surfaces to be sprayed. This is your final dust control chance. 7) Make sure you point the suction hose in the container the right way. Eg. painting a ceiling point it towards you etc 8) Start to test spray the cardboard from about 30cm away. Again you want a nice fine spray. Water will come first then the paint 9) Never try to lay down too much paint. The turbine produces hot air so a thin spray dries quickly. It's much faster to spray less and add more paint then have to sand back runs after it is dry. 10) I don't use more than setting 3 or 4 volume on the large head as I find it wont atomise it properly, similar to the standard head. 11) Now start spraying in long smooth sweeping motions. Flex your arm not wrist you need a consistent distant from the surface 12) Be logical where you start and finish. Think how spraying one part might over spray another vertical part and that might cause runs 13) You want to cover about 50% of the previous spray pattern on your next run. 14) If you need to touch up a section, don't just point and spray. Hold the cardboard in front of the surface, start spraying on that and move off in a smooth motion. This is so any initial splatter is on the cardboard not the surface 15) Wipe down the nozzle frequently (every few mins) with your damp microfibre cloth this will keep it clean and spraying well. 16) I find you can leave the paint in the gun for about an hour if you want to see what the finish looks like and how it dries. Longer than that and I would clean up and start again. Again wipe the nozzle if you stop. Clean up 1) Once you have finished, unscrew the gun from the paint container and screw back into the previous water container. Place the lid on the paint container. 2) Keep the lid tight on the paint container, this is your touch up paint if you need to revisit it. 3) Now take yourself and the whole kit outside. Seal/close the room/area to allow to dry 4) Spray the clean water through the gun until the spray is just clear water. Repeat this until it is. 5) Next disassemble the gun entirely and place all the parts into the bucket of water. 6) Now start cleaning with the bottle brushes and scouring pad. The gun should look like new when you are done 7) Cleanup is critical, the condition of the gun will determine your results next time you use it. A few final tips: 1) Don't ever stand on the compressor hose, if you do you'll end up with really bad splatter! 2) The 1800ml paint container is heavy when it's full, you're going to be holding it for a while and need to be able to move it smoothly and consistently. I tend to use the 1300ml instead. 3) If you are ever painting things like cupboard doors, buy a cheap clothes rail, then screw eye hooks into the door bottoms and hang vertically off cheap clothes hangers. Painting them vertically is much easier and massively reduces dust settling. 4) Polyvine Decorators Varnish sprays really well undiluted: https://www.amazon.co.uk/dp/B01L4PQH7Y, but you need the lowest paint volume possible - basically a super fine mist. Anything more and you'll get runs (#2.5 on the large). 5) The scalpel with sharp blade.. if you get dust or hair on the surface the blade will pluck this off. Use a light touchup spray with the cardboard technique. 6) Enjoy it! This makes painting fun and it is incredibly satisfying to see the quality of the finish you can get. ...and all this is why some people give this product a low rating. Sure there are some flaws but they're easy enough to get around. The simple reality is spray painting well is *hard* and needs practice and a methodical process. But the results can and do speak for themselves.
Trustpilot
1 day ago
2 weeks ago