

🔌 Never Miss a Beat on the Course!
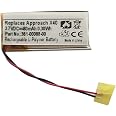
The 80mAh 361-00088-00 Battery Replacement is a high-performance lithium-polymer battery designed for Garmin Approach X40 and Vivosmart HR series. With a capacity of 80mAh and a voltage of 3.7V, this rechargeable battery ensures your devices stay powered during your most important activities. Backed by a 1-year replacement warranty, it offers reliability and peace of mind for active users.
D**G
Battery is perfect match. Instal takes some patience
The media could not be loaded. Battery works as it should. Check vid for some installation guidance.
K**N
Battery matches perfectly- must solder!
The battery is working great! Perfect replacement, but you need to know how to solder, use a heat gun to soften the glue to open the watch, and glue it back together. I had never soldered wires before (soldered copper pipes) borrowed my neighbors solder iron, flux, and solder.. pre-flux and tin the wires first to make the less fragile.. then quick touch wire to solder in the watch.. used lowest heat setting on the iron.. 200 degrees.. Battery holds great charge. My son gets two days continuous use.. very happy.. and we didn’t have to buy a new watch….. yet…LOL
W**H
Hard too install
Did not look at what it took to install!
J**C
Works like a charm —if you have the means and skill to repair.
You came here looking for install instructions so here it goes (try at own risk-glass is very fragile!).1. Keep in mind that everything is glued together with silicone-like adhesive (B-7000?) and you will have to un-solder and solder the old and new batteries to a ribbon inside the watch.2. Remove the T5 screws holding the band in place and remove bands.3. Carefully use an exacto blade (facing up) to strip the glue from the edges between the glass and plastic.4. Carefully peel out the glue from around the gps antenna (watch the ribbon!) and the opposite “button side”.5. Once you are sure you’ve gotten as much glue as you can, use a metal pry tool to carefully pry out the face from the button side. DO NOT TRY TO PRY UNDER THE GLASS SIDES OR GPS ANTENNA.6. Once you have the face removed, begin removing glue from the perimeter. Be careful not to bend the internal ribbon or damage internal components.7. Clean the casing and apply heat resistant tape to the inside of the casing and over the ribbon around the solder joints.8. After noting which solder joint is red and which is black, use rosin flux to un-solder the old battery starting with the red wire.9. Solder in the new battery, and make sure the wires don’t fall into the case perimeter where the face and glue will be - you won’t be able to close it, and risk damaging the wires.10. Hook the watch up to a charger to ensure a proper connection.11. After a thorough cleaning, use B-7000 glue to fill the perimeter and the sides of the face, carefully press in the watch face, and apply a clamp or hold pressure for 2-3 minutes.12. Once dry, clean any glue off that squeezed out around the face.13. Use liberal amounts of glue to apply new watch bands, or clean the old glue out of your existing bands before gluing them back on. Be careful not to get glue in the on-off button.14. Replace the four T5 screws.
Trustpilot
2 months ago
2 days ago
![Charger for Garmin Vivosmart HR/HR+, Replacement Charging Cable Cord for Garmin Vivosmart HR/HR+ Activity Tracker [3.3ft/100cm]](https://images-na.ssl-images-amazon.com/images/I/610iNBcYg7L._AC_UL116_SR116,116_.jpg)