
🚀 Row Your Way to Fitness!
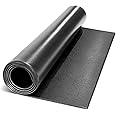
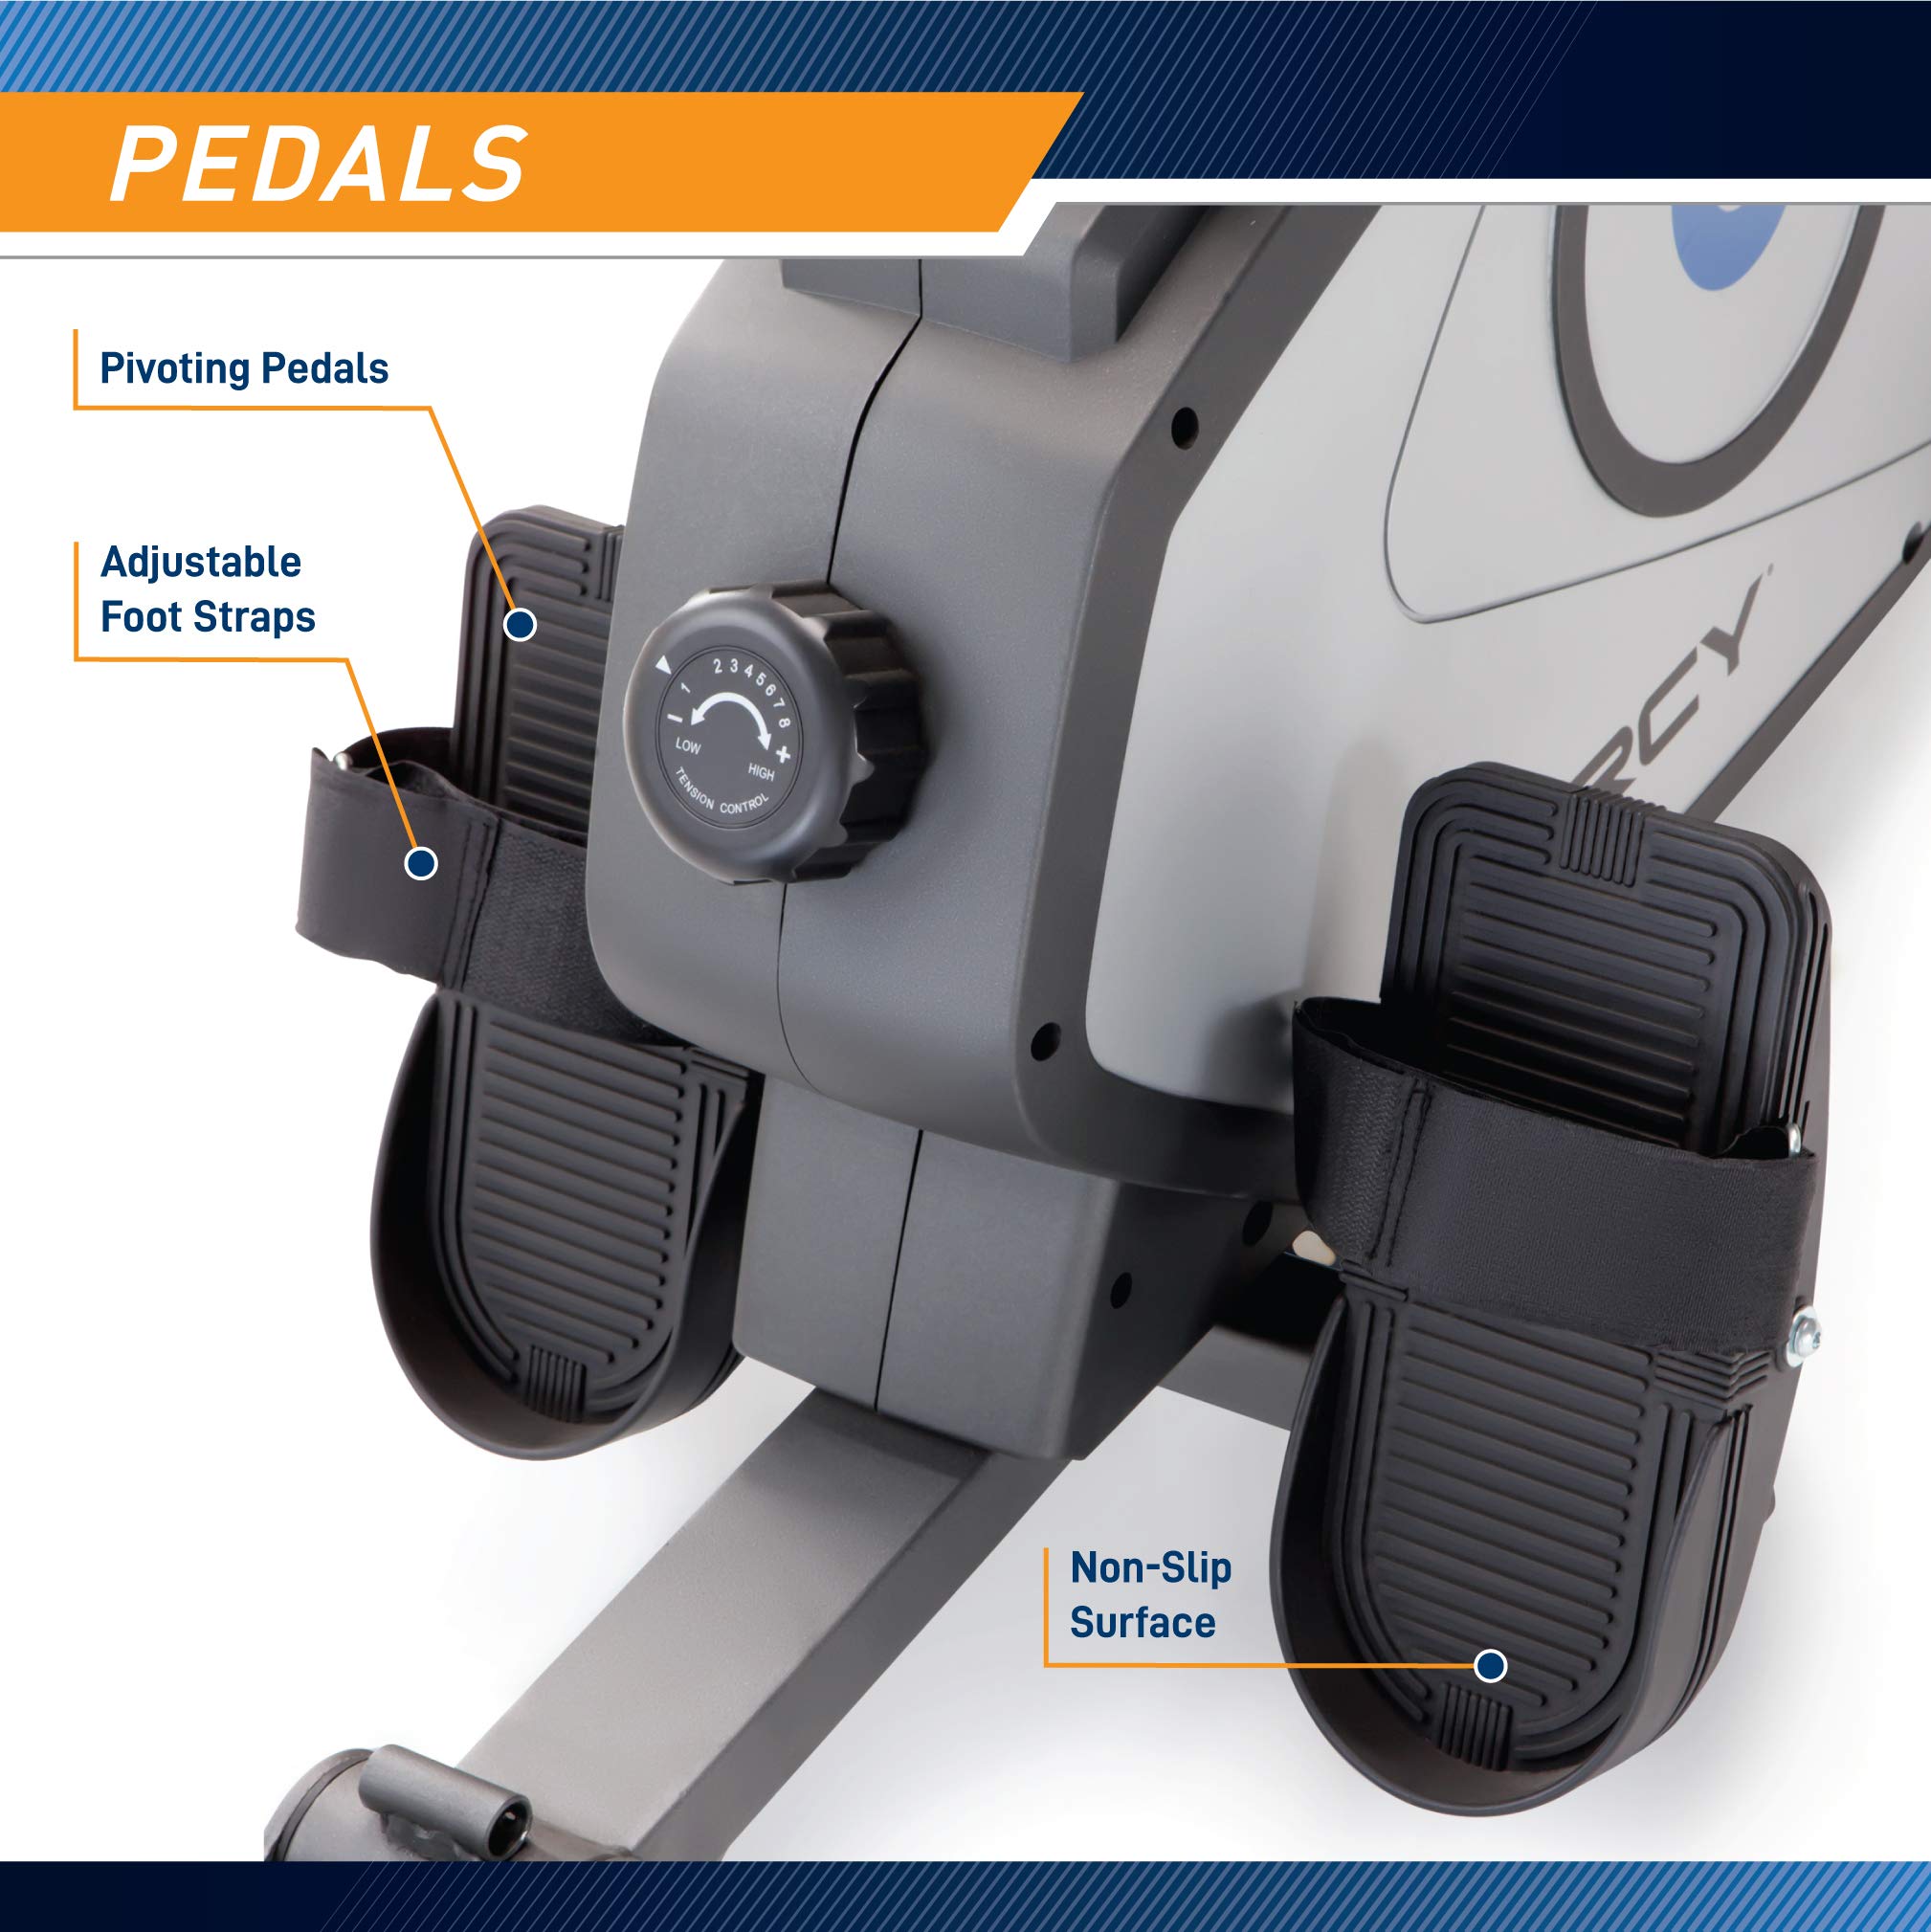
The Marcy Foldable 8-Level Magnetic Resistance Rowing Machine is a versatile fitness solution designed for all levels. With eight adjustable resistance settings, an ergonomic design for comfort, and a compact foldable structure, it’s perfect for maximizing your workout while saving space. The built-in transport wheels make it easy to move, ensuring you can fit fitness into your lifestyle effortlessly.
| Color | Foldable - Grey |
| Size | One Size |
| Style | Standard |
| Display Type | LCD |
| Frame Material | Metal |
| Height | 11.4 inches |
| Length | 38.6 inches |
| Weight | 66 Pounds |
| Width | 20.1 inches |
| Material Type | Alloy Steel |
| Meter | Distance, RPM |
| Number of Items | 1 |
| Number of Pieces | 1 |
| Power Source | Battery Powered |
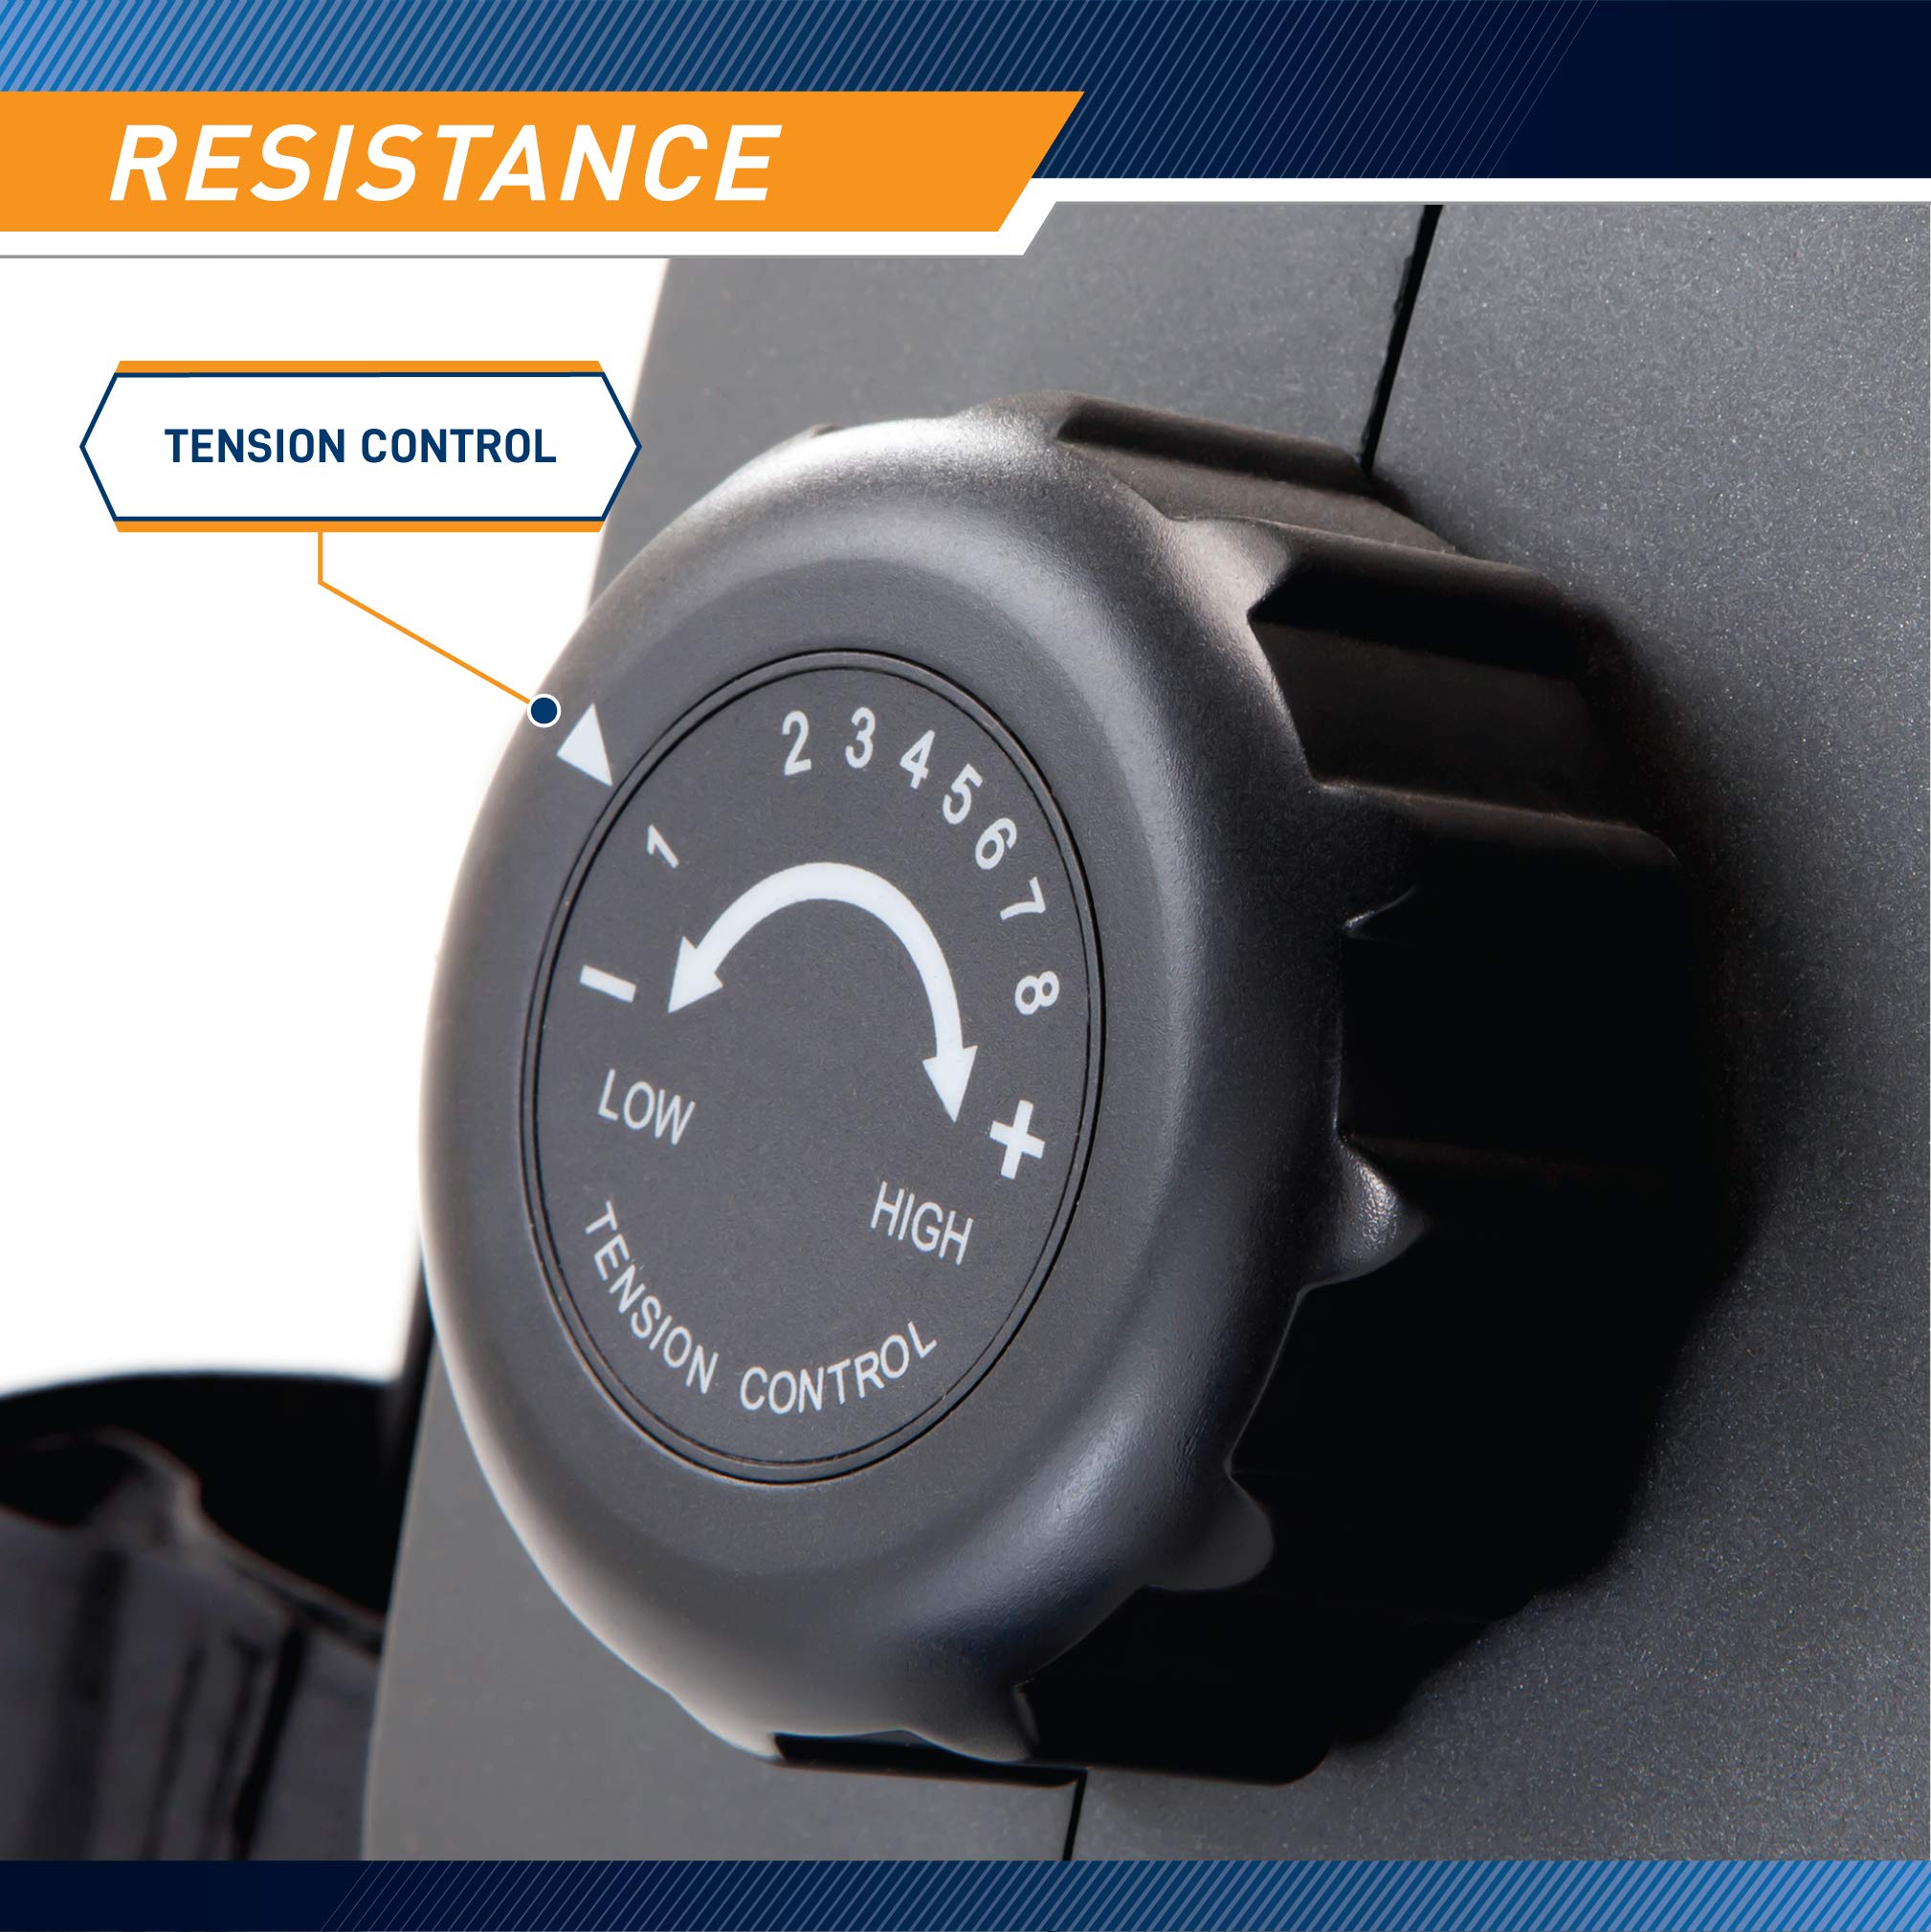
| Features | Adjustable Foot Strap, Buit-In Wheel, Contoured Seat, Foldable |
| Included Components | one rowing machine, Warranty card, User manual |
| Batteries Included? | No |
| Brand | Marcy |
| maximum weight capacity | 300 Pounds |
| Department | unisex-adult |
| Manufacturer | Marcy |
| Item model number | NS-40503RW |
| Product Dimensions | 187.96 x 50.8 x 83.82 cm; 27 kg |
| ASIN | B00O0HX8XA |
T**E
Great machine for price
I really like this machine and it's great for beginners.Machine works well and is quiet.The assembly was quick and easy as it only took me 1hr 15 mins.
A**L
Great Workout on a budget
Quiet, comfortable, compact, and a great workout. It arrived faster than expected and in perfect condition. Instructions are a bit confusing. Note: attach the pedals to the base before you install the base to the machine (instructions say the contrary)
H**.
Great value for the money.
I've been using this rowing machine for over a year. It works great and had a little difficulty with one part of putting it together, but overall it was fairly easy to assemble. It works great and gets well used. I do find that it moves quite a bit when you are using it. It folds up for storage. I was hoping that it would fold up a little more compact than it does. The rollers work ok but I find it awkward to move. I wish they had put locking wheels on both parts of the rowing machine for easier moving and also to help it stay stationary when you are using it. It doesn't fold up that much which I found a little disappointing, but it is a great workout and reasonably priced.
A**A
Recibi mi paquete en tiempo pero llegó con una pieza quebrada... mal muy mal!!! :(
Recibi mi paquete en tiempo pero llegó con una pieza quebrada... mal muy mal!!! :( No se a quien o donde puedo meter mi reporte de la pieza dañada. Muchas gracias!
N**N
(Fairly) Easy to assemble, amazingly fun piece of equipment
This is so fun! I would give it five stars, but the assembly instructions left a little to be desired.Here are my added assembly steps:Before starting, gather the following items: Source of music (to reduce frustration), two AA batteries (not included).The instruction book-*None of the pieces are labeled, but you can pretty much figure everything out from the drawings. The nuts/bolts look very similar, but if you count them and look at the parts list, you'll know which is which.* Putting on the pedals can be hellish. I had a lot of trouble getting one on and lined up but the other one was no problem. Here's a tip for you non-experts. Put the washer and screw on one end. This will be the end away from the center. Put the ^%&%$** pedal on the bracket (heel cup on the bottom). Wiggle and push and swear until you get the axle all the way through. Stick your fingers in the teeny tiny space and attach the other washer and screw. Tighten it as much as you can with your fingers. IMPORTANT: Now, put one of the small allen wrenches in the inside (loose) screw and hold it still while you use the other allen wrench to turn it from the other side. It doesn't matter that the outside screw is already in, this will screw the axle onto the inner screw. SO much easier then trying to move the wrench around in the teeny area. (I know, because I did it the hard way first.)* The four holes on the rail go on the bottom. (Yes, I did it wrong at first.) After you attach and tighten the two screws on the top of the seat rail, pull the big pin out, put the rail in vertical position, and put the pin back in. This makes it MUCH easier to put the four screws in the bottom and add the rubber bumpers. Also, attach the other leg/support this way, making sure it's facing the right way.* Put the rail back down.Here's where I had the biggest problem...THERE WERE NO MORE INSTRUCTIONS!!! Maybe I was missing a page. I hope I was missing a page.At this point I have two screws, a seat, two bumpers, and two end caps that are still sitting on the floor. Honestly, it's not THAT hard to figure out what to do, but I really shouldn't have to. So:* Put the seat on FIRST. (Wheels go in the tracks.) Screw the rubber bumpers on just like you did the other ones with the only screws you have left. Stick the end caps in the end. (Funny: These are the only parts that are labeled.).* Open the little door on the back of the computer and put the batteries in. (You could probably do this before you attach the computer, but I left the batteries in the house so I haven't done this part yet.)**** Try it out.Holy crap! This is SO much fun! If you are old (like me) or out of shape (like me) you should make sure not to go overboard or you'll feel it later.PROS:Even with the sometimes lacking assembly instructions, I put this together in less than an hour.TOOLS ARE INCLUDED!!It folds up so it takes slightly less space.CONS:Honestly, the only complaint I have is the instructions. That was annoying, but not a real problem.So far, I would recommend this.Nicole
Trustpilot
3 days ago
2 weeks ago