Spalding U Turn In Ground Basketball Hoop | Desertcart Seychelles
Spalding U-Turn In-Ground Basketball Hoop
4.1/5
Product ID: 469713523
Secure Transaction
Details
BrandSpalding
MaterialGlass
ColorAC4504
Item Weight145 Pounds
Indoor/Outdoor UsageOutdoor
Special Featureadjustable
🏀54" tempered glass backboard
⚙️U-Turn lift with detachable handle
🛠️In-ground steel frame with aluminum trim
Frequently Bought Together
Description
🏀 Elevate your game with pro-grade precision and style!
SOLID STABILITY - In-ground steel frame with aluminum trim anchors your game with rock-solid support
SLEEK SPACIOUS - Generous 54" x 32" board size offers a professional court feel in your backyard
GAME CHANGING RIM - Pro Image breakaway rim designed for intense play and slam dunk action
PRO LEVEL DURABILITY - Tempered glass backboard ensures NBA-quality rebound and longevity
EFFORTLESS ADJUSTABILITY - Innovative U-Turn lift system with detachable handle for smooth height changes
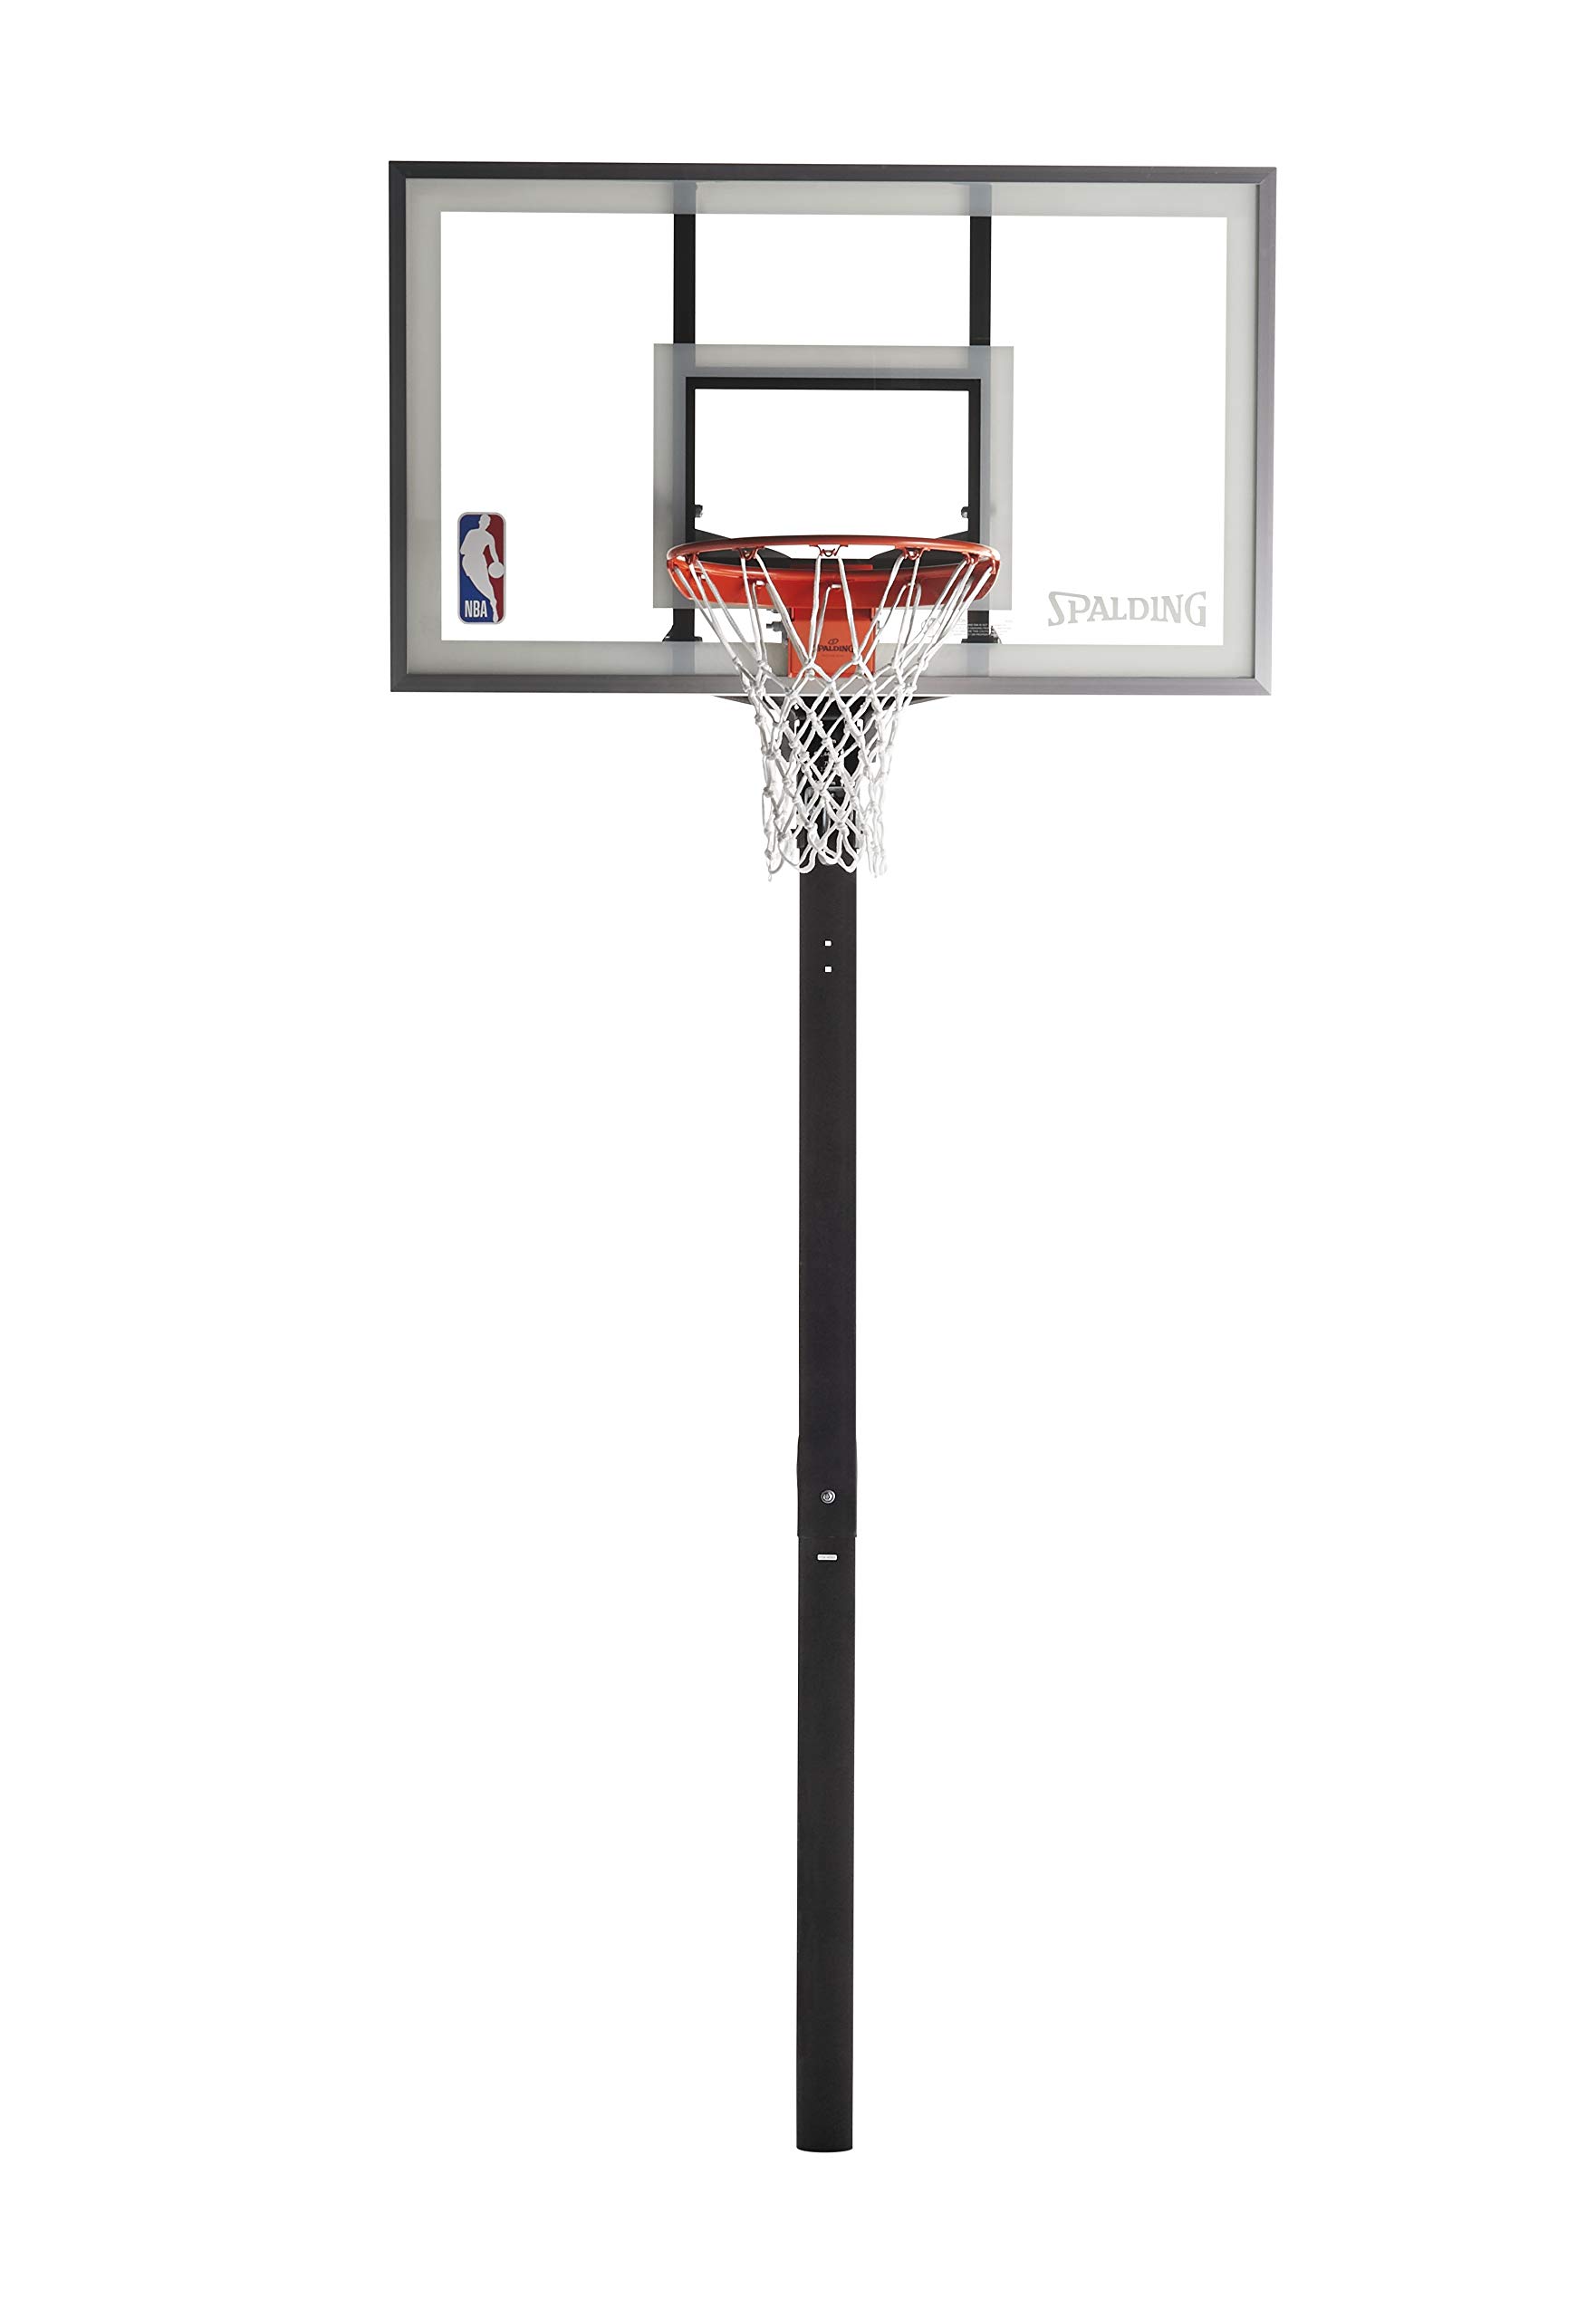
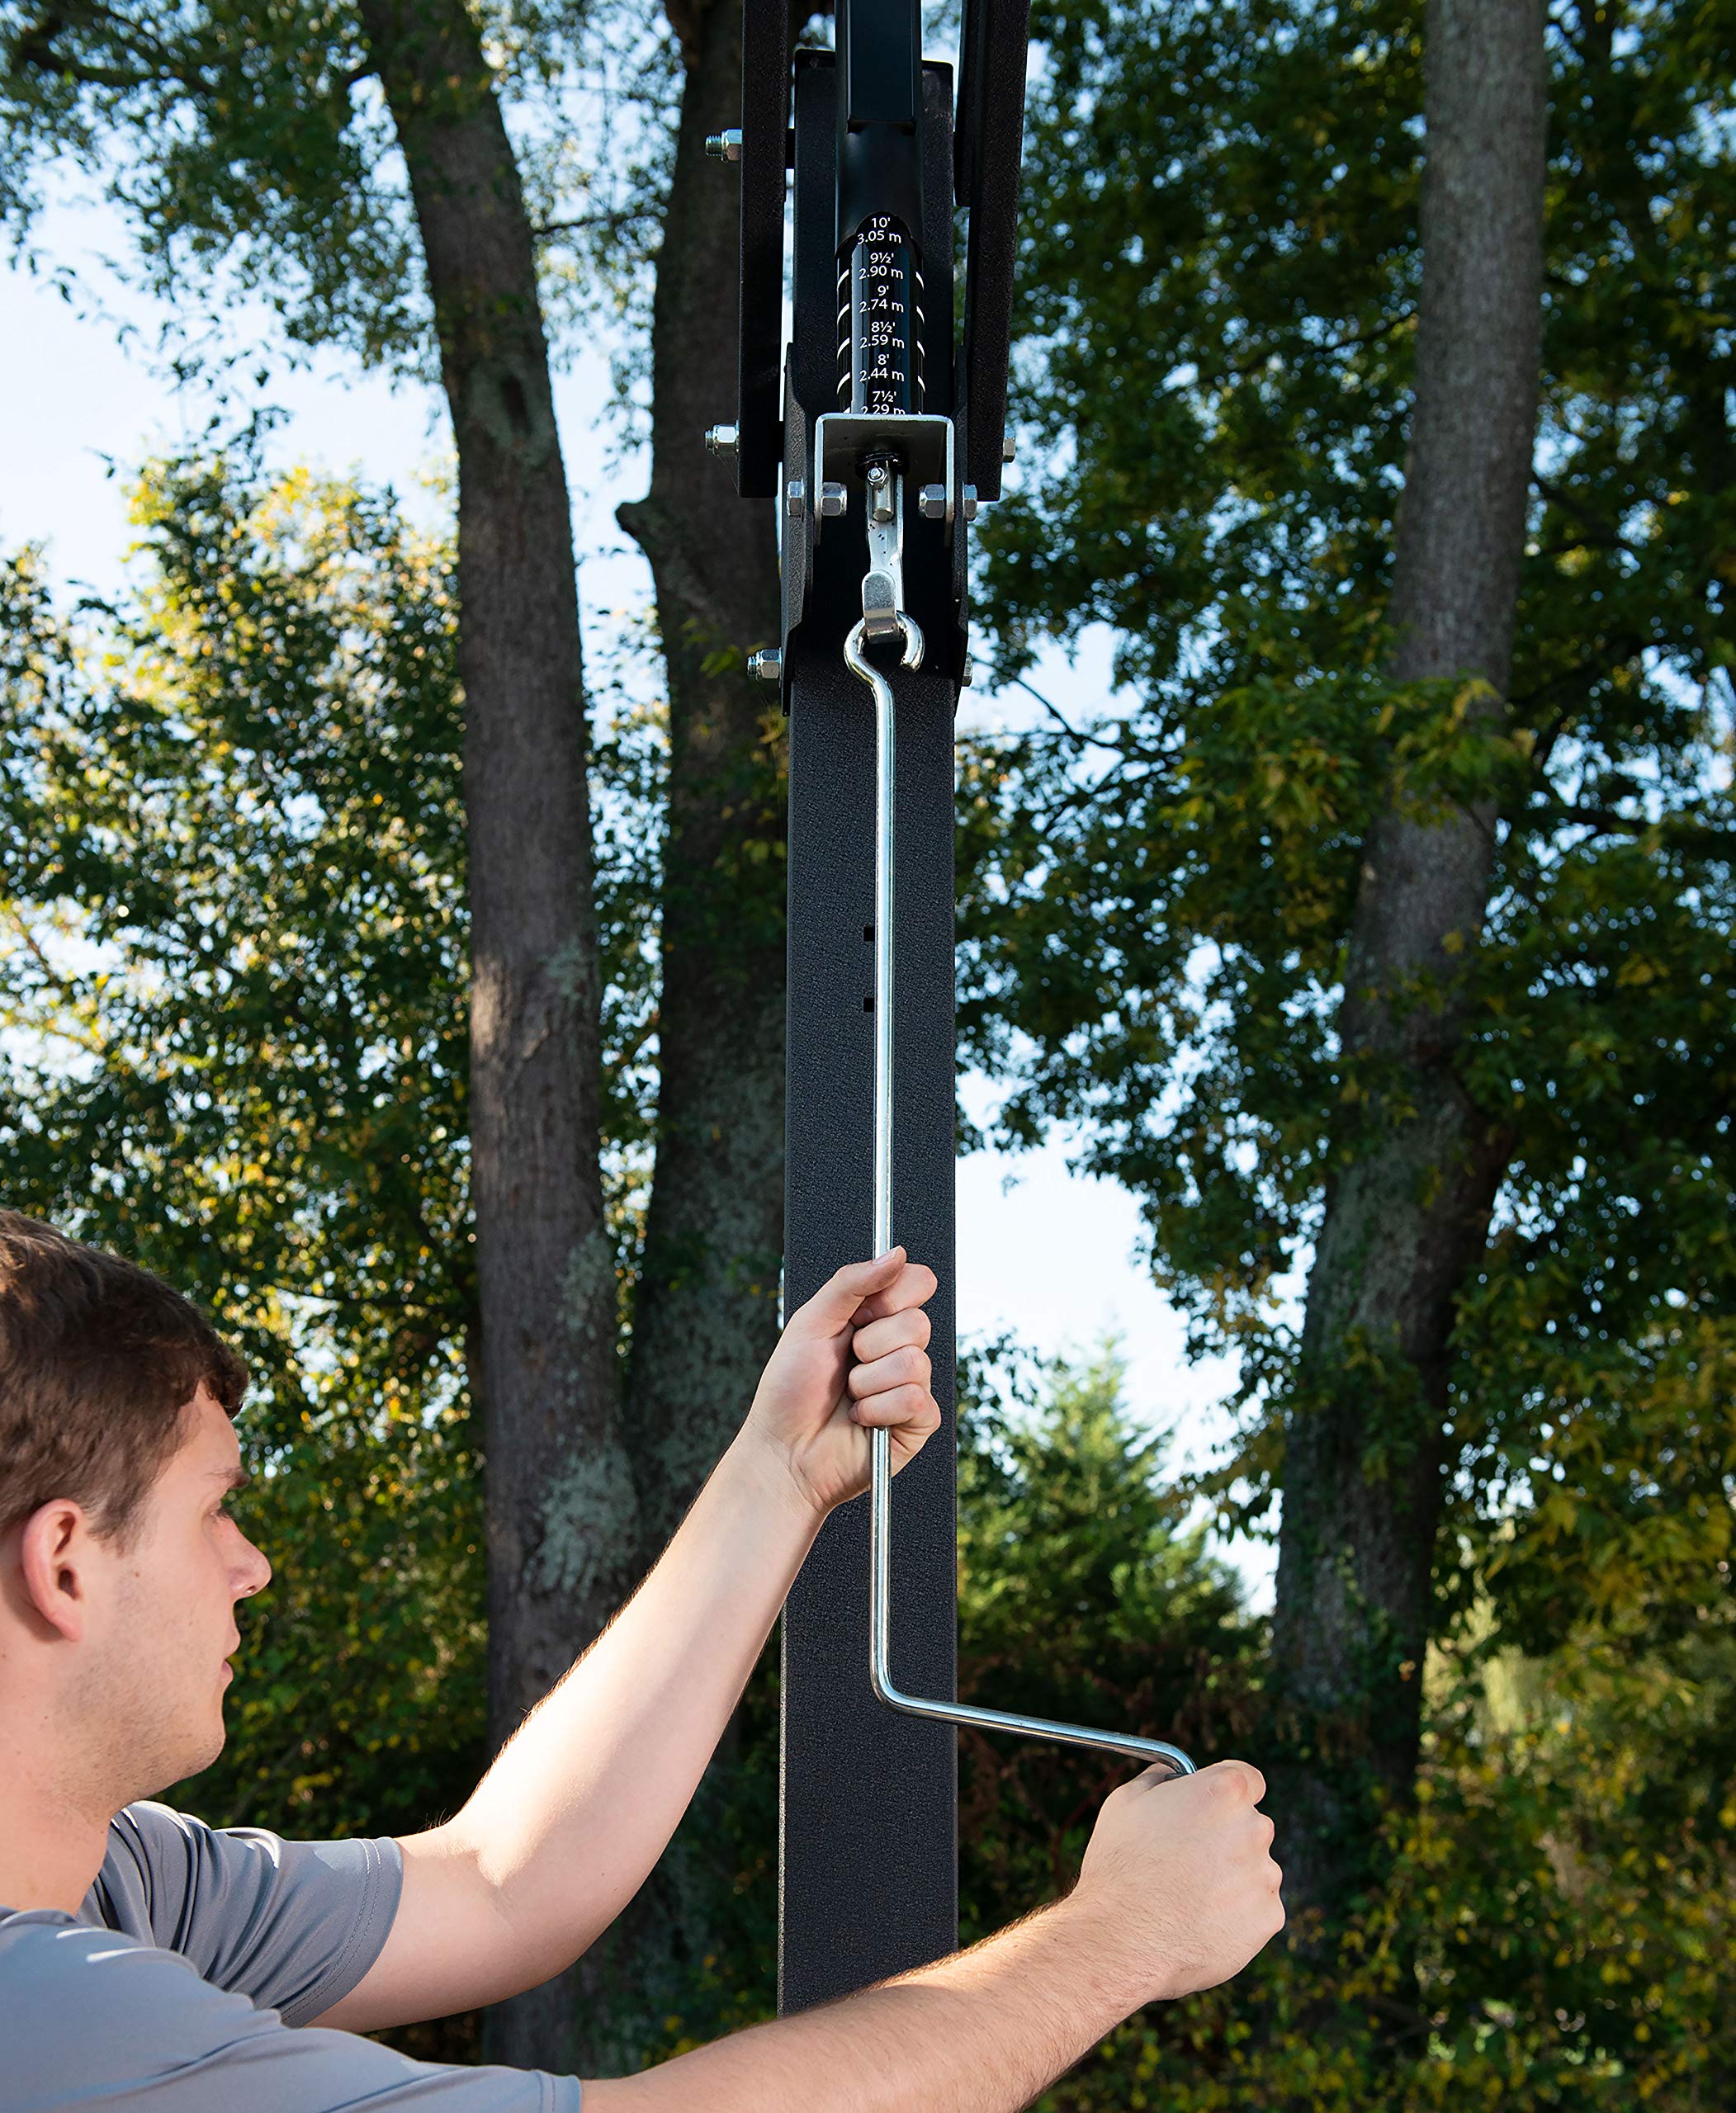
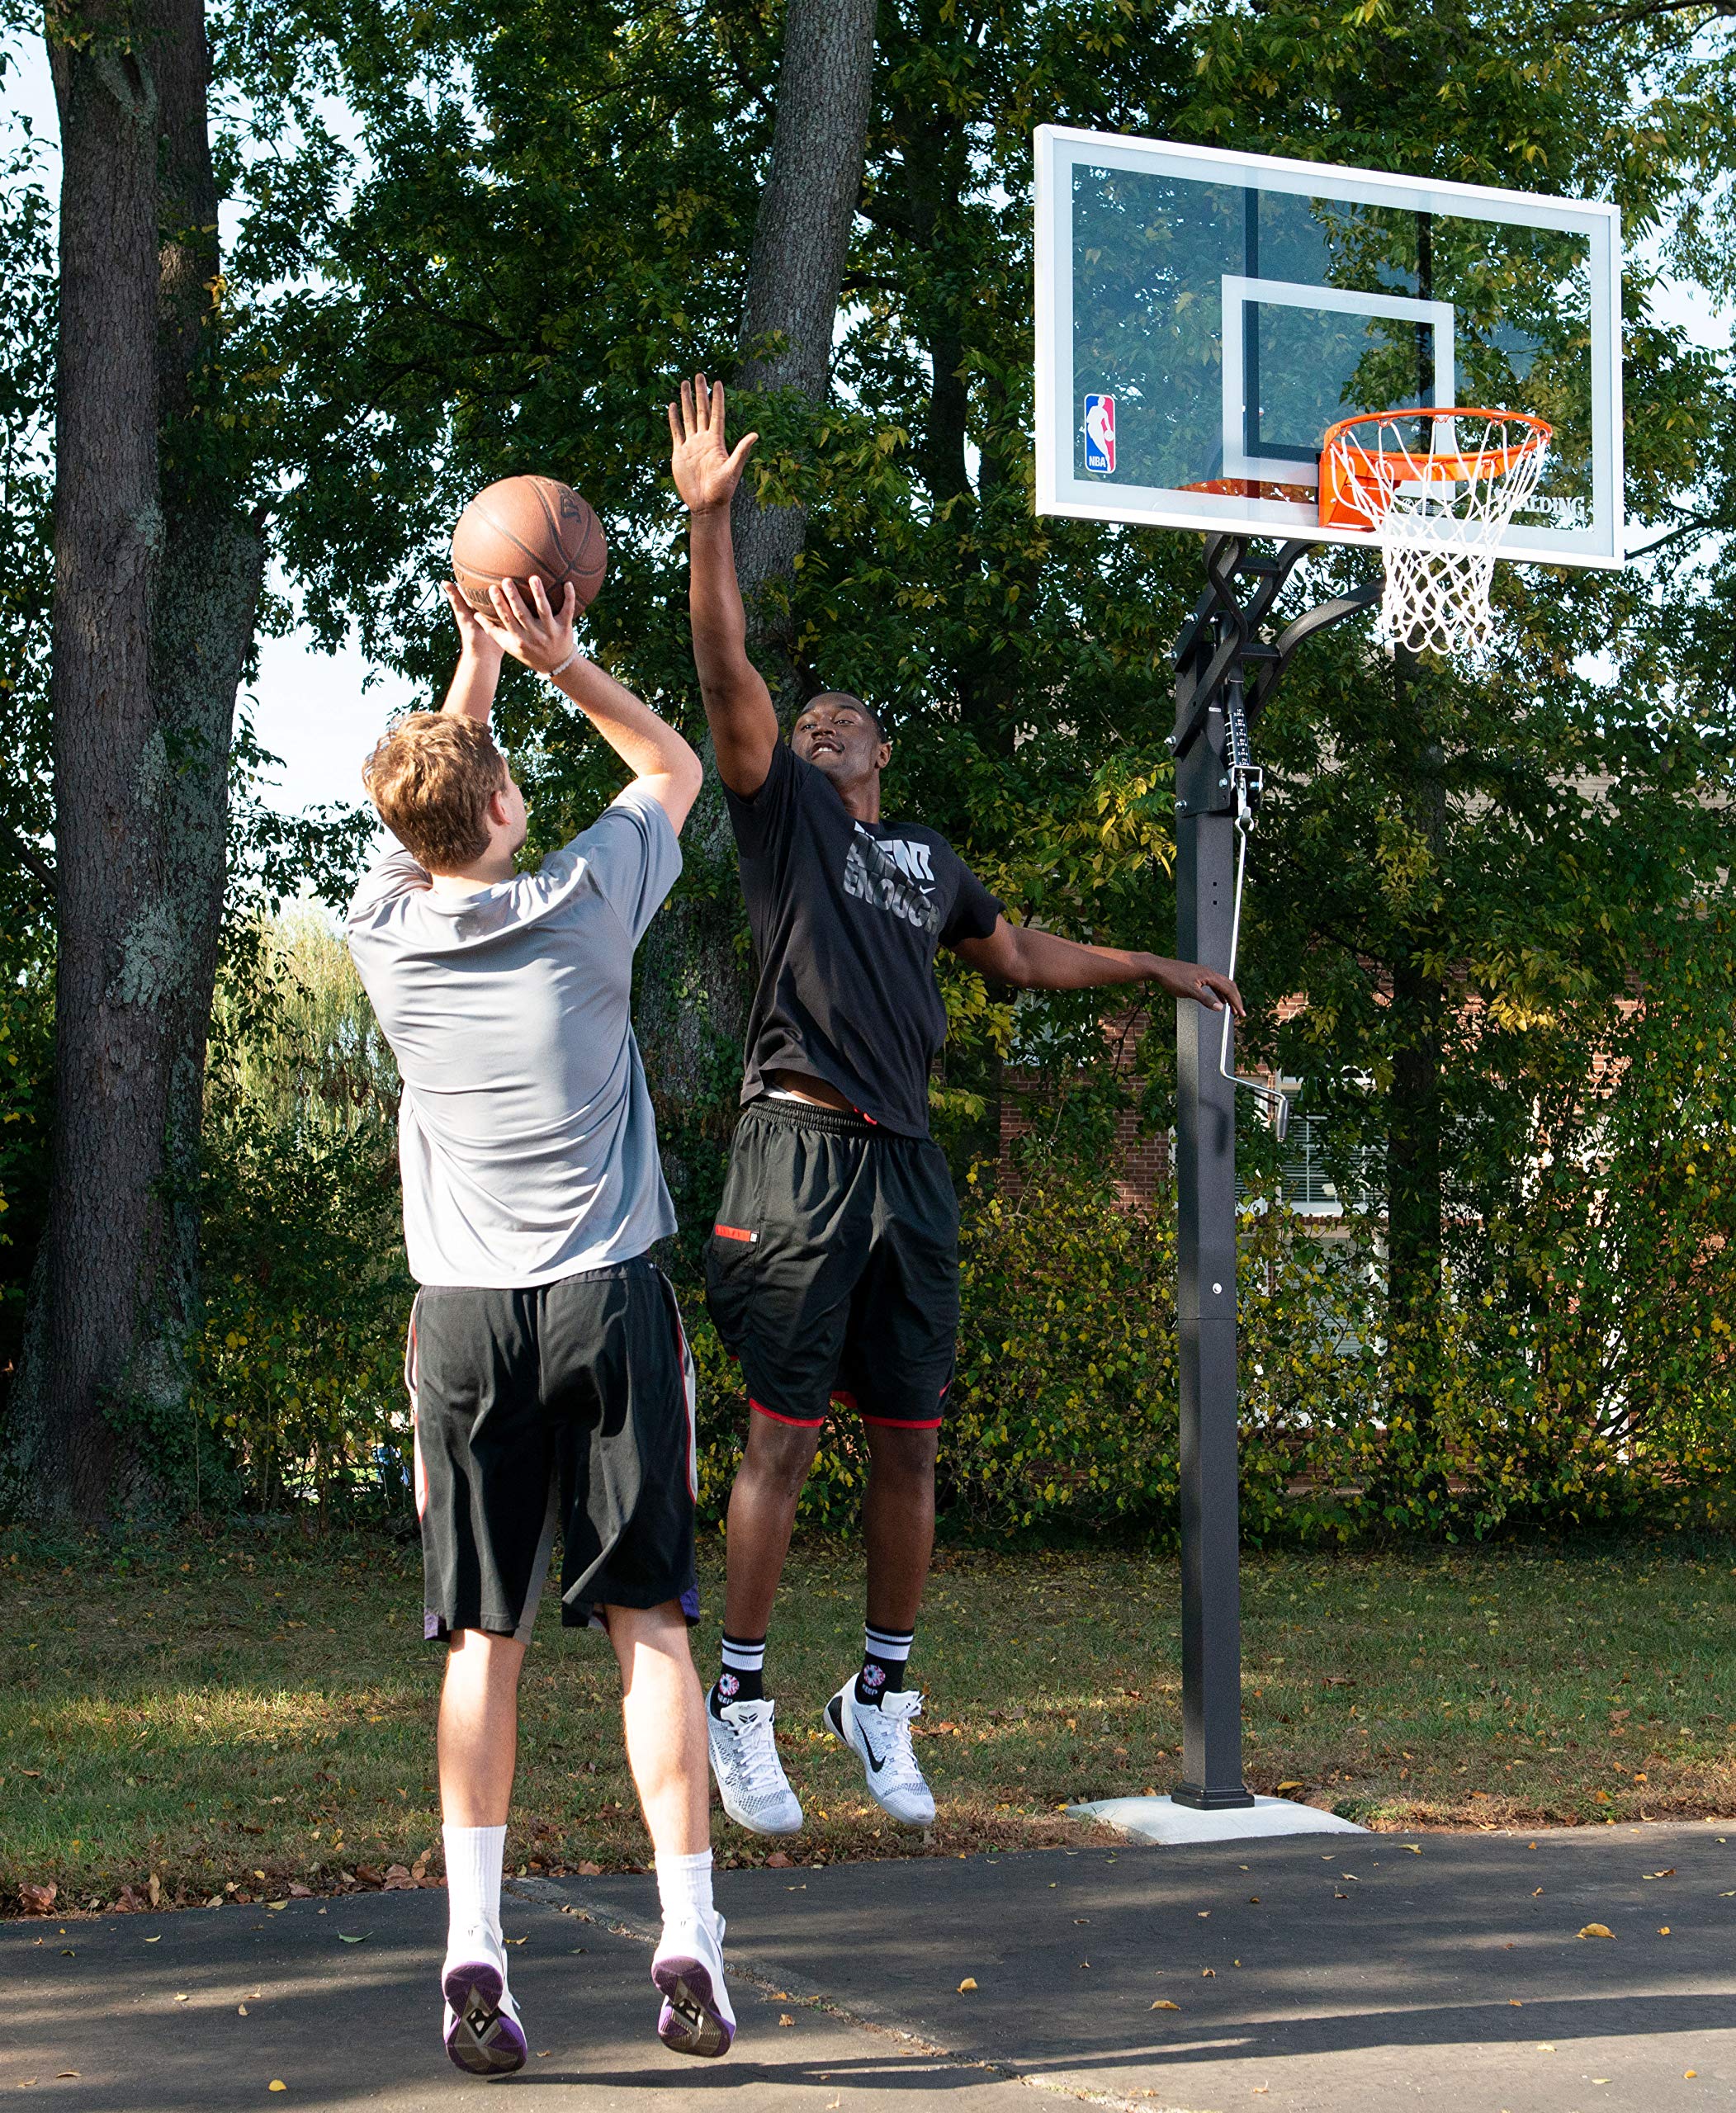
The Spalding U-Turn In-Ground Basketball Hoop features a 54" tempered glass backboard with a 2-foot offset, a durable steel frame with aluminum trim, and a Pro Image breakaway rim. Its innovative U-Turn lift system with a detachable handle allows easy height adjustment, making it perfect for outdoor use and serious players seeking NBA-level performance at home.
Specifications
Brand
Spalding
Material
Glass
Color
AC4504
Item Weight
145 Pounds
Indoor/Outdoor Usage
Outdoor
Special Feature
adjustable
Mounting Type
In-Ground
Target Audience
Unisex Kid
Room Type
Outdoor
Model Name
U-Turn
League
NBA
Included Components
Detachable handle
Frame Material
Aluminum
Minimum Height
7.5 Feet
Style
2021 Version
Assembly Required
Yes
Maximum Height Recommendation
54 Inches
Global Trade Identification Number
00689344334820
UPC
689344334820 714547183552
Rim Size
18 Inches
Manufacturer
Spalding
Overhang Distance
2 Feet
Item Package Dimensions L x W x H
66.5 x 36.5 x 11 inches
Package Weight
71.67 Kilograms
Item Dimensions LxWxH
11 x 54 x 11 inches
Brand Name
Spalding
Number of Items
1
Part Number
88454G
Size
54"
Sport Type
Basketball
Have a Question? See What Others Asked
What is the actual material and thickness of the backboard? I've seen 1/4, 3/16
How far below ground level should the bottom half of the pole be sunk?
If I toss the sleeve, given all the concerns it may cause, how deep does pole go in concrete?
Pole only went in the ground 10 inches. I know it says 14-16 inches. That’s how the concrete cures. Will this create an issue?
Reviews
4.1
All from verified purchases
O**S
Great product for the price
I read every review I could find before buying this product. In addition, I carefully reviewed all of the installation tips from other purchasers. I am very happy with this purchase. It is a great system for the price.For installation, I combined advice from several of the reviews and then improvised as I went. I used a 48" deep and 16" diameter sonotube for the footing in order to hopefully prevent issues with frost heave. It was a similar amount of concrete as the instructions state because it was deeper, but not as large of a diameter. I chose to ditch the plastic insert and insert the pole directly into the concrete footing. Once that decision was made, I created a supporting structure out of 2 x 4 lumber to hold the pole steady and oriented properly. 2 eight foot long boards at ground level squeezed against the two sides of the pole by screwing in two cut pieces that were slightly smaller than the pole width on the front and back. This set-up allowed me to properly set the height and then the parallel alignment with the playing surface. Using another long 2 X 4 mounted with one of the large screws at the top of the pole acting as a pivot point, I was able to connect the bottom end to the rear of my ground level support structure to get a precise front to back vertical alignment which stayed fixed for the remainder of the build process. Then one more long 2x4 clamped to the pole on the front and extending to the side where it was attached to a stake the I pounded in the ground. This allowed me to get the side to side vertical alignment dialed in. With this support structure in place it was easy to pour in the mixed concrete and allow the base to cure for several days. Then I removed the support structure and filled the pole from the top using a milk carton cut in half as a scoop and pouring device. I recommend using a wetter concrete mix for this step so that the concrete is less likely to get caught in the middle where the screw holds the two halves of the pole together. In any case, using a long pole to tamp down the material throughout the process will prevent an air pocket underneath the screw. I actually had too much material in the pole before I started the tamping process and struggled to eliminate the air void, but I eventually could force the material down around the screws and feel it give way and fill up. However, it was a struggle and took some patience. It was also at this time that I built up the water drainage mound around the base with concrete. The rest of the assembly was pretty straightforward and the instructions have clearly been greatly improved since some of the early reviews I read. Definitely get some friends to help with the backboard installation since getting the spacers installed and the screws through while holding the backboard is a challenge. With some help it went pretty quickly.Once assembled the backboard and hoop work great. It is nice and solid. There is some motion of the whole system when a ball hits the backboard hard, but nothing that impacts play. Any motion dampens out quickly and the sound of the ball on the glass backboard is very nice. I've had several types of lower cost backboards and this is a significant step up. However, it is still half the cost of other competitive glass backboard systems.The only complaint I have about the system is that the aluminum L channels that support the glass around the outer edge forms very sharp corners. When the hoop is at a low height, these corners are very close to the height of your average teen. For me this was a safety concern that had to be addressed. Looking online there were products available, but seemed to be outrageous for cost (~25 - 30% of the total system cost). I designed and 3D printed a bumper that snaps on for a couple dollars a piece. If it breaks and comes off I'll just print another.
V**X
The Quality is Excellent - Strong, Ridged, a good simulation for the gym
For the price, I got everything I wanted and am very pleased with the outcome.I bought this to supplement a lower-end round-pole model with a polycarbonate backboard. This is a far superior system with the square pole and glass backboard. It really had the minimum size and feature set for what I wanted, but really it was the highest-end model I could afford. Rebounding and shooting is very realistic in comparison to the gym. With concrete around the included sleeve it is very sturdy.I also love the fact that it is not a permanent installation. The concrete base will stay, but because of the sleeve I can remove the basketball system if and when we decide to move. I imagine when that day comes, removing the basketball system will not be a walk in the park, because it is snugly fit and weighs well over a hundred pounds with concrete inside the pole. Lifting it out will be a bear!Installation took me a lot longer than what others reported, but I was able to install it myself with a little help from my kids and wife at one critical point (I am a average build, but athletic adult male). I opted not to follow the instructions to create a huge diameter concrete base. Instead I purchased one of those 18 inch diameter cardboard tubes for concrete, and I dug a little deeper and poured extra cement in the hole. My concrete pour would actually look like an upside-down mushroom in the ground if you could see it. It looks a lot nicer at the ground level this way and is still very sturdy. I still used just about the same amount of concrete as in the instructions, which was a lot more than I expected going in. With smooth outer cylindrical edges, the concrete substructure will not disintegrate as quickly over time. I just think it is better that way. Installation took me a couple weeks total working on and off because I had to wait for the concrete to cure in two different phases before I could complete the installation (plus weather and schedule conflicts). Phase 1:pour the concrete base and use the pole to make sure it's level. Phase 2: remove the pole and pour concrete inside it. The directions were fine and following the advice of other reviewers helped me enormously. (I hammered one of the poles a little to get them to fit / and used wd-40 - not too difficult - but it avoided a lot of trouble.) Overall it was a lot more work than I expected but it was well worth the end result. I am very satisfied with how it came out.With a durable outdoor basketball (I got a "grip" ball), I have already seen improvements in my shooting and in the shooting of my kids. I am more confident that those skills will transfer to real game on an indoor court. However keep in mind I have a good, flat concrete court to play on. You will not get a realistic simulation if you have a slanted driveway. The screw system height adjustment is finely accurate and stable and discourages kids from adjusting it up and down by hand, which is a great thing. I think it is important to keep the basket at the correct height and practice shooting at that exact height. If the kids want to slam dunk on an 8 foot basket, let them destroy our old polycarbonate system. At least we will have a good glass system in place for the long run.One drawback I knew going in was the clearance between the backboard and the pole. It does not give you a lot of room to practice high speed layups or certain kinds of reverse layups like you can in the gym without potentially interacting with the post or stepping off the court. But that is a very small tradeoff when you are saving hundreds of dollars on the system as a whole. You can still do regular layups, etc... no problem. To get a system with more clearance is a lot, lot, lot more money.So again, the quality I got for the price point on this system is definitely worth the 5 stars!The kids and I are having a lot of fun and I think we will all get better and be ready for game day! - (I'll be in the bleachers though.) Have fun. Hope this helps.
Common Questions
Trustpilot
TrustScore 4.5 | 7,300+ reviews
Khalid Z.
Great experience from order to delivery. Highly recommended!
1 week ago
Pooja R.
The customer service exceeded my expectations. Perfect for buying products you can't find elsewhere.
A Division of Russell Brands, LLC, Spalding is the largest basketball equipment supplier in the world, and America's first baseball company. Spalding is the official basketball of the National Basketball Association (NBA) and Women's National Basketball Association (WNBA), the official backboard of the NBA and NCAA, the official baseball of the Little League World Series, the official volleyball of the King of the Beach Volleyball Tour and of the \"Pro Beach Series\" and the official football of Pop Warner. In addition to being a leading producer and marketer of basketballs, footballs, volleyballs and soccer balls, Spalding produces softballs under the Dudley brand. The SPALDING® and DUDLEY® trademarks are owned by Russell Brands, LLC.
","image":["https://m.media-amazon.com/images/I/71K2r+wDPrL.jpg","https://m.media-amazon.com/images/I/61KcJK7C54L.jpg","https://m.media-amazon.com/images/I/91LMvlaKeRL.jpg","https://m.media-amazon.com/images/I/A1XEtfJb0jL.jpg","https://m.media-amazon.com/images/I/A10Bo-EiIdL.jpg"],"offers":{"@type":"Offer","priceCurrency":"SCR","price":"50935.74","itemCondition":"https://schema.org/NewCondition","availability":"https://schema.org/OutOfStock"},"category":" basketballhoopsandgoals","review":[{"@type":"Review","reviewRating":{"@type":"Rating","ratingValue":"5.0"},"author":{"@type":"Person","name":"O***S"},"datePublished":"May 3, 2015","name":"Great product for the price","reviewBody":"I read every review I could find before buying this product. In addition, I carefully reviewed all of the installation tips from other purchasers. I am very happy with this purchase. It is a great system for the price.For installation, I combined advice from several of the reviews and then improvised as I went. I used a 48\" deep and 16\" diameter sonotube for the footing in order to hopefully prevent issues with frost heave. It was a similar amount of concrete as the instructions state because it was deeper, but not as large of a diameter. I chose to ditch the plastic insert and insert the pole directly into the concrete footing. Once that decision was made, I created a supporting structure out of 2 x 4 lumber to hold the pole steady and oriented properly. 2 eight foot long boards at ground level squeezed against the two sides of the pole by screwing in two cut pieces that were slightly smaller than the pole width on the front and back. This set-up allowed me to properly set the height and then the parallel alignment with the playing surface. Using another long 2 X 4 mounted with one of the large screws at the top of the pole acting as a pivot point, I was able to connect the bottom end to the rear of my ground level support structure to get a precise front to back vertical alignment which stayed fixed for the remainder of the build process. Then one more long 2x4 clamped to the pole on the front and extending to the side where it was attached to a stake the I pounded in the ground. This allowed me to get the side to side vertical alignment dialed in. With this support structure in place it was easy to pour in the mixed concrete and allow the base to cure for several days. Then I removed the support structure and filled the pole from the top using a milk carton cut in half as a scoop and pouring device. I recommend using a wetter concrete mix for this step so that the concrete is less likely to get caught in the middle where the screw holds the two halves of the pole together. In any case, using a long pole to tamp down the material throughout the process will prevent an air pocket underneath the screw. I actually had too much material in the pole before I started the tamping process and struggled to eliminate the air void, but I eventually could force the material down around the screws and feel it give way and fill up. However, it was a struggle and took some patience. It was also at this time that I built up the water drainage mound around the base with concrete. The rest of the assembly was pretty straightforward and the instructions have clearly been greatly improved since some of the early reviews I read. Definitely get some friends to help with the backboard installation since getting the spacers installed and the screws through while holding the backboard is a challenge. With some help it went pretty quickly.Once assembled the backboard and hoop work great. It is nice and solid. There is some motion of the whole system when a ball hits the backboard hard, but nothing that impacts play. Any motion dampens out quickly and the sound of the ball on the glass backboard is very nice. I've had several types of lower cost backboards and this is a significant step up. However, it is still half the cost of other competitive glass backboard systems.The only complaint I have about the system is that the aluminum L channels that support the glass around the outer edge forms very sharp corners. When the hoop is at a low height, these corners are very close to the height of your average teen. For me this was a safety concern that had to be addressed. Looking online there were products available, but seemed to be outrageous for cost (~25 - 30% of the total system cost). I designed and 3D printed a bumper that snaps on for a couple dollars a piece. If it breaks and comes off I'll just print another."},{"@type":"Review","reviewRating":{"@type":"Rating","ratingValue":"5.0"},"author":{"@type":"Person","name":"V***X"},"datePublished":"April 3, 2014","name":"The Quality is Excellent - Strong, Ridged, a good simulation for the gym","reviewBody":"For the price, I got everything I wanted and am very pleased with the outcome.I bought this to supplement a lower-end round-pole model with a polycarbonate backboard. This is a far superior system with the square pole and glass backboard. It really had the minimum size and feature set for what I wanted, but really it was the highest-end model I could afford. Rebounding and shooting is very realistic in comparison to the gym. With concrete around the included sleeve it is very sturdy.I also love the fact that it is not a permanent installation. The concrete base will stay, but because of the sleeve I can remove the basketball system if and when we decide to move. I imagine when that day comes, removing the basketball system will not be a walk in the park, because it is snugly fit and weighs well over a hundred pounds with concrete inside the pole. Lifting it out will be a bear!Installation took me a lot longer than what others reported, but I was able to install it myself with a little help from my kids and wife at one critical point (I am a average build, but athletic adult male). I opted not to follow the instructions to create a huge diameter concrete base. Instead I purchased one of those 18 inch diameter cardboard tubes for concrete, and I dug a little deeper and poured extra cement in the hole. My concrete pour would actually look like an upside-down mushroom in the ground if you could see it. It looks a lot nicer at the ground level this way and is still very sturdy. I still used just about the same amount of concrete as in the instructions, which was a lot more than I expected going in. With smooth outer cylindrical edges, the concrete substructure will not disintegrate as quickly over time. I just think it is better that way. Installation took me a couple weeks total working on and off because I had to wait for the concrete to cure in two different phases before I could complete the installation (plus weather and schedule conflicts). Phase 1:pour the concrete base and use the pole to make sure it's level. Phase 2: remove the pole and pour concrete inside it. The directions were fine and following the advice of other reviewers helped me enormously. (I hammered one of the poles a little to get them to fit / and used wd-40 - not too difficult - but it avoided a lot of trouble.) Overall it was a lot more work than I expected but it was well worth the end result. I am very satisfied with how it came out.With a durable outdoor basketball (I got a \"grip\" ball), I have already seen improvements in my shooting and in the shooting of my kids. I am more confident that those skills will transfer to real game on an indoor court. However keep in mind I have a good, flat concrete court to play on. You will not get a realistic simulation if you have a slanted driveway. The screw system height adjustment is finely accurate and stable and discourages kids from adjusting it up and down by hand, which is a great thing. I think it is important to keep the basket at the correct height and practice shooting at that exact height. If the kids want to slam dunk on an 8 foot basket, let them destroy our old polycarbonate system. At least we will have a good glass system in place for the long run.One drawback I knew going in was the clearance between the backboard and the pole. It does not give you a lot of room to practice high speed layups or certain kinds of reverse layups like you can in the gym without potentially interacting with the post or stepping off the court. But that is a very small tradeoff when you are saving hundreds of dollars on the system as a whole. You can still do regular layups, etc... no problem. To get a system with more clearance is a lot, lot, lot more money.So again, the quality I got for the price point on this system is definitely worth the 5 stars!The kids and I are having a lot of fun and I think we will all get better and be ready for game day! - (I'll be in the bleachers though.) Have fun. Hope this helps."}],"aggregateRating":{"@type":"AggregateRating","ratingValue":5,"bestRating":5,"ratingCount":2}},{"@type":"FAQPage","mainEntity":[{"@type":"Question","name":"What is the actual material and thickness of the backboard? I've seen 1/4, 3/16","acceptedAnswer":{"@type":"Answer","text":"The glass itself is about 1/4 of an in, and the framing, metal included is about an inch or a little more than an inch thick. Hope this helps you."}},{"@type":"Question","name":"How far below ground level should the bottom half of the pole be sunk?","acceptedAnswer":{"@type":"Answer","text":"The ground sleeve is 16\" in length, 14\" of it will be in the concrete. Thus, 14\" of the pole."}},{"@type":"Question","name":"If I toss the sleeve, given all the concerns it may cause, how deep does pole go in concrete?","acceptedAnswer":{"@type":"Answer","text":"I would go just a couple of inches deeper than the sleeve is long. Any deeper and you run the risk of not having the rim go all the way to 10 feet high. Putting it in the sleeve gives the whole thing more play when you're shooting which is not a good thing. They really should make the bottom post longer so you can sink it deeper for better stability. Good luck."}},{"@type":"Question","name":"Pole only went in the ground 10 inches. I know it says 14-16 inches. That’s how the concrete cures. Will this create an issue?","acceptedAnswer":{"@type":"Answer","text":"The extra 4-6 inches would help but ten inches should be good. As long as you also fill the center with concrete to make it sturdy"}}]}]}