Desertcart purchases this item on your behalf and handles shipping, customs, and support to Seychelles.
๐ฌ Elevate your entryway with a mailbox thatโs as bold as your lifestyle.
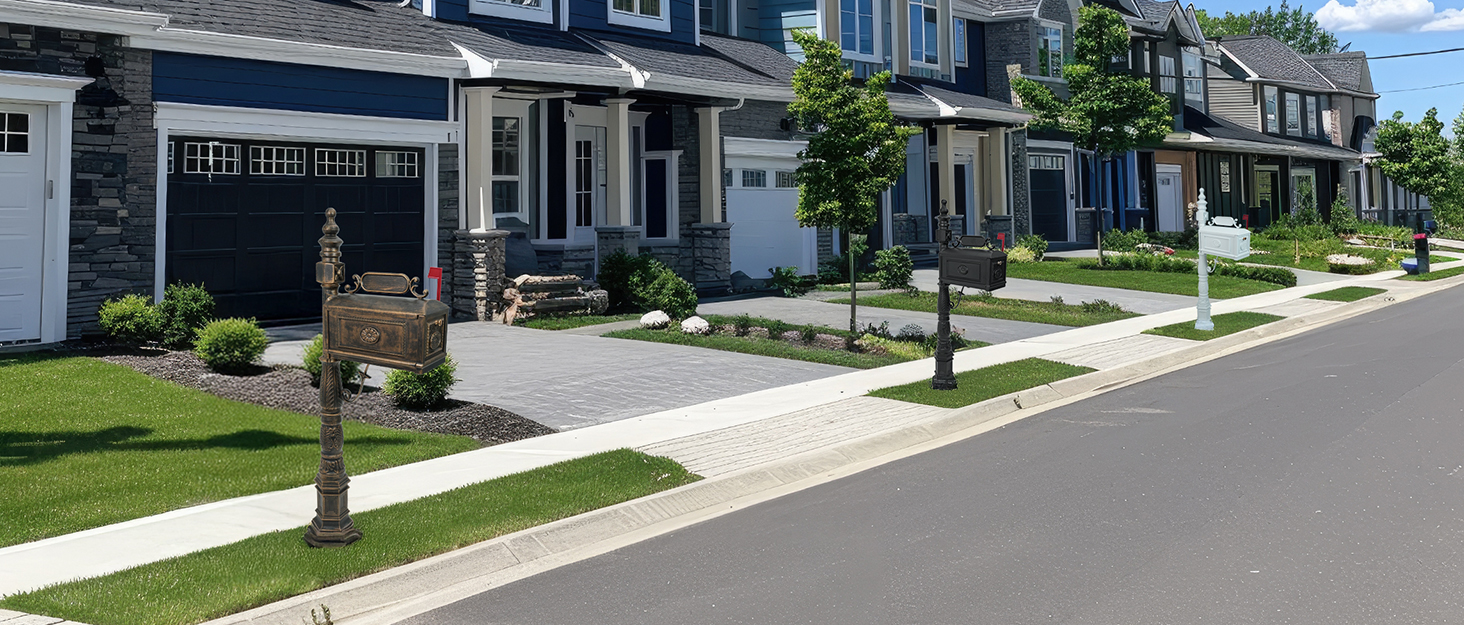
The Barcelona Decorative Post Mailbox is a large, rust-free cast aluminum mailbox featuring a classic Art Deco bronze finish. Measuring 18.3" x 8.8" x 9" with a 62.2" tall post, it offers ample space for daily mail and magazines. Designed for easy 15-minute assembly, it includes a red flag and sturdy hardware. Its advanced double-layer electrostatic powder coating ensures superior weather resistance and long-lasting durability, making it a stylish and practical upgrade for any home entryway.


| ASIN | B0792QCDM3 |
| Access Location | Front |
| Best Sellers Rank | #38,043 in Tools & Home Improvement ( See Top 100 in Tools & Home Improvement ) #31 in Post-Mount Mailboxes |
| Brand | Polar Aurora |
| Brand Name | Polar Aurora |
| Color | Bronze |
| Customer Reviews | 4.7 out of 5 stars 1,617 Reviews |
| Included Components | flag, post |
| Item Dimensions D x W x H | 18.3"D x 8.8"W x 62.2"H |
| Item Highlight | Combination Stratford, Heavy Duty Postal Mail Box with Red Flag |
| Manufacturer | Polar Aurora |
| Manufacturer Part Number | Mailbox |
| Material | Metal |
| Material Type | Metal |
| Model Number | Mail Box |
| Mounting Type | Pedestal Mount |
| Number of Items | 1 |
| Number of Packs | 2 |
| Product Dimensions | 18.3"D x 8.8"W x 62.2"H |
| Style | Art Deco |
| Style Name | Art Deco |
J**N
Beautiful mailbox but the cement post installation is a bit tricky.
First of all this is a beautiful mailbox. The nicest in my entire development by far. I would highly recommend the white over black because the black looks to not hold its color as long as the white. Second the price is better by more than 50 % over competitors in the Naples Florida market. Similar mailbox with installation included is about $600. The kicker is the installation. The box is easy to put together but the installation into a cement base is more problematic. The seller provides absolutely no guidance on installation issues. It provides four 4 inch sleeve anchors that are not very sturdy. On line you will find three different approaches. One uses a presetting of 10 inch j bolts into quickset cement. This is risky because the bolts are 1/2 inch that barely fit through the base holes. If you do not get precise alignment the bolts will not fit through the holes. The second approach is to use wedge anchors inserted into drilled holes in the cement base. The anchors work well but I did not like the look of the nuts being screwed down on the bolt threads. The third approach is lag anchor bolts anchored into the cement into short or long lag shields. I used this last approach because of the incredible sturdiness of using lag shields inserted 6 inches into the cement base. I used stainless steel lag bolt anchors with fixed head which gave it a more finished look. (See picture). To make sure the post was plumb I made a surface form of 2 by fours screwed (14 by 14 inches) together and laid on top of the hole. I anchored the form with wooden pegs and made sure the form was leveled. Also make sure the distance from the pavement and the height of the bottom of the box meets post office requirements (6 to 8 inches from street and 41 to 45 inches above the road surface). The hole was 12 inches deep and 14 inches by 14 inches wide. I used mostly regular set cement since I was planning to let the cement set up over at least a week. Amazingly I ended up using 4 bags of cement (220 pounds). Probably overkill but better more than less. Once the cement cured over an 8 day period, I set the post on the formed pad and checked to make sure it was level. Then I premarked the four holes. Make sure the front of the box is facing forward since the holes in the base are not semetrical. Since the base holes are 1/2 inches wide, I wanted to leave some wiggle room in case the holes were a little off. I used 4 stainless steel 3/8th inch wide anchor bolts that would be inserted into 3/8 inch lag shields. The bolts were 6 inches long. That requires a 5/8 inch hole and drill bit. I drilled the holes with a hammer drill at least 7 to 8 inches deep. Make sure you get the cement dust out of the holes. Once the holes are drilled insert the anchor bolts through the post holes and screw the lag shields (I used the long lag shield for better holding). Then lift the post up and drop the bolt and lag shield into the holes (insert the lag shield with the open end first) and let the bolts drop down to where there is about 1 to 2 inches of the bolts above the post base. Then you can screw the anchor bolts clockwise until you feel the lag shield expand and grab the side of the hole. Then screw the bolt head all the way down to the base of the post. You can do this by hand to get enough torque to get a very firm grip without running the risk of cracking the base of the post by over tightening the bolts with a machine wrench. Once accomplished the post is going to stay there for a long time. Note the top of the box has a plate for address numbers. It will only handle 2 inch numbers. The only place I could find numbers to fit was on Amazon. Even if you decide not to mess with installation you can probably get a handyman to install it for you. Locally I could have found a company to do it for about $180. The installation process was challenging and fun so I am glad I went through the process.
W**S
This Box is a Total Winner -- Mail it In !
This is a stunning mailbox. It has a spectacular appearance, and is extremely well-made. It was getting compliments even before the box was attached to the post, as it was mounted on the curing concrete base. I never imagined that a utilitarian object such as a mail box would attract so much interest and positive comments from neighbors and strangers alike. I had ours professionally installed, and am positively thrilled with the end result. Silly as it sounds, I find myself going out front quite a lot just to look at it. This mail box makes such a positive statement. Highly endorsed as a product worthy of purchase.
J**E
Polar Aurora Barcelona Decorative Post Mailbox Combination Stratford Heavy Duty Postal Mail Box
I am so happy with this purchase. The quality and the craftsmanship of this mailbox is stunning. They took no shortcut on making this an affordable and great looking mailbox. The install was very simple. The instructions were spot on and they actually gave you tools to put the mailbox together. It even came with four anchors to install it onto a concrete base.
G**N
Large beautiful mailbox
Yes, it is beautiful! Love this mailbox so much. The box is large and able to hold big pieces of mail. I had one just like it that got hit by a car and was destroyed. I'm so glad I was able to replace it so quickly.
C**N
Mailbox
This mailbox is gorgeous. A few hiccups with the instructions but all in all a great product.
A**N
Beautiful mailbox
Very nice mailbox. Love it.
G**H
Looks Great and Very Good Quality
N**.
Good post.
This post looked better than the 400 dollar local option. It also have a better built latch mechanism that those that are just 2 side spikes that goes directly into the casting and end up breaking in one of the sides and then are non repairable. The shipping was fast. Post was as advertised, came with all hardware for the post itself. It does not have the attaching bolts to concrete, because there is no way of knowing if you are going to pu this in concrete, wood, etc, and that is understandable. It comes in 2 boxes, one for the post itself and another for the box, and you assemble it. I took the time to use a special liquid plastic material to cover all the hardware that goes toward the inside of the box, and to put anti corrosive compound on the threads of the bolts before assembling everything. All in all, very good item, that saved me some money and was easy for me to install. If you dont have the proper tools, or are willing to learn or have the necessary strenght, then pay someone to put it up for you, but it is really not difficult. If you can do some proper holes in concrete then you can install this.

Trustpilot
1 month ago
2 months ago