


🚀 Elevate Your 3D Printing Game!
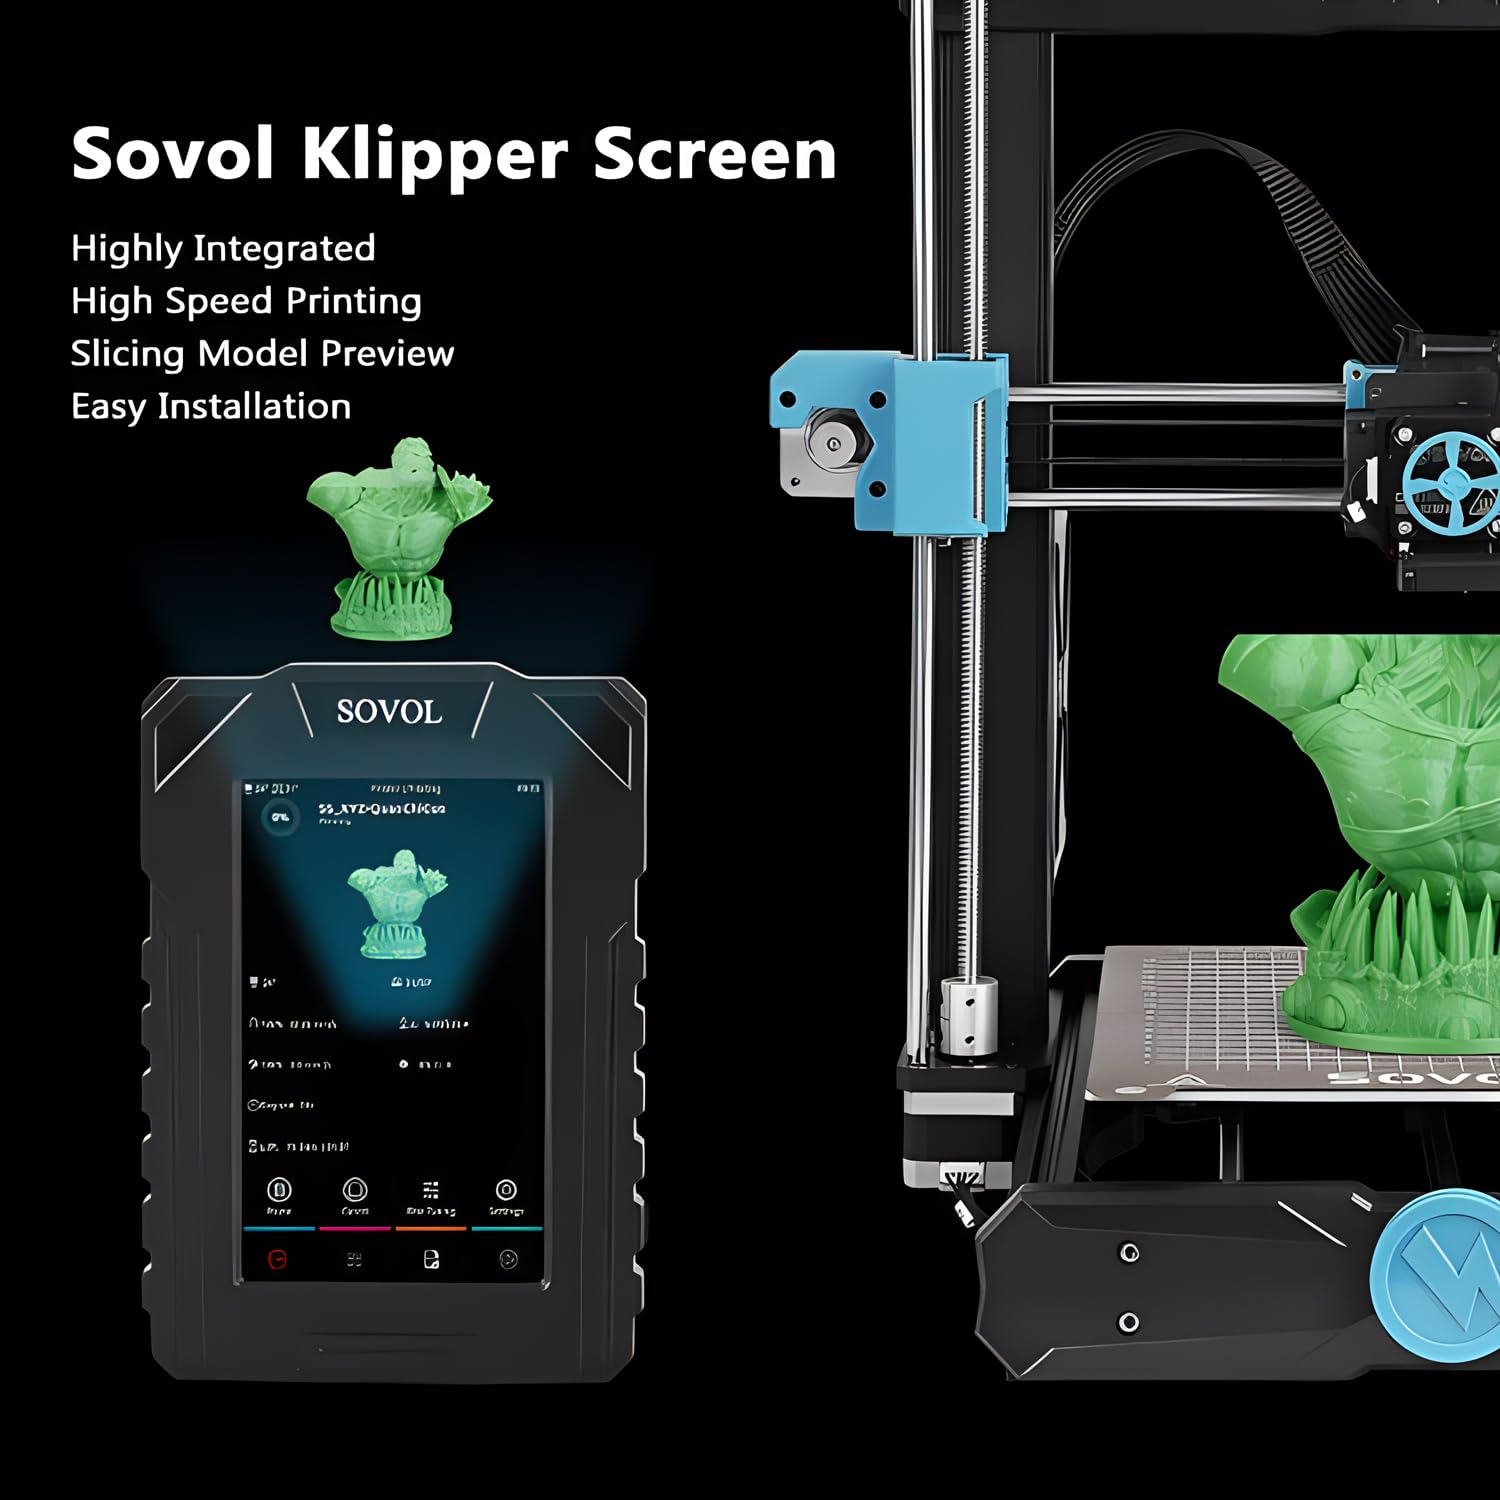
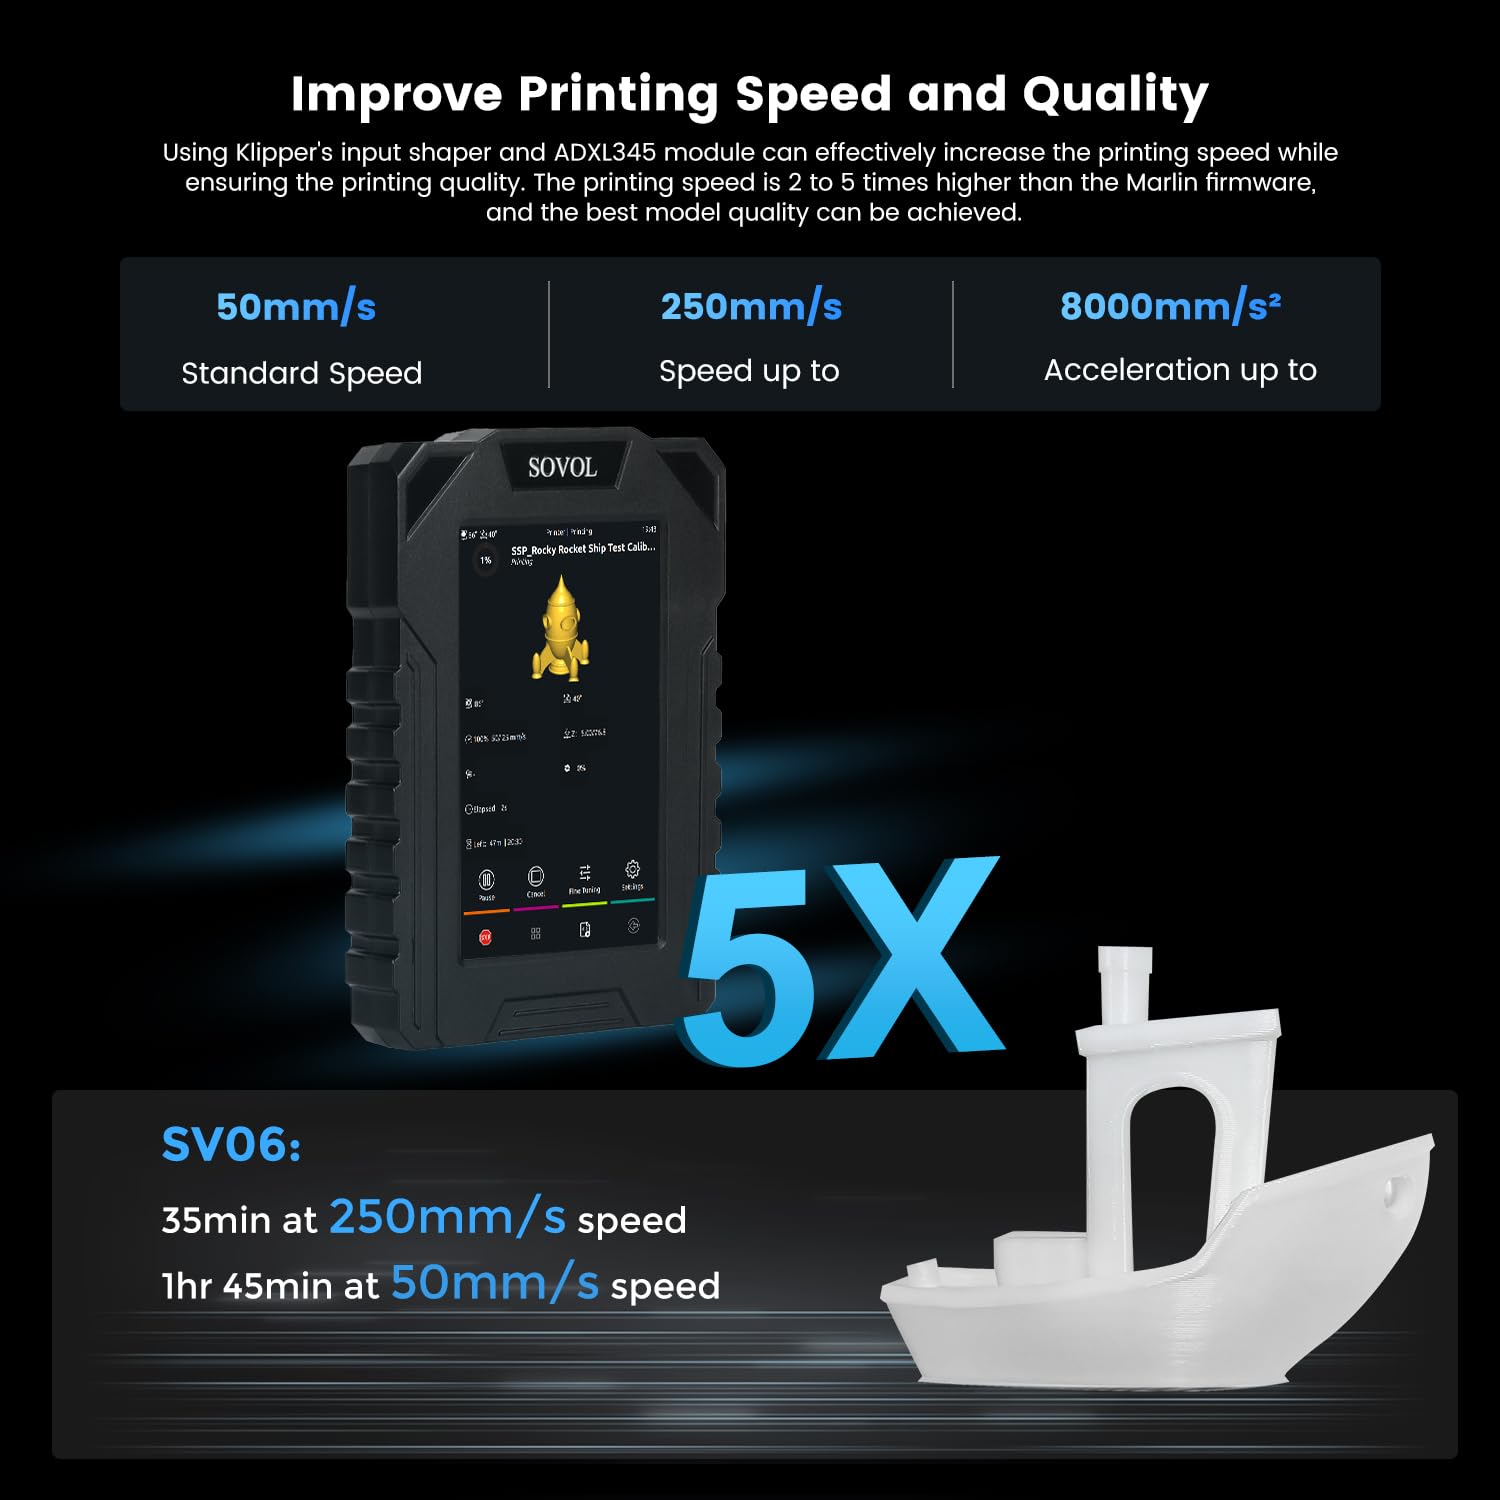
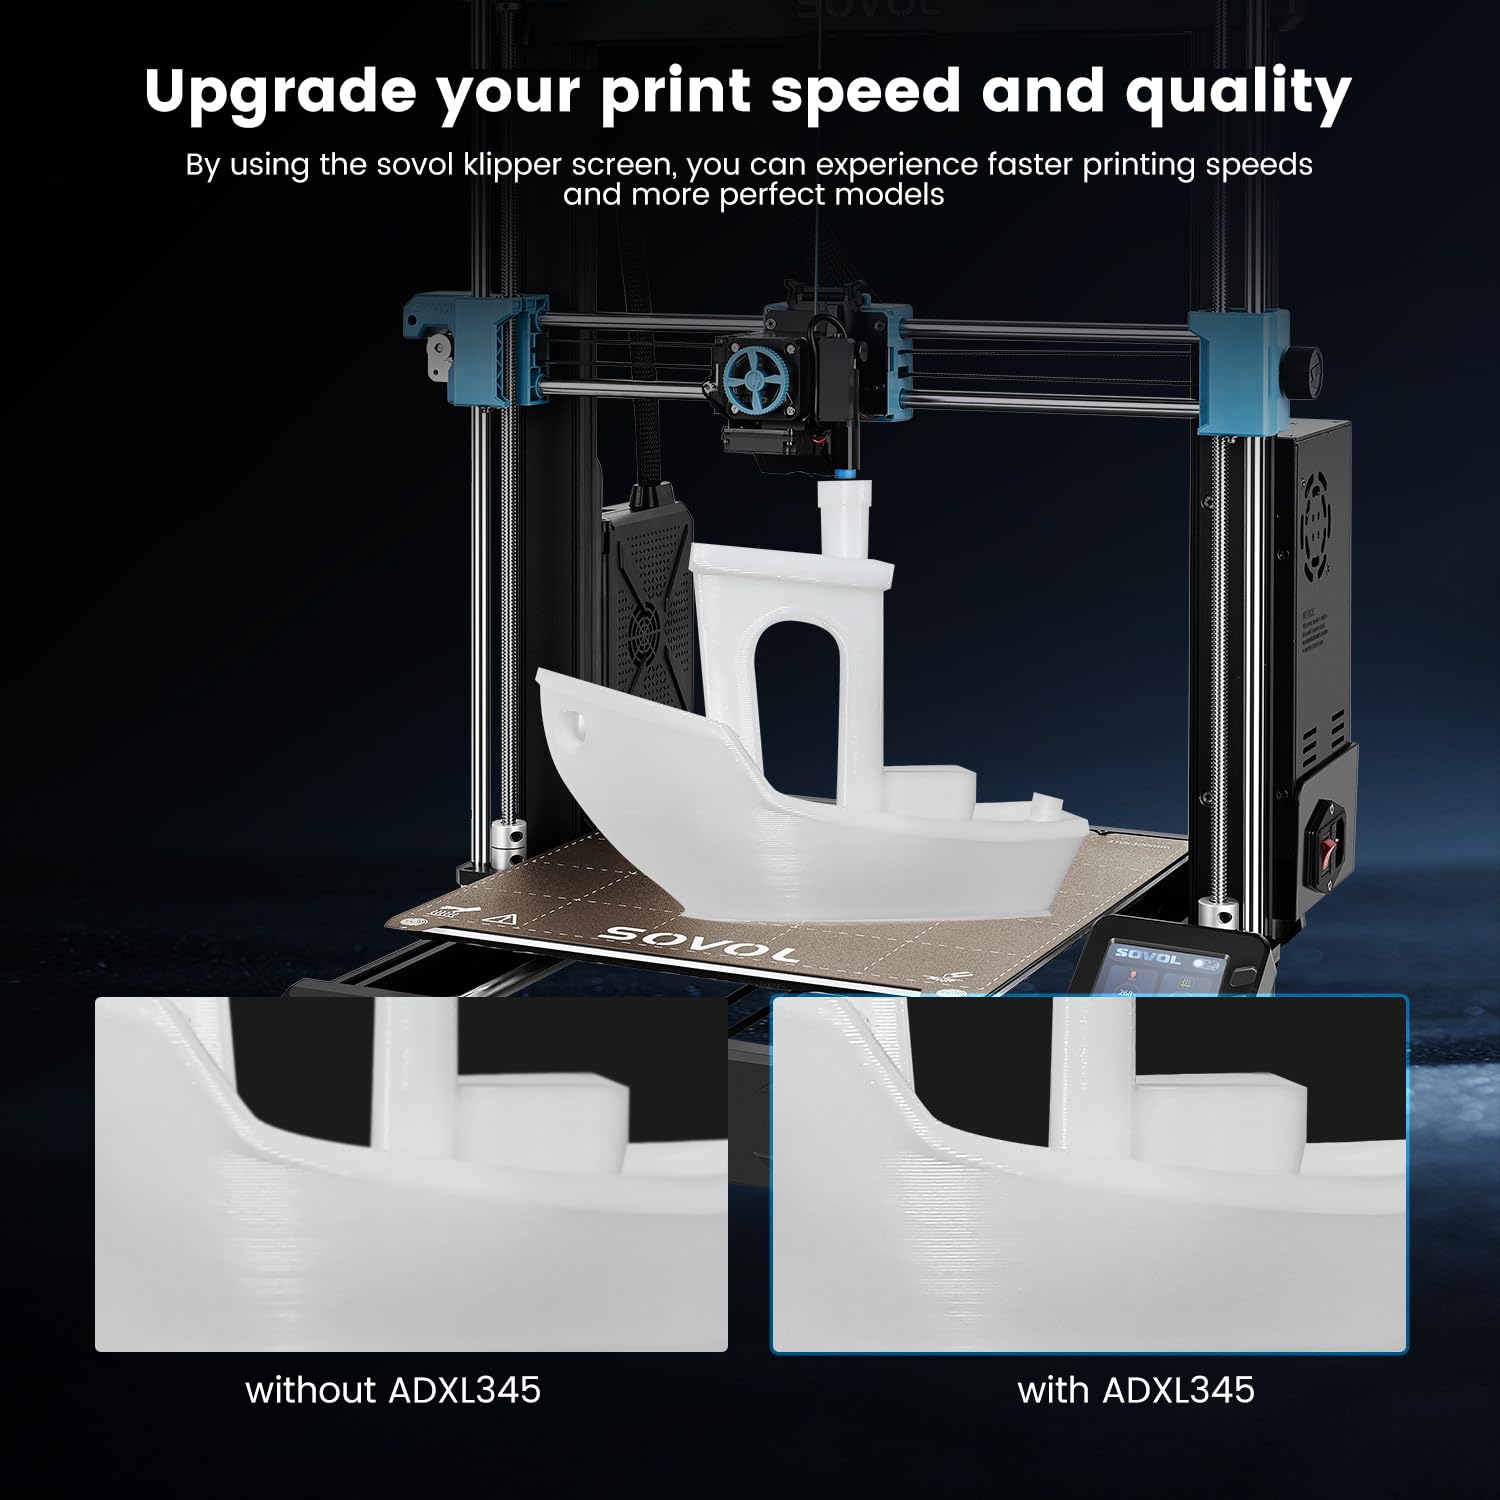
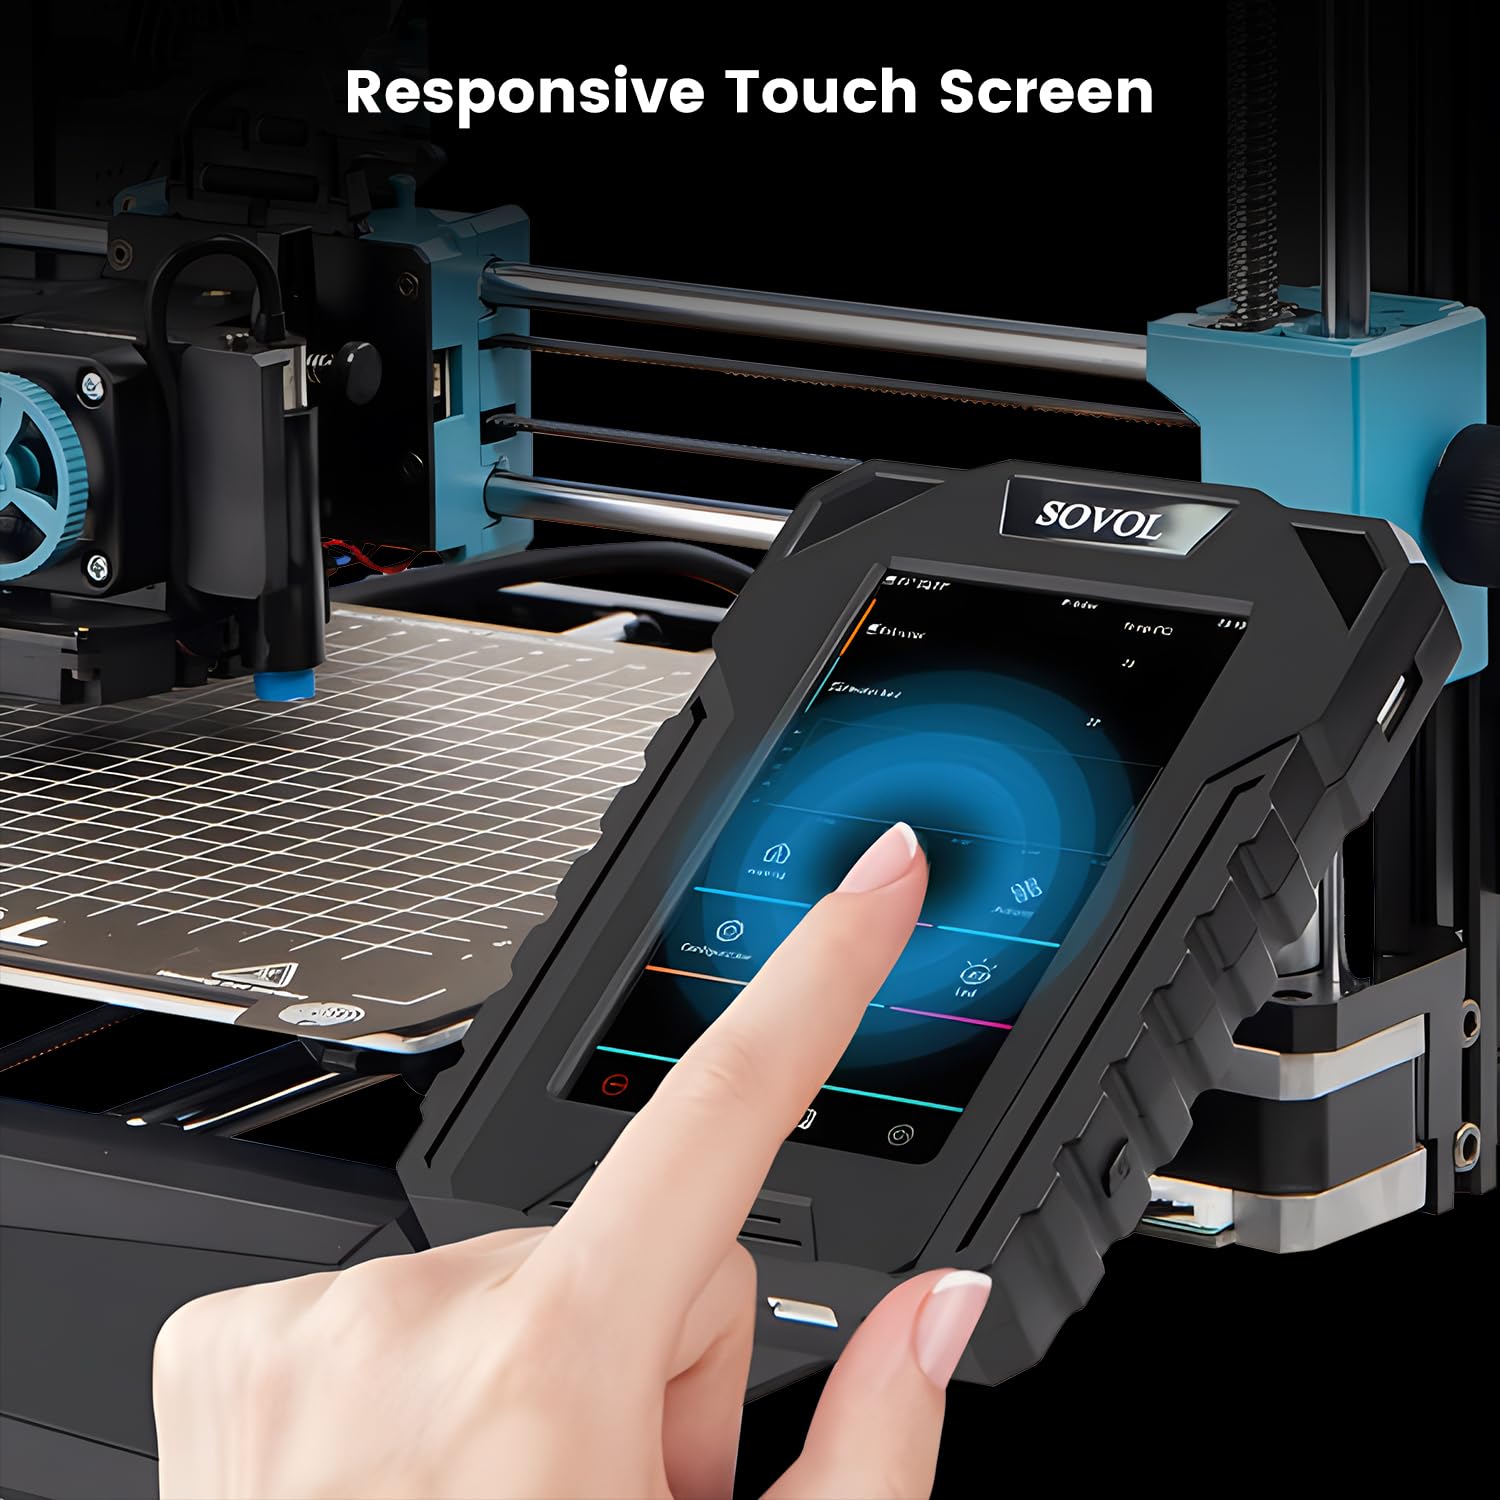
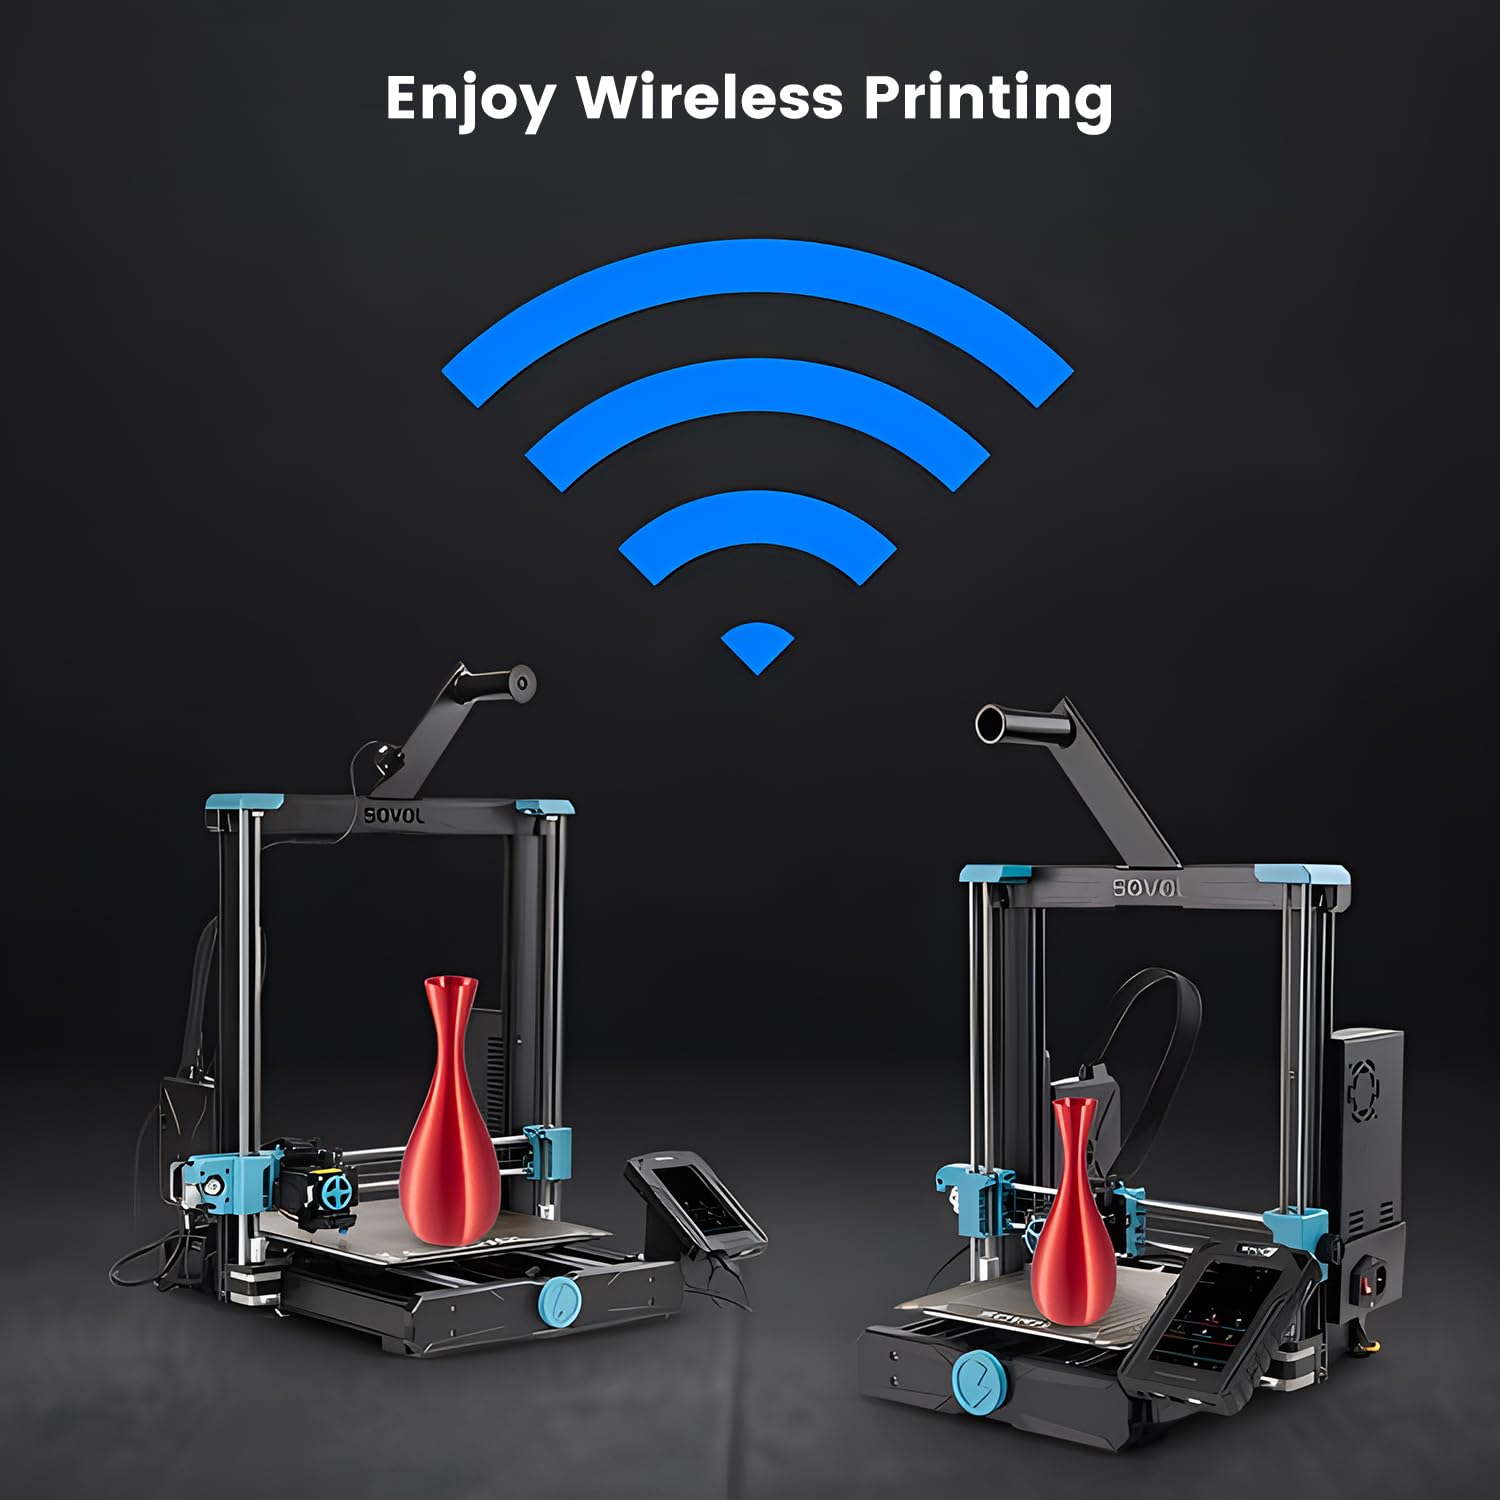
The Sovol 5" IPS Touch Screen is a cutting-edge upgrade for the Sovol SV06 3D printer, featuring pre-installed Klipper firmware that boosts printing speeds up to 250mm/s while maintaining exceptional print quality. With a high-definition 480x800 resolution display, customizable functions, and multi-language support, this touch screen enhances your printing experience and simplifies installation with its innovative clip design.
W**7
Works Great and Super Easy to setup!
The media could not be loaded. Typically, I do not want to change anything that works well, but after getting the SV07+ and using a Klipper system I was hooked. I am very patient with my prints, I do not mind waiting a little longer for the best quality print. That I why I ended up with 6 different Sovol 3D printers, so I can start one something else while I am printing with another. Long story short, the Klipper firmware has totally changed my perspective and quality verse speed, now you can get both. I was worried about the setup process, especially dealing with installing a new firmware and slicer software. But, this process is super easy. Some people might get worried about the wiring, especially the part with the power supply. But it is pretty simple, Red wire is positive (+) and black wire is negative (-). Match up to wires up to the open screws and attach it tightly. Since you have everything opened up, I would suggest snugging up the other few screws that are being used already because a few of mine was NOT very tight. Do not over tighten it or you can strip the screws too.Since I was limited on space with my printer setup, I mount the Klipper screen somewhere else. So, I had to extend the power wire a little longer. The only other addition I made was adding a web camera and that was super easy too. I just plugged the camera in an open USB port on the Klipper screen and added a camera in the settings menu, then it worked.In the past, I used a Raspberry Pi to monitor and control all my printers. The setup for the Pi is not difficult but takes a bit more work to do. But that was not the problem, the real issue was getting your hands on a Raspberry Pi at a reasonable price. For some reason, it was always sold out everywhere and if you did find one it would cost you about $100 if not more. But now, you can get the same thing, plus a 5-inch touch screen for less money. Not only is the installation process is very easy, but your print time will be reduced and the quality will be just as good if not better.If you do not like following directions in a manual, there are a lot of YouTube videos you can watch to learn how to setup the Klipper screen for your machine. Unless you know what you are doing, the Sovol customized Cura slicing software is a good starting point, because it includes all the info needed for the Klipper system (print speed, Start & End gcode, and etc).I am also happy to report that the Web Cam installation was very easy to install too. Once you get your Klipper screen connected with your WiFi network, you can access the Klipper UI on your computer by typing in the IP address. Then go to “setup” (gear icon on the top right), in the popup window, scroll down and click on “webcams.” Click on “add webcam” and enter a name, then click on “save webcam.” You can leave all the other setting as default. Make sure you restart the Klipper screen (shutdown and restart. Not just pull the plug) and the webcam should work now.My final thoughts about this kit is pretty much all positive, so I do not have any pros and cons about it:• Good quality prints at faster print speeds• Easy gcode uploads• Remote monitoring (only local network, unless you use 3rd party app or port forwarding with your router).• Cheaper and easier than running using a Raspberry Pi.
J**N
Setup was easy, but it seems that it can actually destroy your printer.
Update:After resetting things to default I was able to get everything back working again.while getting it set back up and running the resonance tests it seems that the vibrations on the Y axis may have been a bit too much for it, the plastic part the belt attaches to snapped.I've had printers fail in the past but this is a new one, might just be time to call it on trying to get this thing to work.-------------------------------------------------------------------------------I've used this for about a week, and after getting it set up I will say the mesh bed leveling is a massive improvement over the standard SV06, I've had much better luck getting prints to stick and finish successfully than I did before.The main issue I've had since installing it is that many of my prints will have layer shift at some random point, when this happens the layer shift generally continues for 20 layers or so, then the print proceeds as normal, just offset about 2mm on either the x or y axis.In spite of this It was able to complete about 50% of the prints I sent to it.In the past day or so it has begin having issues where klipper will repeatedly crash when trying to load any STL file to print, I'm not sure if this is a unique problem, but a week seems a bit short for the longevity of a product.So I guess my summary is that this would be an amazing upgrade for $100 if it were more reliable, but as is I can't really recommend it, or say I'd buy it again.
P**C
Good upgrade
The media could not be loaded. It took a while set it up properly. But once done it was performing quite well and running as fast as the SV07 versions at 250mm/s. After copying the profiles suggested, they were not tuned correctly and did require some finer tuning to get it back to how it was before klipperizing it. Search for "Teaching Tech 3D Printer Calibration" and you'll find some good tutorials on how to calibrate your printer correctly.Personally I came across a stopping point where I could not flash the board. This was because I did not format the microSD card as FAT32. Other 32GB cards did not work, even a 2GB card I found formatted as FAT (before FAT32 existed) which still did not work. It ABSOLUTELY needs to be FAT32.Likely I will need to upgrade the part cooling fan to make better use of the faster speed. Yes it's 90 bucks to spend. You could klipperize it yourself with a Raspberry Pi or old laptop running linux and add a touch screen pad. But that's a lot more work than most people are comfortable with. This is the relatively easier option for those bad with Linux config. On the whole it would have probably cost more money to get a touch screen and a pi, and definitely more time. Having both of those components in one box is an elegant solution
L**E
Fantastic bit of kit
Well packed and arrived quicklyIn 6 years of 3D printing this is the first time i have used Klipper, and glad i did it with Sovol as they have made it so easy.Lets start off with the pro's and con'sPro'sEverything you need is in the box.The Sovol community is very helpful if you get stuck.Instructions are clear.The benefits of using Klipper instead of your usual 32 bit board is a pro in itself (so much more control).ease of set up. you really dont need to do much to get up and running once installed.Wireless file transfer and monitoring via its built in Web page.The price is fantastic for what you get.Con'sthe power lead that connects to the power supply unit has short connectors, resulting in a tight fit.The power lead also has a connector in-between the power supply unit and plug that going into the Klipper screen, that could potentially coarse a point of failure in the future.Apart from the above i have no more, struggled to find fault if im honest.The Klipper screen took me about 15mins from turning the first screw to install everything to printing my first Benchy. really straight forward.I have definitely seen an increase in speed and quality of my prints since using the Klipper screen and will continue to put it through its paces. But i will admit i am now a convert and will defiantly be putting Klipper on my other machines.Amazing product at and amazing price.Big double thumbs up!
A**E
Wish I had one earlier when I first got my printer.
I do a fair bit of 3D printing and this helps a lot. This is a good size touch screen of 5 inches with an 800 x 480 pixel resolution and a refresh rate of 60 Hz. TCertainly easy to set up and it improved control of the printer. Good speed and quality.Comes with leads and connectors and should be a considered buy for the 3D printer at this competative price.
Trustpilot
1 month ago
2 months ago
