Description
🌟 Enclose brilliance: Print smarter, quieter, and cleaner with every layer!
- ODOR PARTICLE SHIELD - Effectively traps harmful particles and odors, ensuring a cleaner, safer workspace.
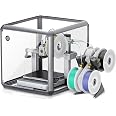
- CRYSTAL CLEAR MONITORING - 360° transparent acrylic with integrated LED lighting for real-time print supervision.
- SILENT WORKSPACE UPGRADE - Cut printing noise by 60%, creating a focused, distraction-free environment.
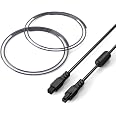
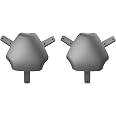
- TAILORED FOR BAMBU LAB A 1 - Precision fit with AMS lite cable inlet and pneumatic interfaces for seamless integration.
- CONSISTENT PRINT PERFECTION - Maintain ideal temperature and humidity to minimize warping and maximize print quality.
The 3D Printer Enclosure for Bambu Lab A1 features a robust acrylic and aluminum build that stabilizes temperature below 40℃, reduces noise by 60%, and offers 360° visibility with LED lighting. Designed specifically for the Bambu Lab A1, it isolates odors and particles, protects prints from dust and accidental contact, and enhances print quality through consistent environmental control.