Desertcart purchases this item on your behalf and handles shipping, customs, and support to Seychelles.
โก Elevate your automation game with rock-solid relay control!
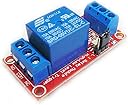
The HiLetgo 2pcs 5V One Channel Relay Module offers reliable, high-current switching with a 10A max load capacity. Featuring genuine quality relays, SMD optocoupler isolation for stable performance, and a fault-tolerant design, it ensures safe and flexible operation. Its intuitive screw terminal interface and selectable high/low trigger modes make it perfect for professional-grade automation projects.
| ASIN | B00LW15A4W |
| Best Sellers Rank | #17,617 in Industrial & Scientific ( See Top 100 in Industrial & Scientific ) #7 in Electromechanical Relays |
| Brand | HiLetgo |
| Brand Name | HiLetgo |
| Coil Voltage | 5 volts |
| Connector Type | Screw |
| Contact Current Rating | 10 A |
| Contact Material | Silver Alloy |
| Contact Type | Normally Open |
| Current Rating | 10 A |
| Customer Reviews | 4.6 out of 5 stars 1,196 Reviews |
| Manufacturer | HiLetgo |
| Maximum Switching Current | 10 A |
| Maximum Switching Voltage | 250 volts |
| Minimum Switching Voltage | 5 volts |
| Model | 3-01-0340 |
| Mounting Type | Surface Mount |
| Number of Items | 2 |
| Number of Packs | 2 |
| Operation Mode | Automatic |
| Part Number | 3-01-0340 |
| Specification Met | Vcc |
| UPC | 702082655948 |
| Unit Count | 2 Count |
| Wattage | 5 watts |
K**R
5V, Simple
They work for 5V.
H**Y
Great relay for BC-250 gaming rig
Great relays for a BC-250 gaming rig. Enables soft shutdowns in CachyOS (probably other OSes as well) when attached to a momentary switch and was able to still power a 12v power LED when attached to the FSP500-30AS PSU's 12v rails. Way easier to wire up/connect than doing a solder soft shutdown mod.
B**K
great
as advertised. great item.
B**P
Input current WAY to high!
I bought this relay module for use with microcontroller output, have less than 10mA to work with. It works, I deducted one star for no datasheet or diagram available. It IS possible to completely isolate the two sides of circuit. Remove the jumper completely. For your microcontroller side, you will attach to the center pin of jumper and IN pin. These two pins connect to the input pins of the optocoupler & 1kOhm resistor. The resistor drops 5v to 5mA current. You can use these two pins in a sinking or sourcing manner, but the polarity must be correct as the opto is a diode on the input. Supply a separate 5v supply to power pins DC+ and DC- to power transistor & relay coil. The relay contacts are isolated from everything else, so you can switch AC or DC at a different voltage using COM and either NO or NC contacts. (NO = normally open, NC = normally closed)
M**Z
Controlled by a Raspberry Pi. I have not electrocuted myself yet!
I connected the unit to a Raspberry Pi Zero 2W, in order to turn on the 120v main for a UV LED outdoor light project. The DC+ went to the 5v pin (Pin 4) The DC- went to a ground pin (Pin 6) The IN went to GPIO4 (pin 7) The COM went to the Black (HOT) line on the 120v plug. The NO went to the Brown (LOAD) wire on my voltage converter. The 120v Plug's White (Neutral) line is connected to the blue line on the voltage converter. A python script on the Raspberry Pi runs every 5 minutes during the hours between 6pm and midnight via the cron function. The script turns on the converter for 2 minutes and then lets the LEDs cool for 3. Voltage converter link: https://www.amazon.com/dp/B01N5SJ72Y
J**R
Works perfectly
Wiring was super intuitive and everything just worked. I was able to power, ground and provide signal all from Arduino and then pull 12V DC from a 4A dedicated power source and connect it directly to the 12V DC magnet when the relay receives a signal. Perfect solution for my secret bookcase door project! Only note was that the relay screws needed the perfect sized screw driver because it felt like it was going to strip with the one little screwdriver I use for everything so I had to get a new small screwdriver kit and then i was able to repeatedly install and change configurations on this board without any problem.
B**R
Garage TV backlight switch
Replacement LED backlight strips went out for 2nd time. Decided to stick LED strip lights around the inside instead of replacing again. Only problem is that I had to turn on the strip lights when I turned on TV. Now the light strips turn on when the USB port gets power.
D**P
Works great for Raspberry Pi, not great for AC voltage
Opens/shuts just like you want with raspi pin out signal, not a huge delay, but not the fastest. Very audible click sound when engaged or disengaged. Screw down wire clamps are very poor quality, you'll have to deal with wires slipping out a lot. After I accidentally shorted 15 amps of 120v AC power through one of these relays, it failed in the closed position, meaning the circuit was stuck active, even when the relay clicked "off." This actually caused me to get shocked, which I didn't find very funny at the time, but my fault for shorting that much power through the relay I suppose. So pair these with a 5 amp fuse to protect them, (and yourself.)
R**H
Works as intended
Connected this relay to Shelly Uni to be able to opens my front door remotely. Works really well
G**E
No es adecuado a lo que necesito.
Trustpilot
2 months ago
2 weeks ago