


🏡 Elevate Your Entryway with Style and Protection!
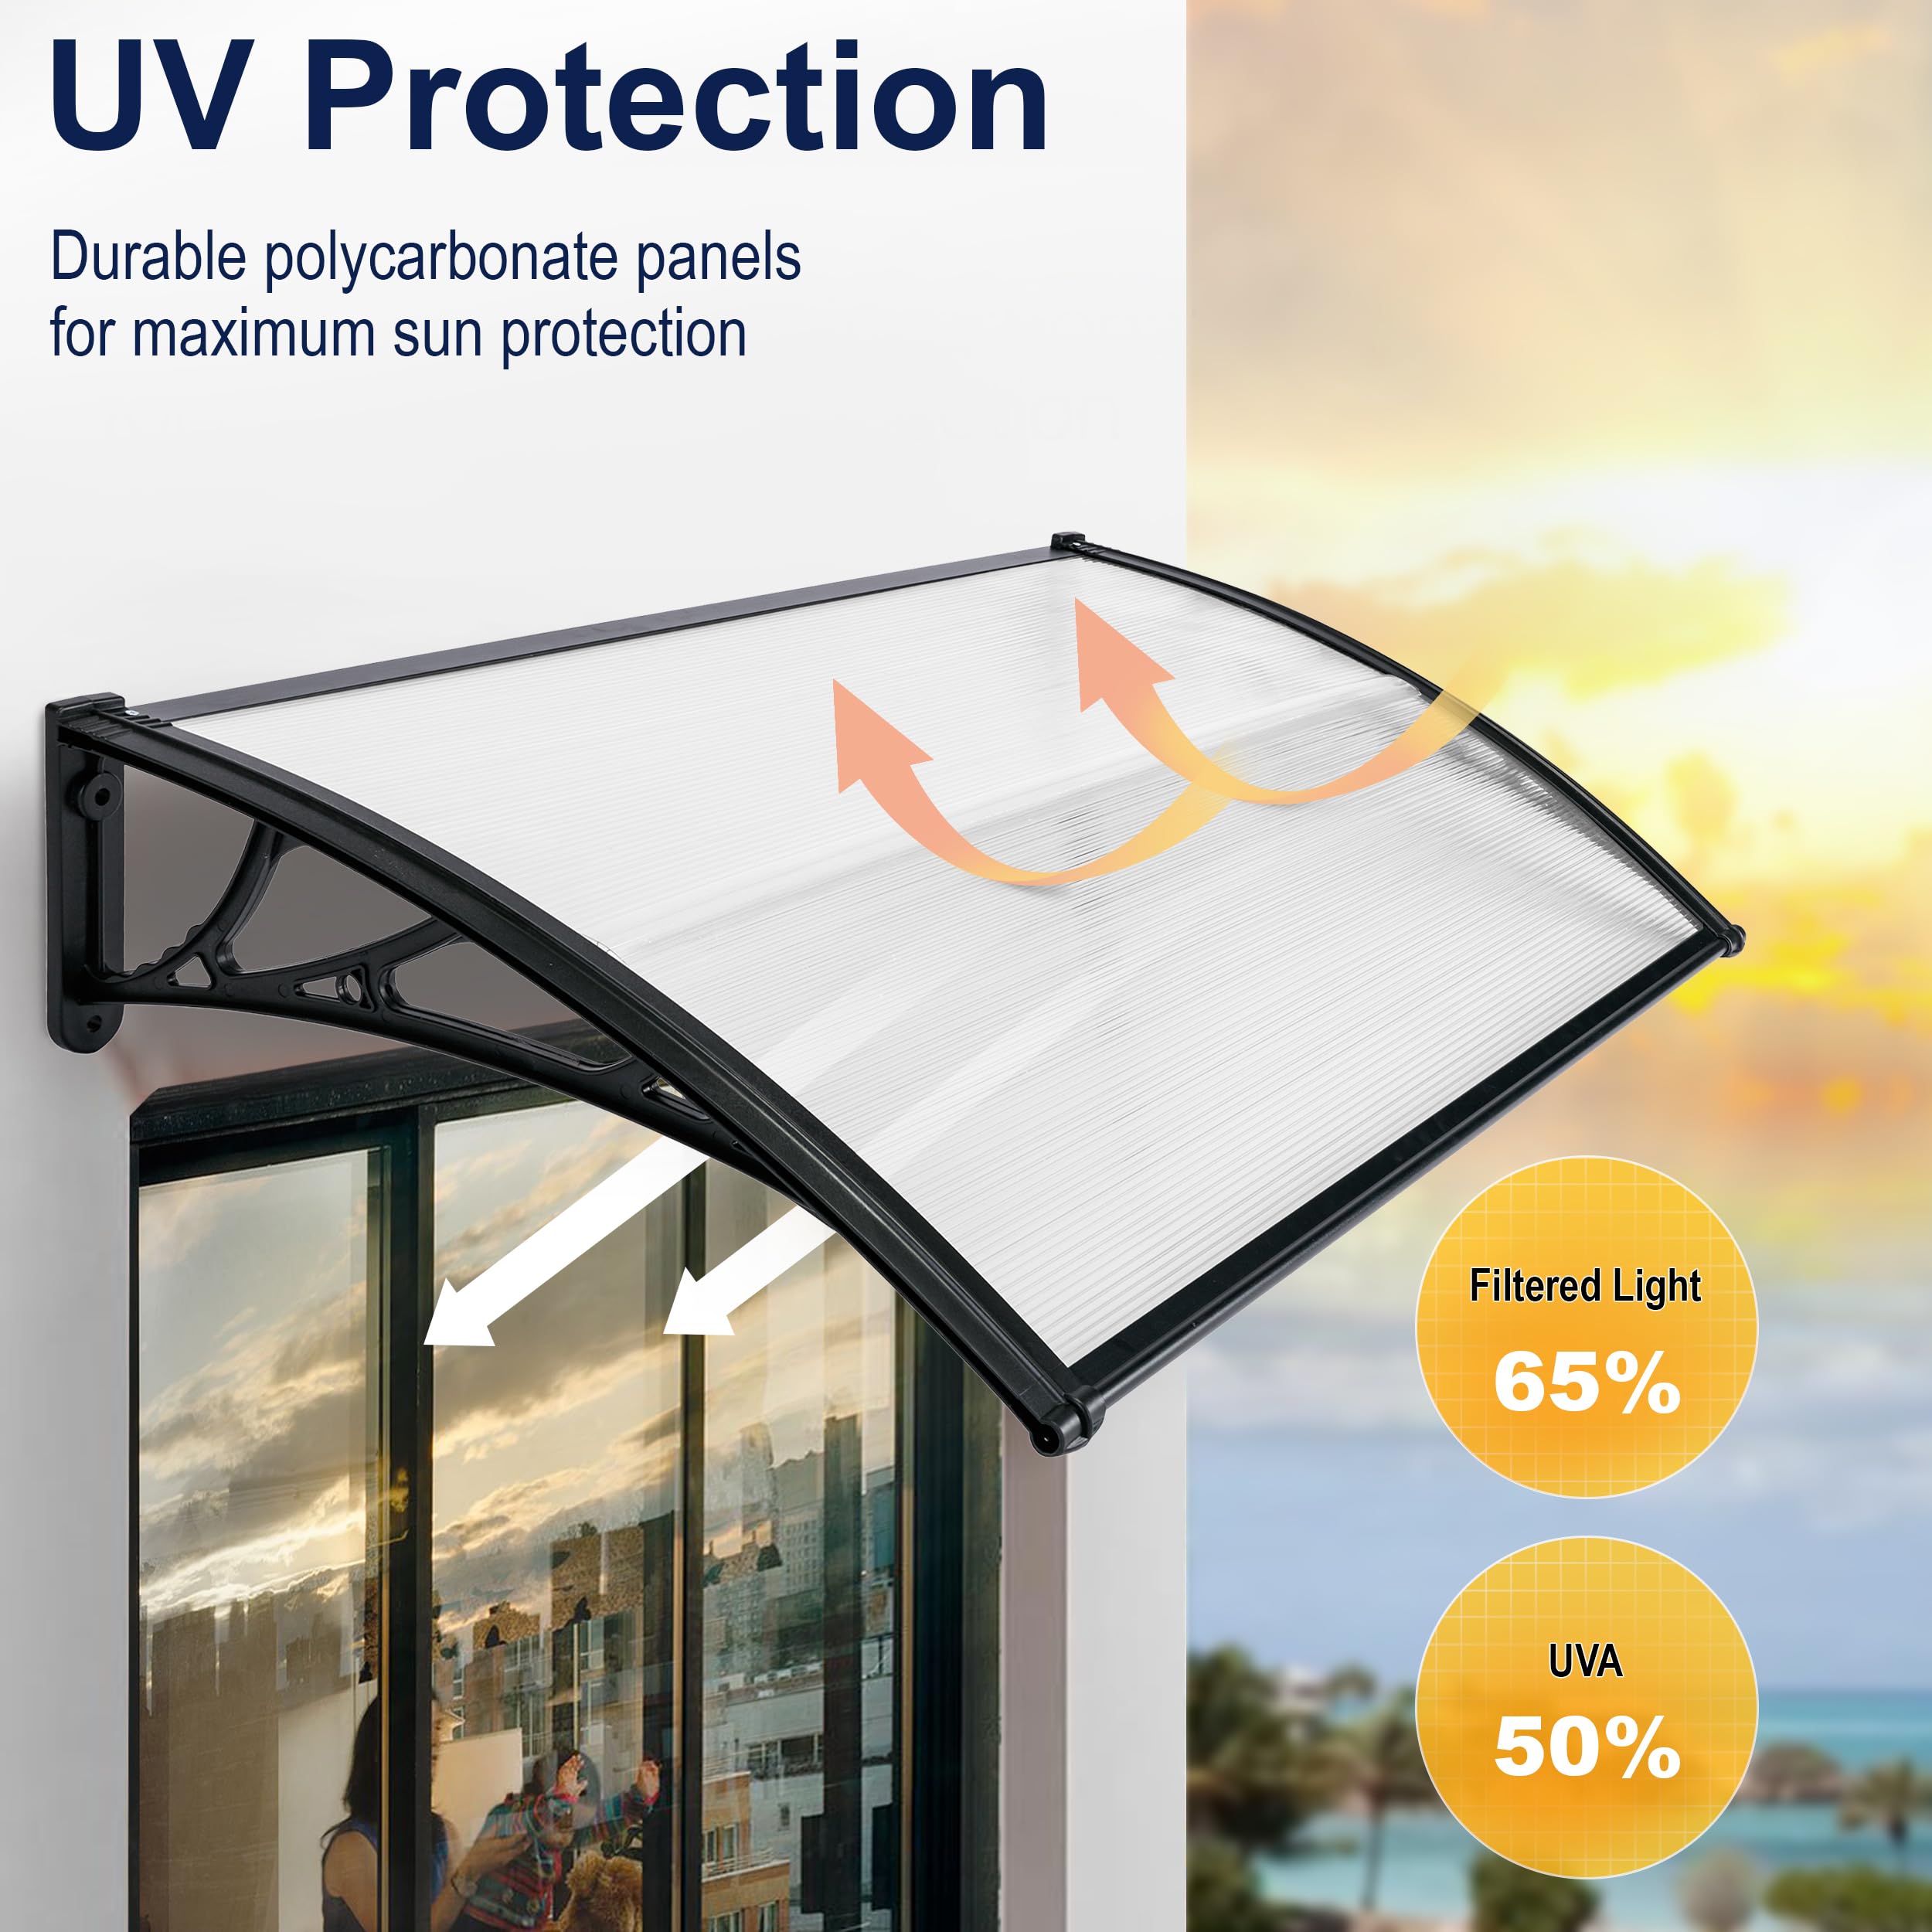
The Door Canopy Outdoor 120x80cm is a robust and stylish awning designed to protect your front and back doors from the elements. Made from durable polycarbonate sheets and lightweight aluminum, it offers UV and rain protection while enhancing the aesthetic of any building. With easy installation and low maintenance, this canopy is perfect for both residential and commercial applications.
| Product Dimensions | 80 x 80 x 24 cm; 3.3 kg |
| Part number | GHT3470 |
| Material type | Polycarbonate |
| Power source type | No |
| Manufacturer | Generic |
| Item model number | KJH1281 |
| ASIN | B083KDTLQR |
A**R
Large door canopy
once fitted a sturdy well made product, perfect cover over kitchen door to garden, can recommend product,
J**N
Tricky to assemble
Tricky to assemble, make sure you have plenty of room! Seemed a bit flimsy but fine once I fixed it in place. Does the job
C**I
parcel arrived quick .
it was easy to put together . it looks good above my front door. i spray it with oil to slide it easy.
J**E
Dreadful
Extremely hard to put up. You can't put it up a bit at a time, you've to put the whole thing together then put it up. But, when it's put together it has no rigidity. Took four people to put up, and first bit of wind and all the plastic covering came out. Total rubbish and a complete waste of money. When I complained the vendor was no help at all.
P**S
Not a simple installation
The media could not be loaded. The instructions supplied with this canopy are lacking in detail. They are the usual simple drawings with inadequate commentary.There is a video that shows it going together. This helps a little but actually serves to make it look easier than it is.I have built a decking with poly carbonate roof from scratch so I am a fairly capable DIYer. (Photo attached of deck project)The insertion of the two roof panels into the central bar is not easy. The bar is so tight that they don't slot in simply, and once inserted at one end it is difficult to get sufficient purchase to pull them them full length and there is a tendency for the other end to slide offline as you do this. It would be easier if the central bar was a two piece affair like I have used before, bottom and snap on top. Or just supply a single piece of poly-carbonate !The aluminium bars have a decent opening so they go in without too much effort. It is a bit awkward to bend the assembled roof panel into the two supports but not too bad.The rear aluminium bar is obviously made to go on a particular way round and up but this isn't described adequately in the instructions. There is a drawing to go where the screes go but it isn't particularly clear and would benefit from some further description in the text.The panel has to be pushed home a certain way for some of the screws to grip and again this would benefit from some additional text description.Once assembled if you apply upward pressure to centre of the roof while lifting it to fit beware that the poly-carbonate panels may pop out of the central bar causing you to disassemble and start over.The central bar is slightly shorter than the panels. This means it isn't inserted in the side supports. It could be full length and the side support mouldings could have a slightly larger recess to accommodate it. This would make the structure stronger. In addition I'd suggest a method of securing the bar to the brackets. Predrilled holes and a couple of screws woul be nice!Eventually you are ready to mount it. Again the description is too simple. If you have done one a second will be easier but if you are installing this for the first and perhaps only time then some more instructions would help.Be very careful to drill your holes in the correct place. It isn't easy as you have to get the roof in position and held levelto mark the positions. Ideally two people to hold plus one to check the level and one to mark the positions. If you get this wrong an unlevel result will look unsightly. It's not impossible to do alone, I did manage with some balancing on a support pole but two people is a minimum and they should be able to stand on a ladder while lifting the roof into place. The good thing is it isn't heavy.A couple of suggestions. They could supply a stiff jig for measuring and drilling holes. Something in plastic with holes in the appropriate places that could be held up to the wall, spirit level in top and drilled through. Even better would be to have this piece being a strong support that could be attached to the wall and to which the roof could then be slid into and secured, if doing this a fine adjustment to level would then be possible after it was in place.A couple of other points. I found the suggested 8mm bit was a bit small. The provided wall anchors were too tight to be hammered into place and getting a hemmer to the to two anchors was awkward due to their position within the arch. This wouldn't be an issue if the wall bracket suggestion above was employed. I eventually redrilled with an 8.5mm and this was a lot smoother and still resulted in a really firm grip once tightened.Also be clear that you drill the holes but DO NOT insert the anchors fully into them. Ideally push the anchor through the roof with the bolt in it and then hammer home while the roof is held in place and then tighten. This stops the anchor going in too deep. If it is too deep the bolt will not be able to reach it to get a grip. Obvious in hindsight but not explained anywhere in the instructions.I installed onto a harled wall I didn't chip of the stones first so the roof isn't flush to the wall, there is a very slight gap. This could happen even on a fairly flat wall as the aluminium bar is rigid. Perhaps a draught excluding strip could be supplied to be attached to the rear bar so that this issue isn't a problem. I have some tarred leaded flashing tape from my previous project that I will use to resolve the issue.To sum up. I am reasonably happy with the finished result. It looks pretty decent and appears to be of reasonable quality (for the price). As yet we have had no rain or wind so it is untested but I would expect it to perform okay in normal conditions.The design and installation method and instructions would certainly bear some rethink.For the price it is much as I expected and so I have given 3 stars, it's okay. Get the design right, make it easier to install and to adjust and beef up the instructions a little and it would be so much better.
M**N
Brought this to go over my pond
Good value for the money, but a little bit tricky to but to together. Definitely needs to but I would definitely recommend.
C**E
Not bad for the price
Put up on my own, but ideally requires two people.The bolts supplied totally useless. Bought some fixings from local diy store. Screws supplied not long enough so used some of my own.Doesn’t state, but I found hole centers to be 35 inches apart which made the third section easier to put up.On the whole, the canopy is better than I’ve had in the past. Sticks out further & I like the rain gully /channel along the bottom.Would recommend. In fact I’ve just re-ordered some more.
S**X
Difficult assembly
I got the 3 panel. Very difficult to assemble and then install. Instructions provided are useless, and the video makes you laugh of how far from what you will actually encounter! I ended upDoing more or less the opposite of what you are instructed Materials are light and flimsy, screws provided useless, they just pop out when you lift the thing. My support arms only had half the required holes pre drilled. Was at my last attempt before scraping the hole thing when I finally got it up. See how it handles the wind next!Update: first reasonable wind and the panels split at the plastic joint. This product not suitable for outdoor use
Trustpilot
1 day ago
5 days ago