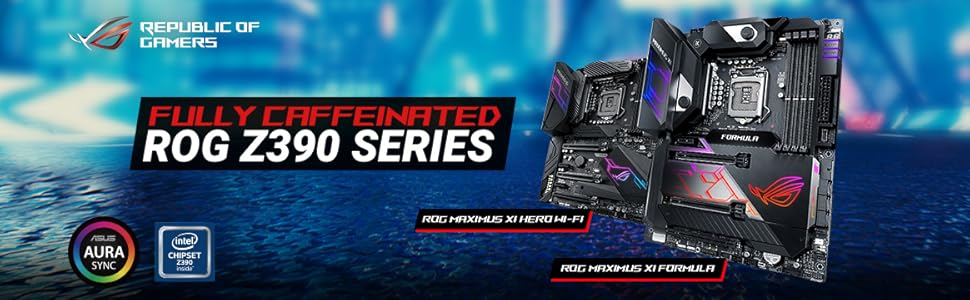
🎮 Elevate Your Game with ASUS ROG Maximus XI Hero!
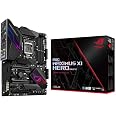
The ASUS ROG Maximus XI Hero (Wi-Fi) Z390 Gaming Motherboard is engineered for high-performance gaming, supporting Intel's 8th and 9th Generation processors. It features advanced connectivity options, customizable RGB lighting, and intelligent cooling solutions, making it a top choice for gamers and tech enthusiasts alike.


| Processor | 1 GHz |
| RAM | DDR4 |
| Memory Speed | 4400 |
| Wireless Type | 802.11a/b/g/n/ac |
| Number of USB 2.0 Ports | 2 |
| Brand | ASUS |
| Item model number | ROG Maximus XI Hero (Wi-Fi) |
| Item Weight | 2.2 pounds |
| Product Dimensions | 14.57 x 4.25 x 12.28 inches |
| Item Dimensions LxWxH | 14.57 x 4.25 x 12.28 inches |
| Computer Memory Type | DDR4 SDRAM |
| Voltage | 0.01 Volts |
| Manufacturer | ASUS Computer International Direct |
| Language | English, English, English, English, English |
| ASIN | B07HCXT591 |
| Is Discontinued By Manufacturer | No |
| Date First Available | October 8, 2018 |
S**R
ASUS Maximus boards - a great product line, easy build
I am quite pleased with my new ASUS Maximus XI Hero motherboard. I highly recommend it.The ASUS Maximus XI Hero has an 1151 CPU socket and is built with the Z390 chipset. It supports multiple GPUs for SLI/Crossfire video operation. It has 6 GB/s SATA ports and USB 3.1 (gen 1 and gen 2). The motherboard has a socket for a TPM module for Windows BitLocker.Back Input/Output (I/O) Ports on back of Motherboard: HDMI port; Display Port; LAN (RJ45); two USB 3.1 gen 1; three USB 3.1 gen 2; one USB 3.1 type C; two USB 2.0; Optical S/PDIF out; audio jacks; Clear CMOS button; Wi-Fi antenna connections.Check the ASUS product page for this motherboard: you can find the "User Manual," documentation, explanations, and the latest device drivers. The ASUS forums may also be of help to you.This is the third computer I have built with an ASUS motherboard. The ASUS Maximus XI product line comes (or will come someday?) in several versions: Hero, Code, Formula, and Extreme. I bought the Hero because it was the only one available. I would have preferred a Formula; but, alas, no one had them in-stock. (I have an older version of the Formula in another computer; it is a great board.) So far, the Hero seems to meet all of my needs.Honestly, I did not want to build a new computer. Assembling a computer from parts is more expensive than buying a ready-built machine; but I keep building my own computers simply because computer manufacturers are not building machines with the features or with the quality that I want. Luckily, building a computer is very easy these days (in 2018). For tools, all you need is one Philips-head screwdriver and scissors (or a pocket knife) to open packages.I built my new computer with the ASUS Maximus XI Hero motherboard in a Corsair 330R case with an Intel i7 8700K (overclocking) processor, 16 GB of Corsair DDR4 memory, and a Corsair AX860 power supply. Connecting cards, components, and cables to the ASUS Formula motherboard can be very, very easy, if you have selected an appropriate case (which I did not). The motherboard is extremely well-labeled and the “User Guide” has excellent illustrations (and is available from ASUS as a download).Speaking of cases: DO NOT use the Corsair 330R or similar case for a gaming computer. The case is too small. The “Specifications” for the case on the Corsair website specifically list the Corsair H100i CPU cooler as being compatible with this case, but it is NOT. With the H100i installed there was insufficient clearances between the cooler and: (1) the CPU power cables; (2) the rear exhaust fan; (3) the top optical drive bay; and (4) the CPU_FAN connectors. Make sure you get a case that provides sufficient room so parts are easy to install and so they will not interfere with each other.Before starting, learn about how to avoid static charge while you are handling the motherboard, CPU, RAM, video card(s), and any component with electronics. I use an anti-static wristband, but I have also been known to simply ground myself prior to handling components. Always handle electronics by the edges only.Placing the CPU in the motherboard’s 1151 socket is very easy; but you should watch some YouTube videos if you have never done it before. Cable connections are obvious and easy to make. Connections include: 24-pin power supply cable; 8-pin and 4-pin CPU power supply cables; front-panel audio cable; front panel SATA 3.1 cable; front-panel switches and lights cables; CPU cooler (H100i) power cable; SATA data cables for 1 SSD and DVD. I like the included "Q-Connector," which made it much easier to connect the front-panel cables to the motherboard; however, I wish the Q-Connector locked in place.WARNING: It is possible to install the CPU power incorrectly. In the past, this seemed to be impossible due to “keying” of the motherboard and power cable connectors. However, it may be possible to install the power connections backwards; so carefully verify the orientation of connectors.Instruction manuals for all your computer's parts and pieces are available online and many helpful souls have posted "How-To" videos on YouTube.I strongly suggest that you download the pdf version of the “User Guide." Reading the pdf “User Guide” on another computer allows you to make the text and illustrations as big as need (instead of trying to read the relatively tiny “User Guide.” If you do not feel like reading it, then look at the great illustrations of all the parts, pieces, connectors, indications, and controls (in this case, a picture is indeed worth a thousand words). At least look at Section 1.1.2. I had the “User Guide” up on another computer as I built this one.You really should read the section of the “User Guide” addressing motherboard installation. I am sure that a lot of the complaints and problems people speak about resulted from their own failure to follow the "User Guide." I also wonder if some problems might be due to failure to load the correct drivers for the chip set, LAN, audio, video, etc. And definitely read the section of the “User Guide” on avoiding damaging electronics with static electricity!The ASUS Maximus XI Hero motherboard is designed for gamers (it is, after all, part of the ASUS "Republic of Gamers" line of products). If you are not building a computer for gaming or for other demanding applications, then you should probably select a cheaper motherboard. If you are only going to check your mail, surf the web, and use Microsoft Office programs, then this motherboard is overkill: you would be much better off buying an inexpensive, ready-built laptop or Surface Pro. I have a Surface Pro connected to a monitor, keyboard, and mouse via a KVM switch and it can do practically everything, except run some demanding work software or games.The on-board graphics (HDMI and Display Port) and on-board audio are outstanding. Of course, the intended customer of this motherboard will undoubtedly want to install a high-end video card (maybe even two high-end video cards in SLI/CrossFire). I installed the EVGA GeForce GTX 1080 FTW 2 video card. The Hero’s on-board audio is great.This motherboard supports both 8th and 9th generation Intel CPUs. I installed an Intel i7-8700K (8th gen) CPU. The "K" means it can be overclocked. It would be pointless to buy this motherboard without also getting an unlocked, over-clocking CPU. I wanted to install an Intel i7-9700K (9th gen) CPU, but I could not find one in-stock.The ASUS Maximus XI Hero comes with the motherboard drivers loaded on a disc. These drivers will get your new machine up and running; however, they may not be the latest drivers. Therefore, I recommend that you download the LATEST drivers (from the ASUS webpage) to a flash drive. That way, you will have the latest drivers available, even without a LAN connection or a working DVD player. At least copy the LAN or wireless drivers; that way, you will be able to access the Internet to get the rest of the drivers.I really like the BIOS (UEFI) interface for this motherboard; it is very easy to understand and to use. The "User Guide" contains good explanations for using the BIOS program, including the three methods to update BIOS.Power Requirements:The "User Manual" specifies an ATX power supply. Required power supply capacity (watts) will depend on the CPU and video card(s) that you are using. For example, many high-end video cards specify you need at least a 500 watts power supply (just for the computer with one video card). To maximize energy efficiency and to minimize noise, I believe it is best to have a power supply that will operate between 40 and 70 percent load. Therefore, I looked for a power supply that should remain under 70 percent capacity when the computer is at full load. Since my computer has only one video card, I chose the Corsair AX860 power supply. If you are going to run more than one video card, you might want to consider installing a 1200 watt power supply (something like the Corsair AX 1200).Power Connections:Installing the 24-pin power cable is quite easy and obvious; but you should read the “User Guide” about connecting to the 8-pin and 4-pin CPU power connectors. At the top of the ASUS Maximus XI Hero motherboard you will find an 8-pin EATX 12 volt power connector (EATX12V_1) and a 4-pin EATX 12 volt power connector (EATX12V_2). The “User Guide” warns us to connect power to the all 8 pins of the 8-pin CPU power connector to lower the power (watts) per pin. The “User Guide” further encourages us to also connect a power cable to the 4-pin CPU power connector. Warning: In past builds you might have only connected to 4 pins (2 pin pairs) of CPU power supply. Doing so with this motherboard could damage or destroy the board. Therefore, according to ASUS, connect at least 8 pins (4 pin pairs), and possibly 12 pins (6 pin pairs), to reduce the current per pin pair, thereby reducing the risk of damage due to high current.Memory:Before you order memory modules, you might want to download and review the "User Guide" for the ASUS Maximus V Formula motherboard. Also check out the Qualified Vendor Lists (QVL) on the ASUS website. I installed two DDR4 dual in-line memory modules (DIMMs). Up to two pairs of DIMMs (four DIMMs total) may be installed on this board in four slots (for a maximum of 64 GB). Ideally, you should buy the memory modules in "matched sets": either a matched set of two DIMMs or a matched set of four DIMMs. The "User Guide" recommends installing DIMMs from the same vendor, with the same CAS latency, and of the same version or date code (D/C). If you are interested in over-clocking memory, then you might want to research DDR4 DIMMs with higher clock ratings.If you want "dual channel" function, only install DIMMs in pairs (two or four DIMMs, not one or three DIMMs). For example, if you want 16 GB of memory, then purchase two 8 GB DIMMs (not one 16 GB DIMM). If you are only installing two (and not four) DIMMS, you MUST install them in two specific slots (see illustration in the "System memory" section in the "User Guide,", page 1-4). Lastly, you might consider running a memory test on your newly-installed memory.CMOS Battery was Dead on Arrival:In the past, I have always installed a fresh (type 2032) CMOS battery before installing a new motherboard. For this build, I did not do that. Post-construction, I quickly realized that the CMOS battery was dead. Yep, ASUS shipped me a motherboard with a dead CMOS battery. No big deal: I should have installed a new one before installing the board. You see, the CMOS battery is located under the video card: It is very easy to replace before you start building and rather inconvenient afterwards. I use a long-lasting 2032 lithium battery; that should last you about 4 to 5 years.CPU-Cooler Connections:I used the CORSAIR Hydro Series H100i v2 AIO Liquid CPU Cooler. The H100i v2 manual directs connecting the cooler as follows: plug the pump power connector into the CPU_FAN socket on the motherboard and connect the two fan power cables to the H100i instead of to the motherboard. The Maximus XI Hero manual directs connecting the pump to AIO_PUMP and connecting the two fans to CPU_FAN and CPU_OPT (instead of to the H100i). I chose to follow the H100i v2 instructions above: connecting the fans to the pump ensures the fans are controlled by pump temperature instead of motherboard temperature (a better indicator of radiator demand, in my opinion). If you connect the pump power to CPU_FAN (and the 2 fans to the pump cables), then go into BIOS and make sure that the fan profile for CPU_FAN is always at 12 vdc (maximum) at all temperatures.
H**Y
Asus Maximus Hero XI Z390 Experience
I paired this Asus Maximus XI Hero Wifi board with an Intel I5-9600k with cooling via Noctua DH-14. This board is definitely a premium product and beautiful if you are into hardware - its heavy. I had a hard time getting it into my Fractal Define S case, it was like I couldn't push the board tight enough to the back far enough to get the screw holes to line up to the board. After a struggle I managed, maybe it was because of the backplate being part of the board. The memory is G.Skill Trident Z 3600 16-16-16 2x8 gb and was not an issue at all. Video card is an Asus Strix GTX 1070. I had a Samsung 970 pro M.2 drive already set up with Windows 10 to put in it, getting the cover off the M.2 drive bay was a bit of a struggle too, it was really tightened on there by the factory. Another interesting thing is when I first turned the power on (EVGA G2 850w PSU) it was like there was nothing, just dead. I recycled the power switch on the PSU and it came on - whew. Not sure why but wondered if it was part of the board having an extra 4 pin power plug for extreme overclocking.After that there was the software side - the drivers. I could not get the ethernet port to work in Windows 10 and it was quite confusing because I had updated the Bios (to 0506) via the Internet bios choice right away and that worked just fine. The driver installed by Windows automatically for the Intel V-219 was version 12.17.10.8 and this is later than the driver version that Asus Armoury Grate wanted to install (not sure how they get this program to magically install). Windows 10 kept telling me there just was no ethernet connection and I thought maybe there was a hardware port problem as I had tried multiple cables, routers etc. Finally I decided to delete the 12.17.10.8 driver and install the 12.17.10.7 driver manually and all of a sudden it came alive - another whew. I called Asus support on this and I got really good service, I didn't expect that to happen.The Bios on this board is different in certain ways that I had not seen before. Like if you wanted to boot from an SSD for example (I have a Samsung 850 pro drive in the case as well) and not an M.2 drive then you have to enable CSM, it comes disabled, this was definitely confusing. So basically it comes setup assuming you will have an M.2 and no SSD to boot from and then you will only see the SSD as a data drive. It is nice you can turn Aura off in the Bios. I am pretty familiar with Asus Bioses but this one will take me awhile to find everything.After getting past a few snags with the install, the board operated very solidly, no issues at all and it has a ton of bells and whistles. It is not a fast booting board but it feels like it would always be there every time. Overclocking choices are amazing. I have an Asus Strix Z270-E board as well and wasn't sure if I should take the Z390E or the Maximus Hero XI but I think I made the right choice for the money. The one thing I really don't like is the WIFI antennae - its weird, the Z270E's is a much better design and also magnetic. I have an I5 7600k in my Z270E system (Samsung Pro 960 512gb) and it overclocks to 5 Gz without a blink. You don't notice any change in speed in the new rig but if you run the benchmarks it does a lot better, its not far from an I7 8700K. Overall I am happy with my purchase. I bought both the motherboard and cpu on Amazon.
Trustpilot
1 week ago
1 month ago