


🔧 Elevate Your Tactical Game with Unmatched Precision!
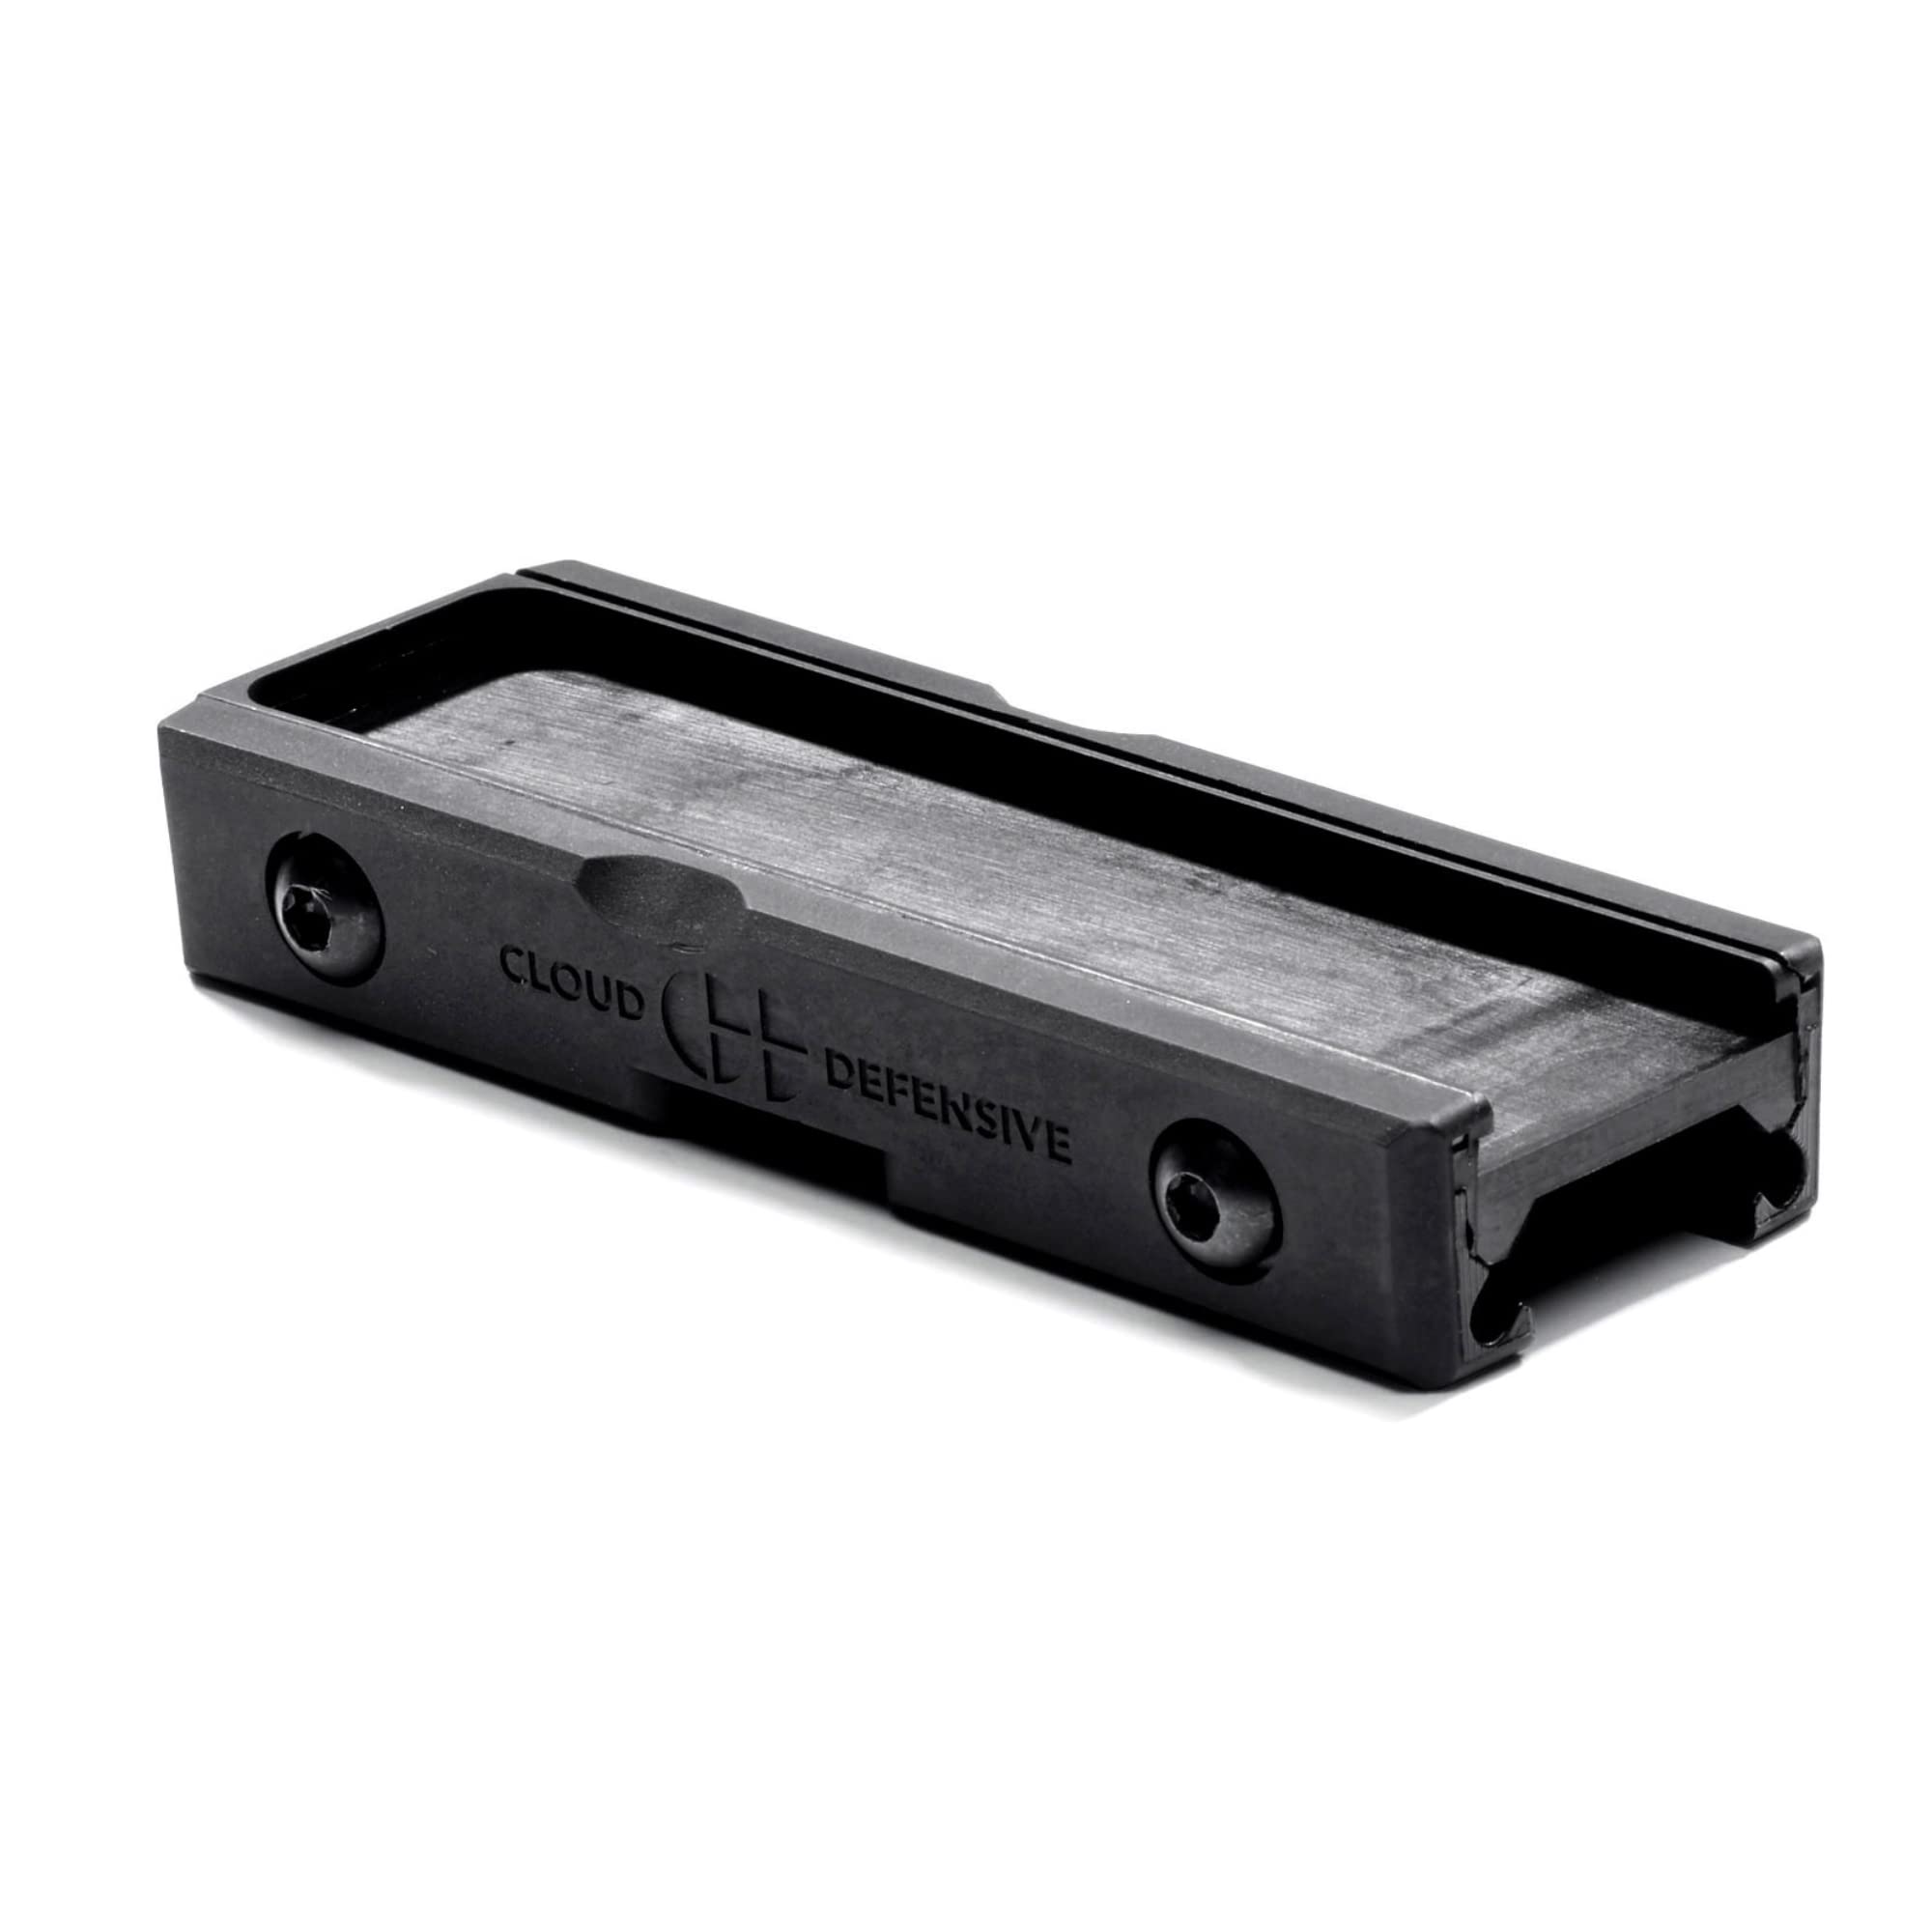
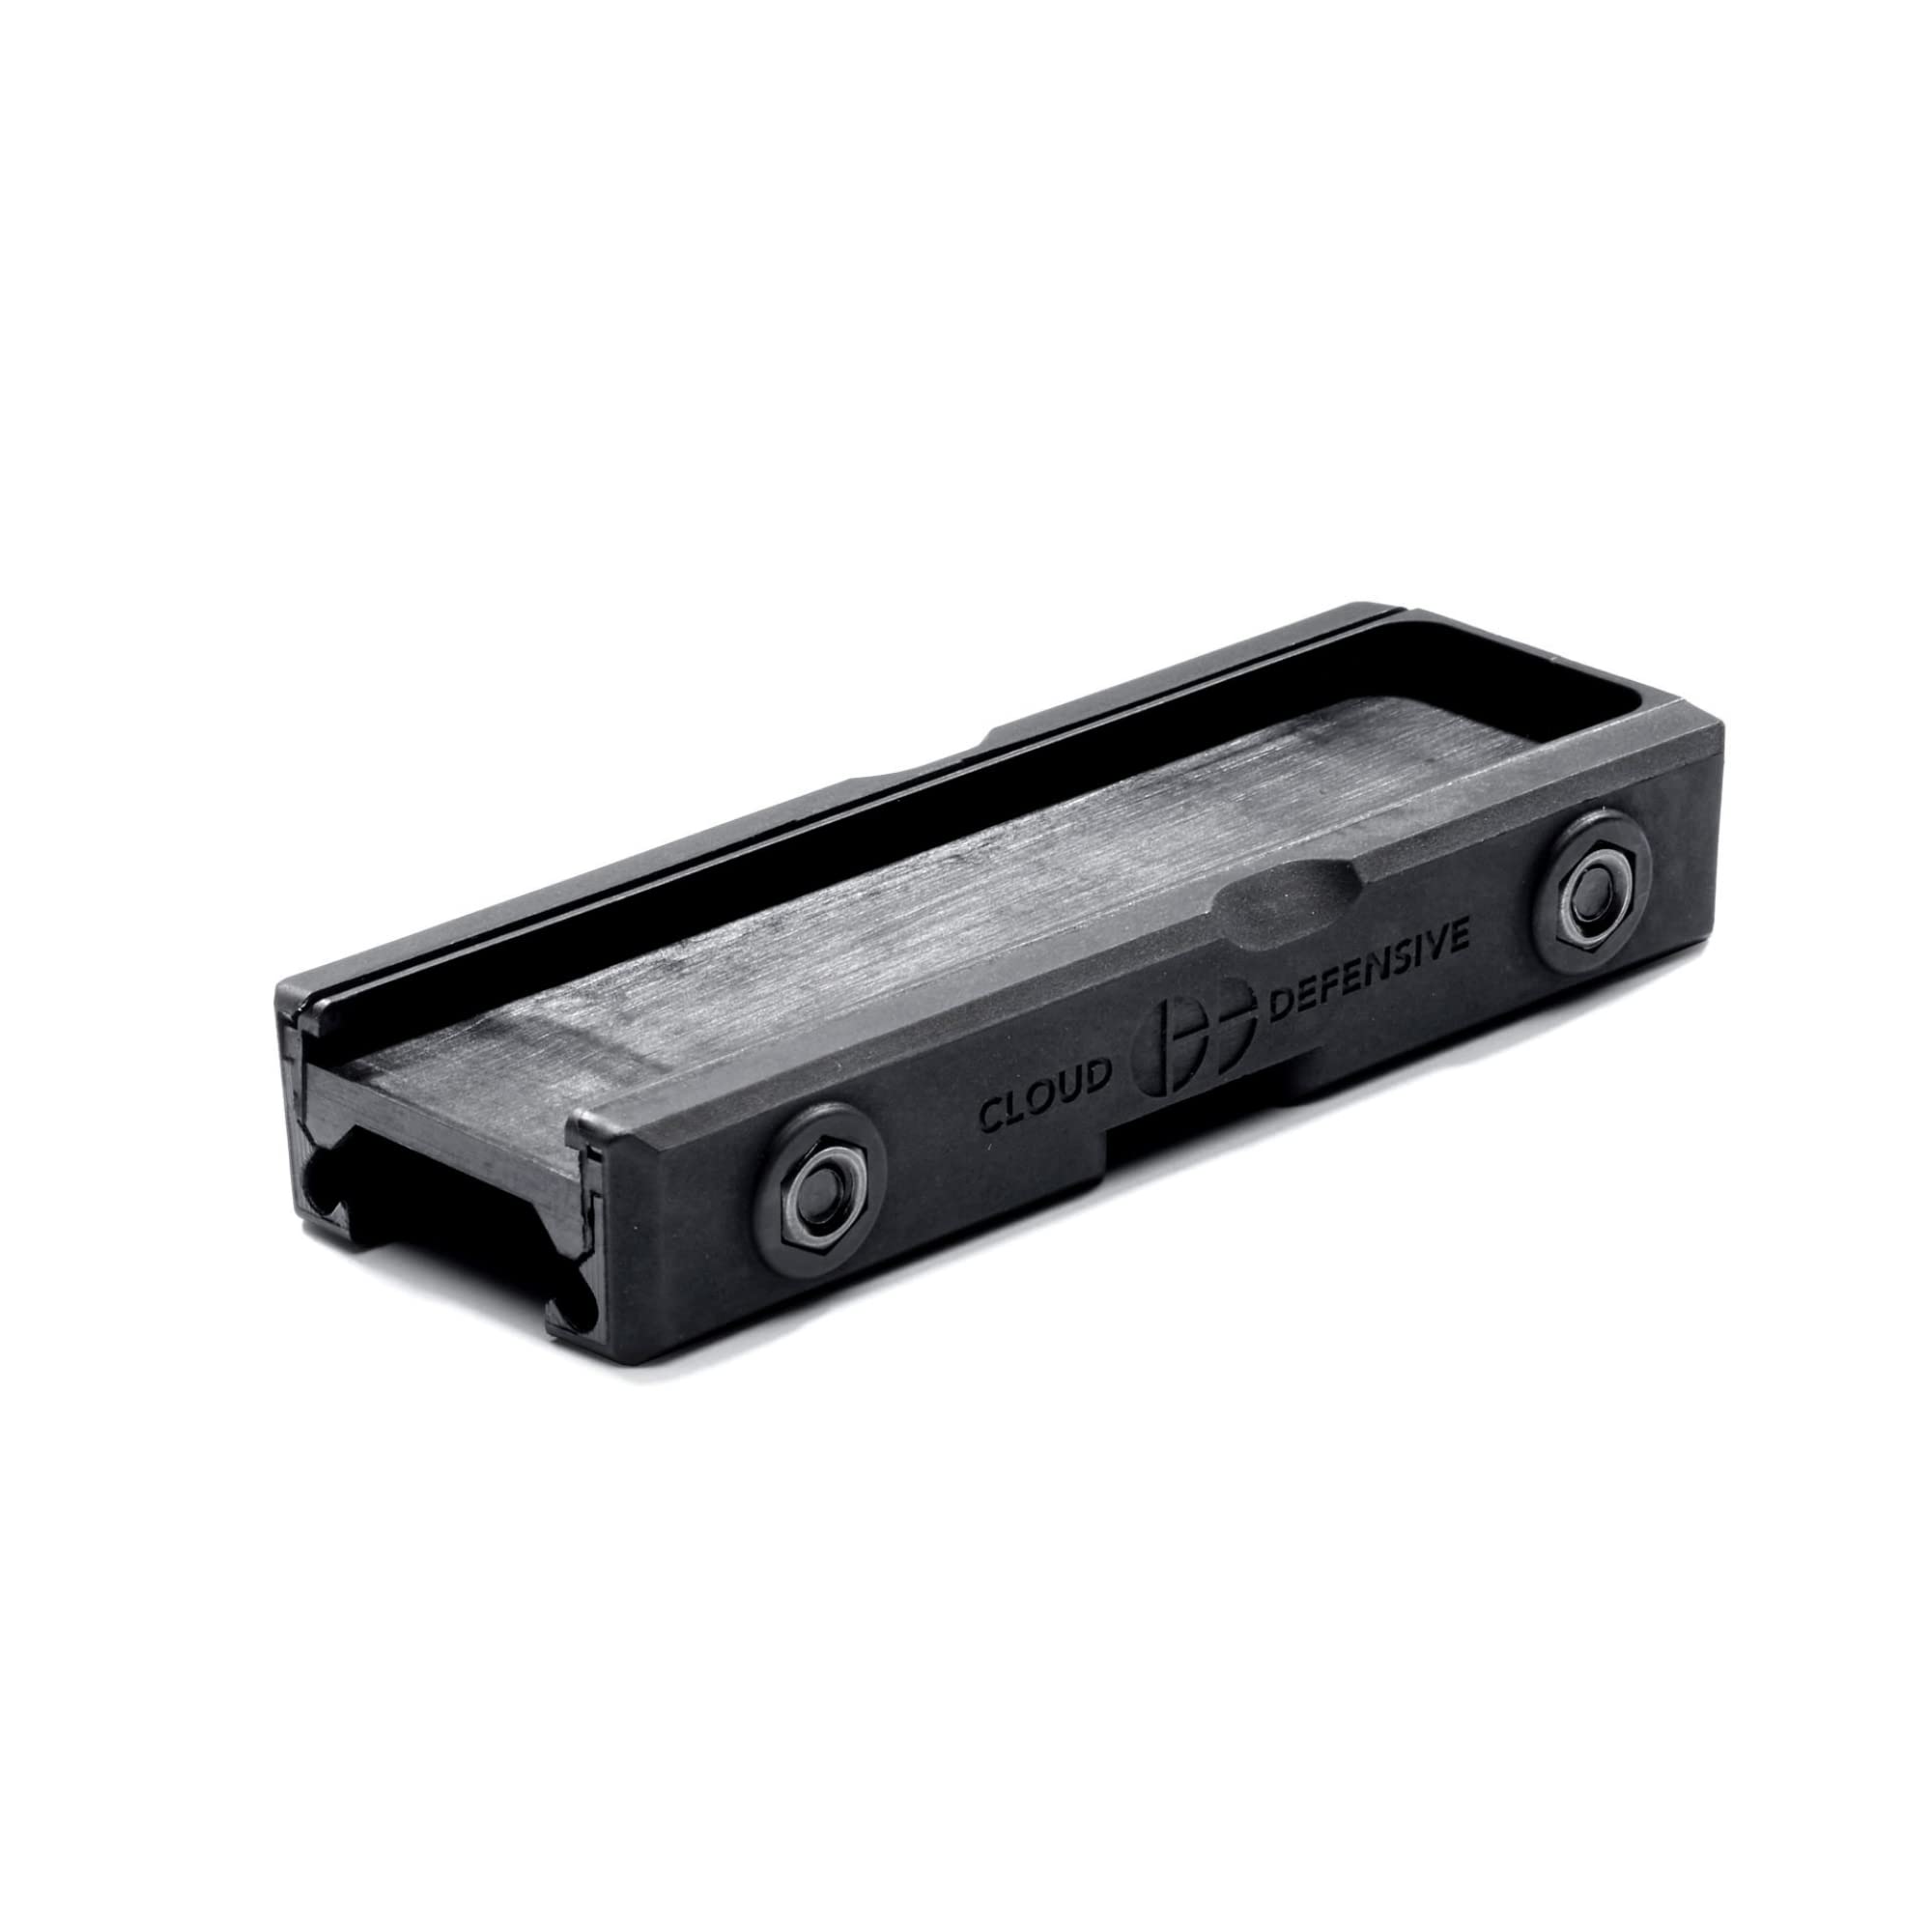
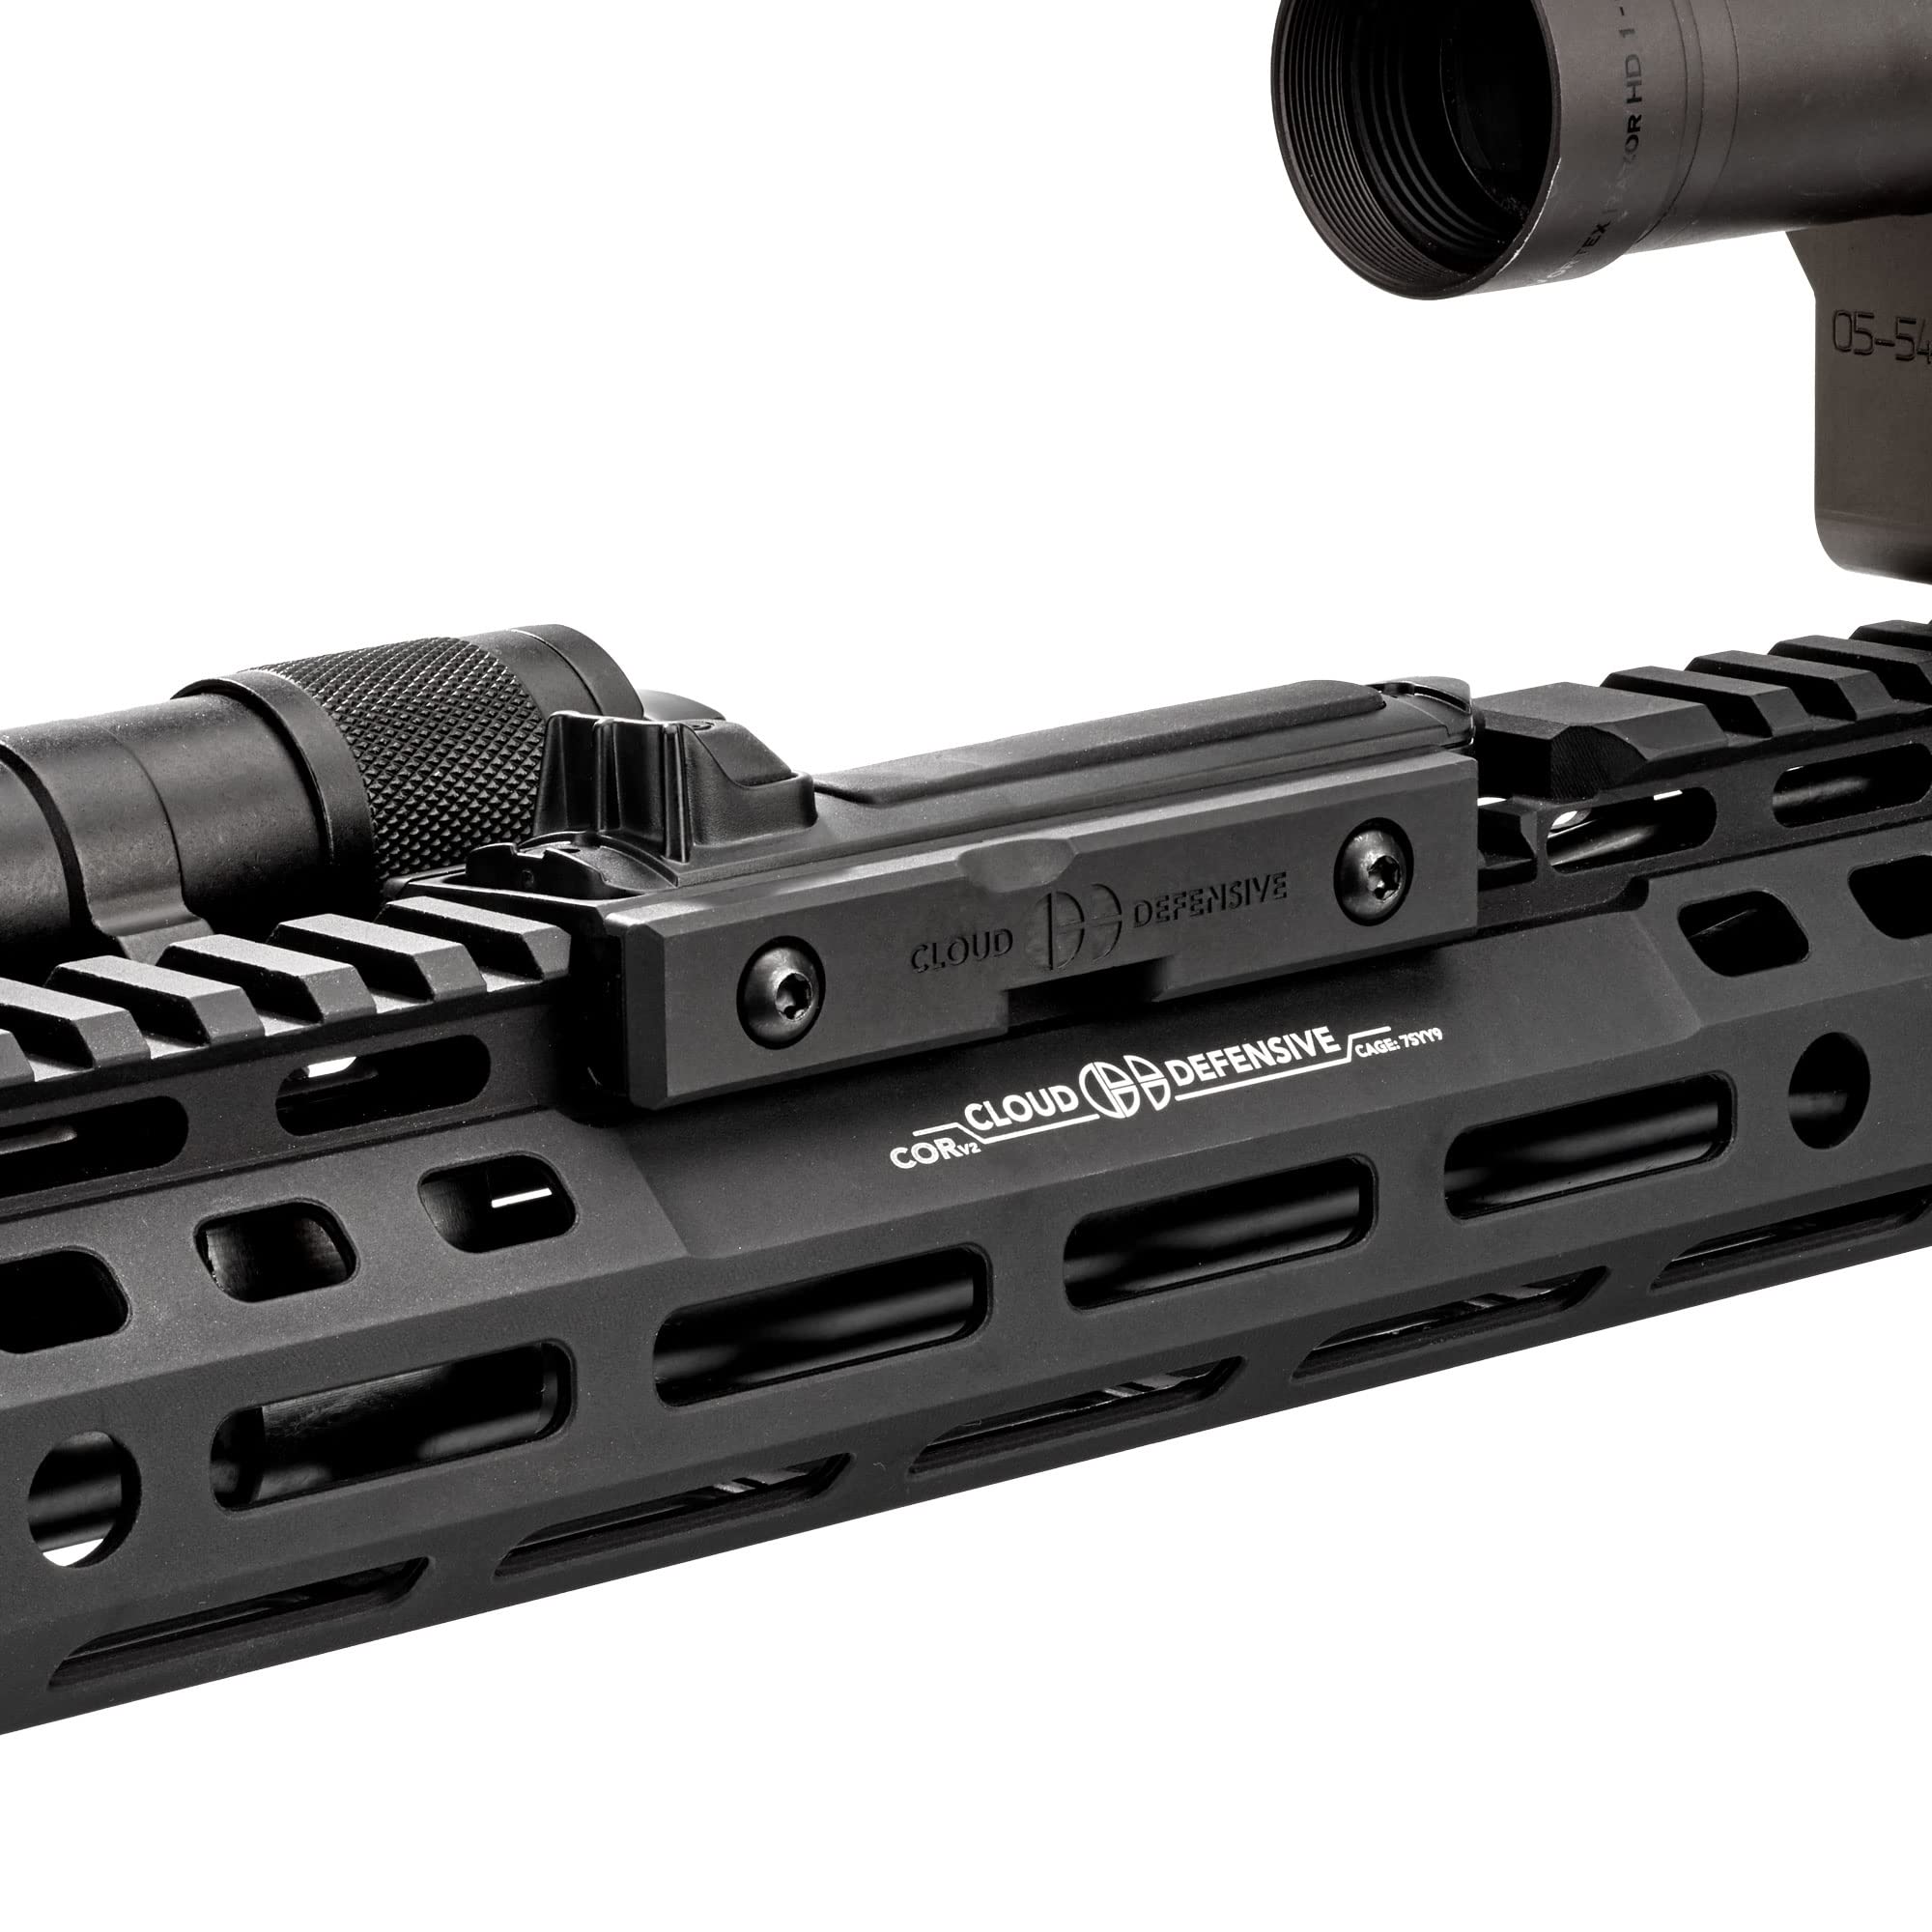
The Cloud Defensive LCS Fits Streamlight ProTac Switch Mount Plate is a high-quality, precision-engineered accessory designed for seamless integration with picatinny rails. Made in the USA from durable glass-filled nylon, it offers ambidextrous versatility, ergonomic comfort, and a secure fit for your tape switch, ensuring reliability and performance in any tactical situation.
| Switch Type | Decorator |
| Material | Nylon |
| Brand | Cloud Defensive |
| Color | Black |
| Finish Type | Polished |
| Configuration | Single |
| Installation Type | Screw-In |
| Product Dimensions | 1.32"W x 0.58"H |
| Manufacturer | Cloud Defensive |
| Part Number | LCSMK2J BLK |
| Item Weight | 1.44 ounces |
| Country of Origin | USA |
| Item model number | LCSMK2J BLK |
| Item Package Quantity | 1 |
| Finish types | Polished |
| Power Source | Corded Electric |
| Batteries Included? | No |
| Batteries Required? | No |
C**.
Assembly help for excellent product
I was embarrassed at first that I spent almost 2 hours trying to assemble this darn thing. Out of frustration I came here to see reviews that validated that my parents weren't cousins and this thing was not intuitive to assemble. I read a few reviews that said the side pieces need to be "snapped " into place. That didn't work either but I did figure it out and hopefully this will help others.1. To clarify orientation, the bottom of the side pieces have a full length wire guide as well as a cutout in the middle.2. The top piece where the tape sits SLIDES onto the side pieces. Just put the corner of the top piece in the small channel on the side piece and while applying pressure in the direction of travel , ensure to put slight pressure to keep the section already engaged seated or it will pop out. If you only push in the direction of travel at the back of the side piece, it is essentially a lever and the rail on the top piece will easily come out of the infinitely tiny channel on the side piece.3. After both sides are slid on the top piece, gingerly maneuver them into position and pass the screws through. Screw into the side with the nut and tighten to ensure its all lined up.4. Route wire for your set up5. As an assembled unit it has to slide onto your rail and after you have it parked at the proper rail address, adjust on your rail so the screws can fit all the way to the other side.Hopefully after deciphering my instructions (I am a proud card carrying crayon eater) and the instructions there is enough info to get this mission accomplished.Good luck, because this seems to be an excellent product that just needs its instructions rewritten.Stay safe
T**R
Great Retention, easy install.
Installing it can be complicated IF you don’t have an Allen key that goes into a screwdriver, you’ve got more grip and you’re easily able to install it over a regular Allen key like the one provided. No wiggle play or sliding when it’s installed, good addition by the built in wire hider, all around a great piece. Would’ve loved a CD sticker though ;)
R**N
Works great
This is my 3rd tape holder, secures it well enough to warrant purchasing more than 1.
R**.
Precision & Quality Built
This tape switch mount is very nicely made. The fit and finish is superb, tolerance between pieces is excellent. I would highly recommend the mount for anyone looking for a solid and low profile mount to attach their tape switch to the foregrip.
M**L
Difficult assembly
Everyone rates this component with high ratings - once attached and functioning. However, until you assemble the three (3) components via the two (2) screws, it cant provide that functionality.I've purchased and eventually installed two of these on my rifles but DAMN did I spend a lot of energy to assemble.In the end, they very much hold your switch securly in place but it takes a long time to get to that point.Stronly suggest DD spend some energy on evolving the parts configuration / alignment so the process to get you to a state of "functioning properly" is smooth ...... with the same outcome.
T**A
Expensive but is exactly what you want
Expensive for what it is, basically just paying for a name, but it's so nice to have the pressure pad mounted nice and secure. It's exactly what your looking for
M**T
Fix for the short screw problem...
Ok, I had the same issue as others with short screws. It appears that the screws are just the right size. After playing around this, I mounted it with a little effort on my pic rail.Here is what I did.Use a good, solid quality T15 driver - if you use a cheapy one this makes it harder to mount...Put the thing together before attempting to mount it. Sinch it tight, as if it was mounted to your rail, this gets all the parts to snap together and make the fit better.Undo the screws and the side with the bolts will remain attached to the switch holder (don't use too much pressure or it will snap off again).Attach that side to the rail and then get the other side lined up and softly set the screws, you may need a little pressure to get them started.Once they are started, sinch it tight.I really like this mount. It works really well, now that I've got it attached, and it doesn't add too much weight.
J**Z
How to fix short screw problem
im reposting what someone else had said cause it helped me too and want it to be known1:You have to pre-assemble this thing without the torx bolts first. There are channels in the side clamps that mate up with top that holds the tape switch. These three pieces will snap together.2: You need to leave the supplied torx bolts off of it and slide it onto your rail from the barrel end of the rail going towards the receiver( you may have to remove flip up front sight etc)3: Once you've done that just line the holes in the mount with open slots in your rails,slide the torx bolts in and tighten them down.shoutout to who ever wrote this originaly your my savior cause theyre instructions are absolutely horrible from factory
Trustpilot
2 weeks ago
2 days ago
