🚗 Don’t let cracks drive you crazy—repair like a pro in minutes!
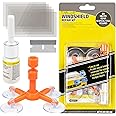
The Rain-X Windscreen Repair Kit offers a quick, cost-effective, and easy-to-use solution for repairing minor windscreen chips and cracks. Its advanced resin formula penetrates deeply to bond and strengthen damaged glass, preventing further spreading while restoring clarity. Suitable for various damage sizes and multiple repairs, this kit empowers drivers to maintain their windscreen’s integrity and safety without expensive professional intervention.


| Manufacturer | Rain-X |
| Brand | Rain-X |
| Model | Winsdscreen Repair Kit |
| Product Dimensions | 12 x 5 x 1 cm; 30 g |
| Item model number | 26150 |
| Manufacturer part number | 26150 |
| Item Weight | 30 g |
M**N
From An Ex Windscreen Repairer - This Works.
***The kit I received was supplied with full English instructions. I suspect previous reviews had an older packaging without this.***I’ll preface this review by stating I’m an ex windscreen repairer with 10 years’ experience in the employ of a well-known vehicle glazing company. I’m sure you can guess which one *cue annoying ad jingle*.I mention this to give context to the fact that I have a lot of comparison basis in regards to equipment, usage, results and expectations.Firstly, the concept and application is more or less identical, bar the Rain X kit not having active, external vacuum; it creates its own vacuum due to the plunger assembly. Aside from that, the procedure is the same:- Clear the surface of debris/glass fragments- Position resin port directly over the impact point- Apply resin- Apply plunger/vacuum- Wait for air voids to fill- Cover surface with resin & patch- Wait for full cure (external UV light, if available, would work wonders)- Scrape away excess cured resin- Refill surface if necessary and repeat curing stage (not always necessary)When I first saw these kits hit the market as a windscreen technician, I swiftly disregarded them as inadequate and a cheap mock-up from companies that couldn’t compete with the big players who have design patents and entire R&D departments dedicated to producing equipment for this purpose.After using this kit for the first time, I’m happy to report that I was mostly wrong.The resin filled the chip’s voids and cracks just as well as I would’ve expected my previous “professional” level equipment to do. Over the course of doing 10+ repairs per day, 6 days per week for 10 years, you get a feel for these things. In fact, the repair was so much simpler and accessible for the average car owner due to not needing any external vacuum compressors, airlines or power supply.Cosmetically, you can barely see the chip now and it was indeed very visible beforehand with multiple “legs” radiating from the impact point, full of air and very dark from certain angles. Now, you’d be hard-pressed to spot it if you didn’t know where it was. And we’re over one month in with no sign of degradation or cracks spreading so I’m confident the repair will hold. My only regret? In my enthusiasm to get the job done, I forgot to take before & after pics 🤦♂️Finally, an important tip for those looking to DIY your windscreen repair: if the chip has been recently exposed to water/rain, wait until it’s completely evaporated from inside the chip before attempting repair. Bare this in mind before you wash your screen in an attempt to clean the glass beforehand - this is actually counterproductive. The reason for this is water will dilute the resin, prevent it from filling and displacing air in the break, and also prevent the resin from curing properly. You can tell if it’s full of water by a translucent, faintly milky appearance, whereas a dry chip will appear darker with more pronounced air voids. If in doubt, leaving it in the sun for a day if possible should do the trick. You can accelerate drying by using a hairdryer on gentle heat, but BE CAREFUL with this, especially in cold weather as thermal shock is one of the best ways to send your chip into a full crack. Also, don’t apply pressure to the chip or attempt the repair if the glass is hot, for the same reason.In summary, this kit works, is great value for what it can achieve, will repair multiple chips (and cracks, according to the instructions), and is more or less as good as a professional repair if you prepare correctly, as with any job.Hope that helps.
R**I
Good product
Quality, looks like it works, ease to use, drys out well and quickly.
T**S
Exceeded Expectations – Fantastic DIY Repair!
I recently had a small chip with two cracks (about 6mm and 10mm) on my windshield and decided to take matters into my own hands after a frustrating experience with a professional repair service. A few months ago, I used Halfords’ service, and they actually made the crack more noticeable and scratched the glass around it. This time, I went the DIY route—and I’m so glad I did!While the product didn’t come with English instructions, I found plenty of great tutorials on YouTube, so it wasn’t a big issue. I may have used a bit too much resin, as some leaked out even after tightening, but I saw that as a plus—more pressure to push the resin deep into the cracks! To give the resin more time to settle, I covered the repair with a black hoodie since I was working outside on a sunny day.Once the resin cured, it was easy to scrape off the excess with a razor blade. The result? Way better than I ever expected! From the outside, you can’t even tell there was a repair. Inside, there’s only a faint shadow if you really look for it. After a few hours, the repair became completely invisible!I was so impressed, I used the leftover resin to fix a chip on my watch face caused by welding spatter. It filled in perfectly and is barely noticeable unless you look closely at the right angle. I wish I had taken before photos to show just how good this repair turned out. Definitely worth every penny!
R**B
Disappointing Experience Made the Crack Worse
I purchased this windscreen repair kit to fix a small crack on my windscreen. Unfortunately, the product failed to deliver. Not only did it not repair the crack, but it actually made it worse!The kit was easy to use, but the results were disappointing. I followed the instructions carefully, but the crack has now spread further. I would not recommend this product to anyone.Would not recommend.
M**N
Does the job but don't expect a perfect result
It does make my window chip less visible but certainly not a good as YouTube shows.
A**A
Very good
Very good easy to use and hood instructions did the job. Passed the MOTvery
P**E
Good product
Good product. Arrived on time.Although it was difficult to follow the instructions, several videos on Youtube helped to show the method.It filled a chip in the windscreen of the car without any issues.Just as a side note, I competed this in the evening when the UV levels would have been lower, to cure the product, so I used the wife's UV nail gel lamp, which worked a treat.
T**
Works well.
Follow the instructions and it works very well.We had impact from the bottom of the windscreen and the crack had spread for in a few directions. I knew I wouldn’t be able to fix it all so just concentrated on each leg of the crack and also the impact point.(Wiper motor was being removed and the arms had just squashed the corner of the windscreen)I highly recommend using a UV lamp. We used the nail one we had here, they are cheap enough.So I cannot comment on the sun doing the curing which is what the instructions say. The uv lamp worked a treat to cure the uv glue then you scrape off the excess. The overall finish was the crack seemed to disappear in some places, others it’s visible but it’s ‘sealed’ and the main impact site is sealed from the Elements. Overall a worthy purchase. On a single bullseye 🎯 crack I think you would get a brilliant result.
Trustpilot
5 days ago
4 days ago