🖌️ Sign Your Success with Style!
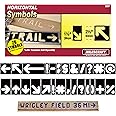
The Milescraft 1212 SignPRO Sign Making Kit is a comprehensive solution for crafting stunning, personalized signs. It includes 166 templates for horizontal letters and 80 templates for vertical numbers, along with essential tools like a 3/8" router bit and low profile C-clamps. Designed for ease of use and precision, this kit is perfect for both DIY enthusiasts and professional sign makers.
| Material | Wood |
| Brand | Milescraft |
| Style | Custom |
| Product Dimensions | 3.15"L x 3.15"W |
| Item Weight | 16 ounces |
| Manufacturer | Milescraft Inc. |
| UPC | 893264000615 |
| Global Trade Identification Number | 00893264000615 |
| Part Number | 1212 |
| Item Weight | 1 pounds |
| Item model number | 1212 |
| Is Discontinued By Manufacturer | No |
| Size | 1-(Pack) |
| Color | Black |
| Item Package Quantity | 1 |
| Number Of Pieces | 1 |
| Included Components | 5/8" metal nose bushing, 1/4" tungsten carbide router bit, 2 sets of 2-1/2" horizontal characters, (2) low profile c-clamps, to permit easy passage of the router, 2 sets of 1-1/2" vertical numbers 0 to 9, 7/16" metal nose bushing, 2 sets of 1-1/2" horizontal characters, 2 sets of 2-1/2" vertical numbers 0 to 9, 7" TurnLock™ BasePlate with 4 mounting screws, 3/8" carbide tipped router bit |
| Batteries Included? | No |
| Batteries Required? | No |
| Warranty Description | 3 year limited warranty. Milescraft will at its option, repair, or replace without charge, any defects due to faulty materials or workmanship for three years from the date of purchase. |
J**H
Sign Maker kit
I first tried just using the lettering templates that interlock and that you just tape into place (as was recommended by their "how to" video). I was not at all satisfied with the results. It was difficult to position the router and if you were not very careful you would cut right through the template since the pilot did not set down well into the guide. After this disappointment, I ordered the Sign Pro Router Signmaking Jig. Maybe I did not read carefully enough but I did not realize that it came with everything you need. Templates, router base with a different pilot inserts, router bits, jig frame, braces, clamps - the works. The jig elevates the templates above the work and holds them in place so that the pilot slips right down into the templates and allows you the follow the template. This is not totally foolproof since, for some letters, it very much makes a difference the direction you follow the template, etc. This is because of the direction of rotation of the bit and the fact that the templates are not a full outline of the letters. As a result, a little practice is required for some letters as is a careful setup prior to starting to make sure everything is clamped and tight. After only a few practice runs, very acceptable results can be achieved with this system. It does appear that only the Milescraft templates work in this system so you are somewhat limited there. The jig also supposedly has the ability to be doubled in length but I found it to not be very stable in that configuration - I found the extended version more trouble that it was worth and just cut one frame at a time.Bottom line, this may not make you a professional sign maker but it does a decent job and, since it includes everything that you need, it is a good value for the money. I have very much enjoyed playing with it and have turned out some decent custom-made signs. I strongly recommend it vs. the interlocking templates that are not held in place above the work by a frame.
B**S
Not perfect, but pretty darned good
My experience seems to be a little different than most of the others who like this jig. For one, the bits seem too short. I haven't seen a lot of comments about that. If I follow normal procedure and bottom out the bit in my DeWalt plunge router and then pull it out a 16th, the bits are much too short. I can buy longer bits. In fact, I have some on hand. For another, the Milescraft included directions say to set up the router so that it cuts a 3/32 groove. The videos just say to adjust for the depth you want. At 3/32, the one letter I cut was perfect and did not need sanding or removal of fluff at the edges.. At deeper depths, it certainly does. But at 3/32, you won't be making a very visible sign. I'll cut deeper and clean up the edges as needed.Nevertheless, despite those things, the kit does allow me to create signs, albeit, signs that need a little work after cutting. I haven't used the extension bars yet, but I know that those have to be braced.The second sign I created came out perfect, except for the top of the A. I have two of them in my name, and one of them chipped out the top of the A where it comes to a point. I may have been better off routing out the whole top of the A. As it is, I'll cut both of them down a bit to just below where the tearout is on the one A.Overall, with a little practice, I should be able to turn out satisfactory signs. Compared to every other system I reviewed, this is the best and/or the cheapest.For those who seem to nick the letters when removing the router, the trick is to not remove the router while it is running, or at least, not remove the router until you raise the plunge mechanism. Take your time.
M**S
It's a nice set, however...
Okay, so it's a reasonably nice set. Instructions lacked a few things. For example, how to line up the base when there is rarely more than one hole to use. It is vague and ignores ideas on how to drill your own holes, or find a way to secure it. A person can around that. One would think that there would be a list included that would help a newbie get past those kinds of road blocks. As far as some saying that the dies crack too easily or get chewed up, my reaction is, "huh?" If you use the bushings correctly and only turn it on once the bit is in place, no die should be able to be chewed up. Me thinks the ones who complained about this were those same guys (and they've got to be guys, after all; women read the instructions in every language!) anyway, they are the same guys who NEVER read the instructions. This is the easy part. Just use the sign pro the way it was designed to be used, be a little careful, and you'll be pleased that you bought it. Some little ticky tacky things that could be improved are: why force people to tighten the bars with a flat head screw-driver, but then, force us to tighten the top adjusters by using a Phillips screwdriver? And those screws that require a flat head screwdriver? They are soooo cheap. At least use decent screws there. It seems as though one of the bar holders could allow the bars to go all the way through it so that you would not even need to bother with spacers... You could simply push the letters together that way and tighten the side (flat head) bolts. No need for the top brackets that way... Explain to me why they couldn't do that. If there's a reason, I'll be happy to hit my forehead and cry out, "Why am I such an idiot!"
Trustpilot
2 days ago
1 month ago