🔊 Revive Your Sound: DIY Your Way to Audio Perfection!
The Ancable Replacement 4-Pack TRRS Male Plug is a versatile solution for DIY audio repairs, compatible with a wide range of devices including PlayStation and major smartphone brands. With an easy-to-use design, this pack includes four connectors and shrink tubing, making it perfect for anyone looking to enhance their audio experience without professional assistance.
| Connector Type Used on Cable | Auxiliary |
| Number of Ports | 1 |
| Compatible Devices | PlayStation |
| Specific Uses For Product | Headphones |
| Unit Count | 4 Count |
| Number of Items | 4 |
| Item Weight | 0.02 Pounds |
| Package Quantity | 1 |
| Item Dimensions | 1.86 x 0.36 x 0.36 inches |
| Finish Types | Metallic |
| Color | Black |
G**Z
Description is on point!
Exactly what i needed!
S**K
Works but be prepared to curse a little
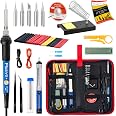
I got this to replace a broken headphone plug on a Turtle Beach headset. I watched a few videos and decided it was worth giving repair a shot. I chose these plugs as they had mostly easy solder points and would be a bit more forgiving to my shaky hands. In addition to the plugs I bought a cheap soldering kit since I didn't have one.I took off the old broken plug and separated out all the wires. I prepped the wires by giving the ends a little coat of solder. Then I took the replacement plug, grabbed a wiring diagram on my phone, and figured out what goes where.Tip: do the left audio first (Pin 1, the middle tiny solder point) , it is by far the hardest and easiest to screw up.Tip: Get a little blob of solder on the point first before you try soldering the wire. Then just hold the wire to the point you want to solder, bring up the iron, the solder will melt and you can kind of press the wire into it. Is this the best way to do it? Probably not but it helped me and my amateur soldering skills.Tip: get a cardboard box and stick the pointy end of the plug through to hold the plug in place when soldering if you don't have alligator clips and whatnot.The other three solders are super comparatively easy.Tip: After you are done soldering, get some electrical tape and wrap the solders for Right Audio and Ground (Pin 2&3, the two tabs). This will prevent any shorts after getting it back in the plug when the wire moves around.After that screw it back in to the sleeve and you are done. I also added a bit of electrical tape around the base of the sleeve for a bit more added stability. Plugged it into my laptop to test and everything worked perfectly, including the mute and volume switches on the headset. Pogchamp. Handed it back to the 9 year old its been working ever since.It took me about an hour and a half to do this start to finish BUT this also included me learning my soldering iron and a few mistakes I made separating the wires out. Now that I know what I'm doing I could do this again in 30 minutes easy.
L**D
Good quality TRRS plug
This is a pretty conventional TRRS 4-circuit (tip, ring1, ring2 & ground) plug. It has the usual lugs for R1 and R2, and the combination cable anchor/ground lug for shield/circuit 4. The tip solder lug is not what I was hoping for - it's just a small metal nub, not a cylinder, so you have to be careful when soldering the tip wire in order to avoid shorts with one of the other lug. If it was a cylinder instead of a solid nub you would be able to keep the tip wire in line with the cylinder making it easier to avoid shorts. But other than that it is functional, stands up to reasonable soldering heat and seems sturdy enough.
L**Y
Works, but not without having to change audio balance.
NOTE: I suggest buying this WITH the Plusivo 60W Soldering Iron Kit for $9.99Reviewers, PLEASE look at the product pictures. I found out that after a week of confusion, cutting half a foot of cable off my headphones, and using half of my solder, I had the connections wrong. If you are having problems with the left audio, use the little tiny prong sticking out in the middle of the jack.Headphones wouldn't work without mic, either. Luckily, my headset has a detachable mic, so I can probably buy a dongle and plug it in. Right off the bat when I plugged it in, I noticed that almost all of the playback was in my left speaker. Went to test the balance, and found out that my left audio was somehow crossing connections with my right! Boooo! I could tear my headphones back apart and re-solder everything, but I'm lazy, and I don't want to risk having to cut another inch of cable off of my wire. I'll just stick with having to adjust the balance.Microphone doesn't work either when I tried to solder it into place. Whenever I plugged it in (with the mic soldered), it gave me 2 popping sounds in my left ear, and I had no sound. So I had no choice but to not use the mic wire. I also had another red wire that was hiding in a wrap of copper. Maybe that could be my ground...?The sound of the new jack sounds pretty amazing, very close to my previous jack. That's pretty much the only thing I like about this jack, and its robust look of the sleeve (not the sleeve on the solder joint, but the black casing.)Overall, if you want to repair your headphones, possibly a limited edition buy that costs as much as a kidney, or some cheap headphones, I suggest you take a pass on this one. Find another brand. Or, just go wireless entirely!
R**E
Perfect for when the headphone jack breaks the iPad's fall
Given the choice, the $25 headphones breaking vs my $400 iPad is a no brainer. I just would have preferred my son not drop electronics from his bunk bed, fortunately, a little soldering skill and a little time had his headphones back up and running.This came in a 4 pack, so the price-per-jack is pretty reasonable, and I suspect I'll be fixing more headsets.An interesting quirk of the TRRS jack for headsets: the longest, "groundiest" looking solder pin/wire crimp is actually meant for the mic line. The ground wire goes to the second "R" in TRRS, the ring adjacent to the sleeve.
Trustpilot
1 month ago
1 day ago