


🏡 Transform your floors, transform your vibe.
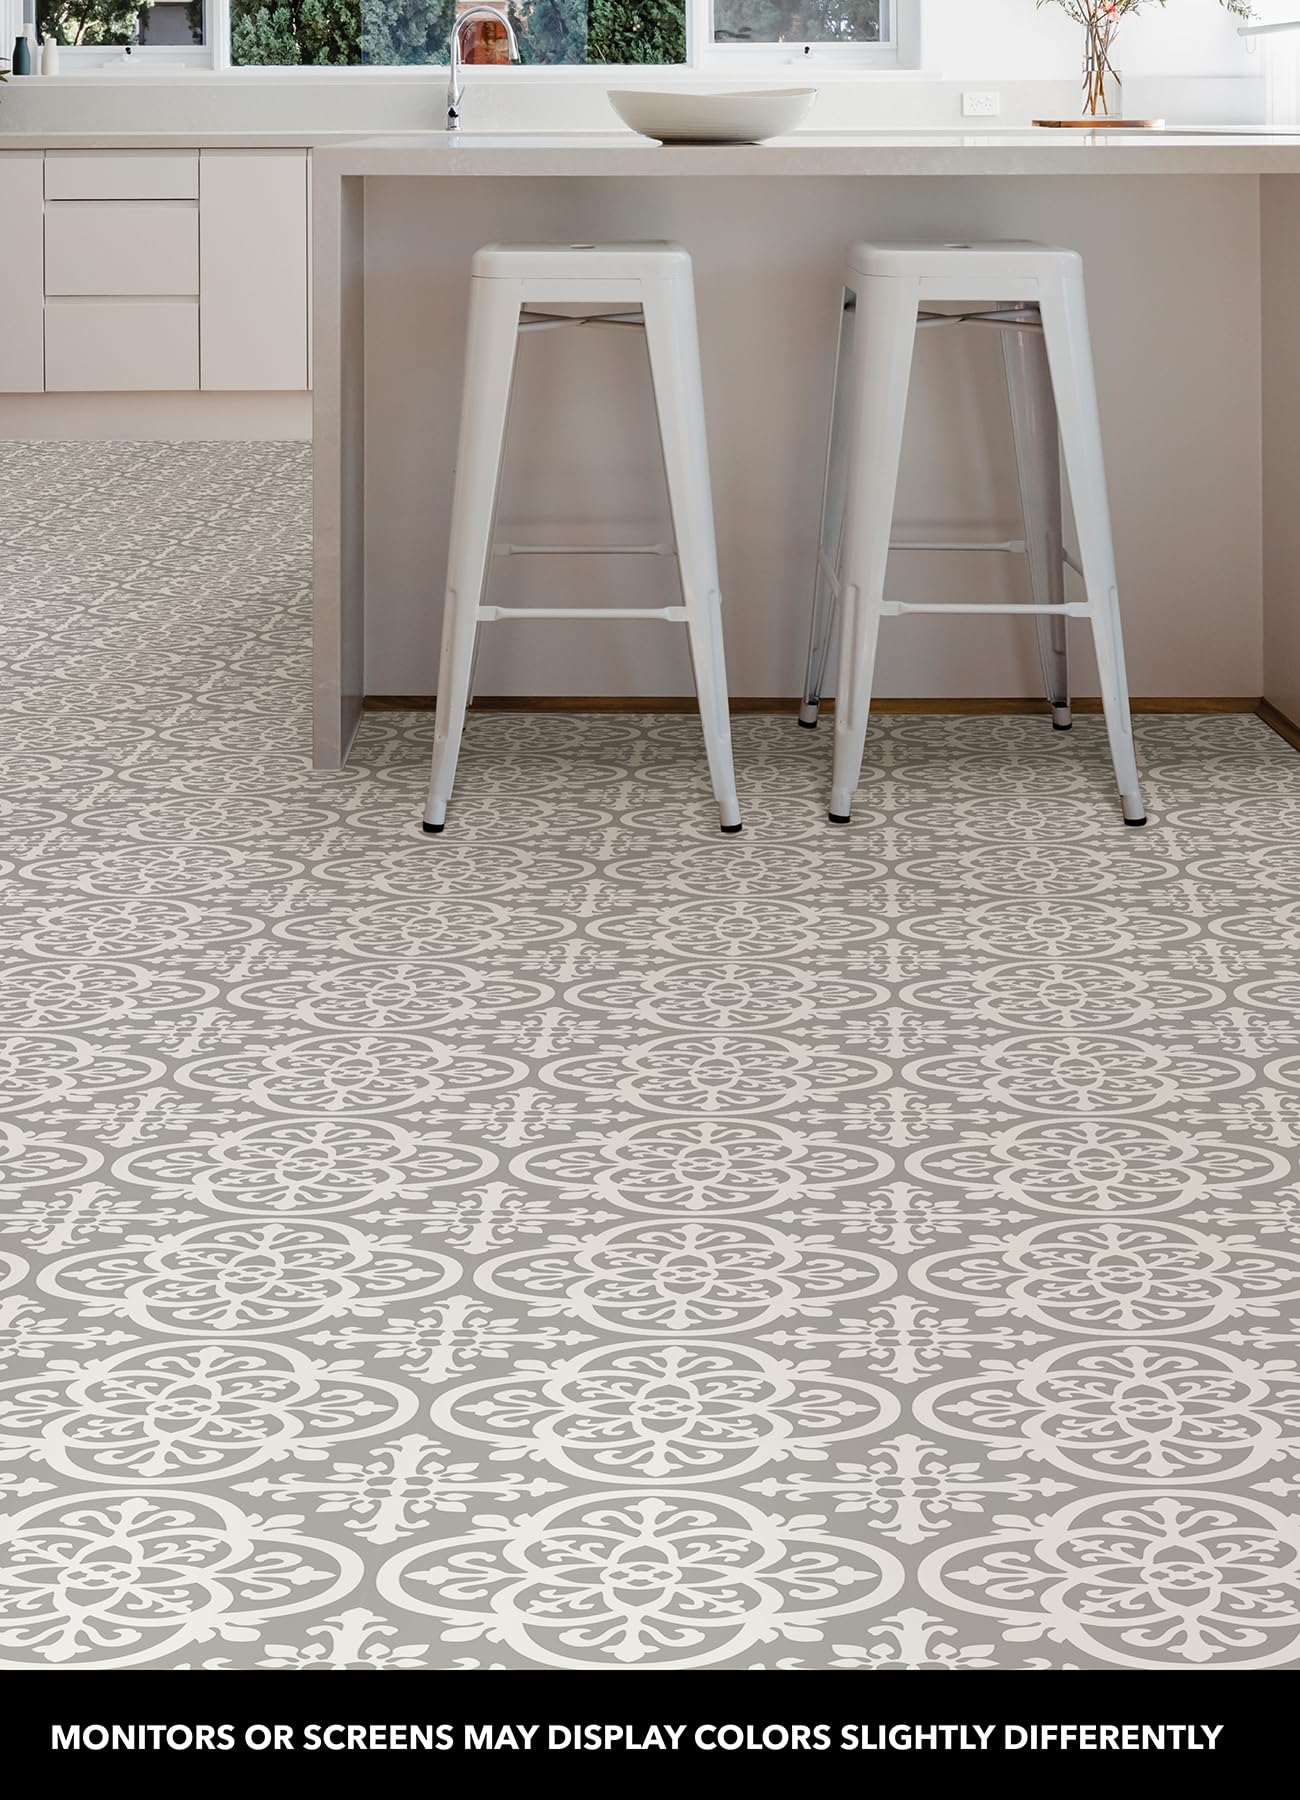
FloorPops FP2942 Medina Peel & Stick Floor Tiles offer 10 durable, 12x12 inch grey and white patterned vinyl tiles with a water-resistant, textured finish. Designed for easy peel-and-stick installation without grout or tools, these farmhouse-style tiles bring a stylish, low-maintenance upgrade to kitchens, bathrooms, and more, backed by a limited lifetime warranty.


| Brand | FloorPops |
| Color | Grey |
| Item dimensions L x W x H | 60 x 24 x 0.06 inches |
| Material | Vinyl |
| Recommended Uses For Product | residential flooring, kitchens, bathrooms, entryways, and decorative living spaces |
| Surface Recommendation | Wood, tiles, vinyl |
J**J
Inexpensive & stylish but took me a long time
I decided to cover the existing blah contractor grade linoleum in our laundry room. As with a lot of DIY projects a lot of time involved is the prep - the cleaning, the moving of the items in the room, etc. After I had the room emptied and the floor & baseboards cleaned I decided how I would lay out my new tile design. Directions suggest finding the true center of the room and working out from that point. I decided to go with the visual center of the room as it pertained to my most frequently seen view into the laundry room. I also wanted the tiles to be centered as they were placed in between the washer and dryer. The walls in the laundry room and their corresponding corners are not true square so the existing linoleum with a square pattern (which was not installed on the diagonal) always looked crooked. That was why the third design decision I made was to lay the new tiles on the diagonal. That decision definitely caused the project to take a lot more time as far as all of the varying cuts required along the walls. Once I began the project I realized that at least 50% of the new tiles were dirty. They had a black dust and/or spots that needed to be cleaned. I was very disappointed in that. The next thing I realized was that about half of the tiles were cut incorrectly when they were manufactured. This particular tile design requires its edges to be exactly on center otherwise when you take the next tile that is on center there’s no way to line them up. I wish I would have ordered extra cases of the tiles so that I could have cherry picked the centered and the clean tiles to save myself a lot of headache. I found that using my dollar store breakaway blade box cutter was a very easy way to score the tiles. Then I would bend them and they would break along the scored line very cleanly in most cases. Are used my needle nose pliers a lot for the cuts that were difficult to get a cleanly cut edge. Overall I absolutely love the way it turned out it so does my husband. For the price I don’t think you can beat it the style upgrade, but it was by no means a 30 minute project. LOL it took me DAYS of working a few hours at a time. If I had it to do all over again I would probably spend the $20 on a linoleum tile cutter, the kind that look like a paper cutter with a sliding blade. I think that would have been a big timesaver for me. Oh and you will definitely need some kind of adhesive; the self stick isn’t nearly strong enough. These tiles are a very cool product. I tried a different adhesive tile design to line the bottom of my kitchen cabinets that hold the heavy duty appliances and I loved the result. Have fun with it good luck!
A**A
Amazing deal
You get what you pay for, plus more! I paid $20 for tiles to redo my little bathroom and I am so impressed. If you have realistic expectations, you will also be very impressed. The pattern is gorgeous, but does not like up perfectly. It’s not noticeable unless you’re looking for imperfections. The tiles seems to stick well but some have migrated over the past month. They were very easy to apply. Very easy to cut with a razor knife, just score and snap. I scrubbed the floor today and the pattern remains. I would definitely purchase again for a small project.
A**R
Flooring for Nubes
I had been wanting to replace my boring, cracked bathroom tile, but our bathroom needs a lot of work and we are saving up to gut and redo it so I didn’t want to invest a lot of money upgrading it. I saw this tile for around $11 a box and fell in love with the vintage pattern, so I thought I’d give it a try. I was nervous about the installation because the tile in my 93-year-old house Is all uneven and my plan was to put this floor directly over the tile-grout and all! 😬 Also, I had no previous experience laying down floor tile and was missing some equipment (a tile roller, for instance). Despite all this, the floor turned out gorgeous!! I made about a million mistakes when putting down this flooring but thankfully the pattern is very forgiving. I’m glad I chose to work with this product for my first time laying flooring, it’s perfect for a nube like me! I gave this product 4 stars instead of 5 because it isn’t perfect. A few of the tiles came with no adhesive on the back and the pattern doesn’t totally line up (although the manufacturer does explicitly state this). Additionally, there is one tile that keeps lifting in the corner so I have to tack it down with construction adhesive. Here’s the thing though: for $11 a box, it’s not going to have the super strongest glue or the perfect pattern that lines up seamlessly. I am okay with that because, quite honestly, the fixes are really easy and cheap and the floor tile cost me only $45. For that price I am totally fine living with any product imperfections. And as I mentioned, it looks amazing and is a HUGE improvement to what I had before. A few notes: the manufacturer says no grout is needed, but I used grout between the wall and the tile (I left a gap because it says that the tile can expand later on, causing it to buckle if they are laid too tightly against the wall) and lots of caulk around the fixtures. I’m also thinking of putting a layer of polychrylic to protect the floor and seal and adhere it completely. UPDATE: it's been almost three months and the floor is doing well! My only regret is never sealing it with polychrylic like I had originally planned. Because the tiles are textured, they tend to trap dirt and grime, which you CAN see on the white parts of the pattern. Swiffer wet mop wipes work great, but you have to scrub to get the grime out of all the little crevices. Do yourself a favor and don’t be a sucker like me. Seal your floor! It will save you some precious cleaning time.
M**Y
Happy with this product; will use again
I like to do DIY projects to update my home. But my DREAM designs don't always agree with my set budget. I had a few hundred dollars to make improvements and wanted to get the most bang for my buck. In walks in this product for my bathroom floors. The installation was really straightforward. Peel the paper, stick down to floor. A CLEAN floor! I scrubbed mine a couple times and let it dry for 12 hours. I used good scissors to cut the shapes I needed which I found pretty easy. I did NOT use additional adhesive but I did use waterproof tile caulking in between all the seems since I stuck this on an existing tile floor. I would most likely use some sort of tile caulking no matter the floors surface underneath. Just some extra protectin for the prodcut. The tiles seem rather durable and I love the design. It's a GOOD upgrade that I hope will last for a few years. I do think the product works best with a completely flat floor so keep that in mind. The whole project for this bathroom (Tiles, PVC baseboards, finishing nails, caulking) was less than $50. Not a bad budget for a huge upgrade! I will definitely use these products in the future.
L**P
Love them! Look great and are easy to install!
Update 1 year later 12/2023: All but one of these are still down and look great! One is lifting up in the middle where there is the most traffic. Still so glad I did this project. We get tons of complements from guests on them :) I pulled it up and and it did leave a sticky residue behind that took about 15 minutes of hard stubbing with dawn soap to lift. Pictures included. 12/2022: Love them! Look great and are easy to install! I literally used a pair of scissors to cut these to size. The only hard part was getting around some of the funky corners. But, even that wasn’t too bad. I bought five sets of these tiles and was left with one. It took me eight hours in total. A full day project for sure. it is such a nice upgrade, I was so sick of my old black tiles. They had tons of smudges on them that no matter how hard I scrubbed could never be cleaned fully. This is a great cheap upgrade and I love how it reflects off the side of the walls too. Definitely makes it look bigger! So far, they are sticking great! I will update if they start to become loose. But I think sticking these directly to clean tile is the move. I wouldn’t be so sure of doing this over wood. There is a before and after photo.
O**O
Nice, but did not hold
Installing these tiles on my fireplace was a snap and it looked amazing (despite the tiles not always aligning). However, and this is a big however, once left over night the tiles fell off and stuck to each other making it impossible to salvage most of the tiles to try to glue back on. Basically 1 and a half boxes out of 2 bought, trashed and useless, that was sorely disappointing. The tiles at the base of the fireplace are still going strong (keep in mind there's no foot traffic on this area) so I gave this product 3 stars because if installed with some kind of extra adhesive I'd think these would have been great! I have not used the fireplace, it's rarely used in SoCal, so I could not tell you if heat would distort or discolor the tiles. Maybe I'll remember to update once I use the fireplace. The pictures attached are during install and after, but not of the mess the next morning. I was too peeved to think about taking pictures while I tried to carefully peel tiles apart, the tiles stuck amazingly to each other though. All in all, 3 stars for the easiness, the simplicity, the look and price point (which was about $10-12 per box).
S**S
Great flooring
I was really hoping this would be a perfect fit for my small laundry room and it is!! It’s beautiful. I did buy some extra spray adhesive to ensure that it stuck really well. I love this flooring and would definitely recommend.
A**R
It's a complete gamble, I recommend DO NOT BUY
I am not new to self stick vinyl tiles, however I will NEVER go thru this company or brand again. Some complain that they don't line up and yes you spend time finding the best alignment, but seriously the pattern is busy and that doesn't even matter. What matters is the corners and seams that come up and then if you catch something on them they will bend and snap. Trust me, I read the directions. My floor I went over was solid and squeaky clean as I wanted this cheap solution to look good. But it has been nothing but a time robber of a nightmare, spending more money to glue corners and seams as heat gun wont even work. In reading directions it states: *Do not use extra adhesive *Prime IF you are going over wood or cement Customer service just wants to tell me everything they THINK I did wrong. Stating you can NOT go over linoleum and that you HAVE to prime the surface and what glues and tapes you need to use to keep corners and seams down. Funny thing is, the tape has bad reviews of being difficult to use and I am not even going to entertain that nightmare as I would need to get the tape under the edges without pulling up more of the tile that ACTUALLY sticks. Tried to paste something else stated in the description where it doesn't state anything customer service says, but I can't paste it in. BELOW IS THE INSTRUCTIONS THEY GIVE, CAPITALIZED RESPONSED FOLLWED BY !!! ARE MY REPLIES. Instructions For Use Step 1 Prepare Tiles and Clean Surface Lay tile package flat and allow 48 hours to acclimate to room temperature of at least 65°F (18°C).. I DID THIS!!! Be sure the surface is clean, smooth, flat and dry before applying. I DID THIS!!!! Area must be free of grease, dirt, wax, uv coating, and other oils. Yup Done!!! Inspect tiles to ensure tiles are free of defects. DID!!! Make sure to not apply tiles to loose or uneven flooring, and radiant heated floors. NOPE I DID NOT!!! If installing over concrete, a primer adhesive is necessary for a secure application. DO NOT Apply to loose or uneven flooring. I DID NOT !!! DO NOT Apply over radiant heated floors. I DID NOT!!! DO NOT Use additional adhesives. I SHOULDN’T HAVE TO AND DIDN’T INITIALLY, BUT WAS TOLD TO!!!! …DO NOT Apply over concrete with excessive moisture or alkalinity. I DID NOT!!!! DO NOT Apply where the temperature regularly falls below 55°F or over 85°F. I DID NOT!!!! DO NOT Apply to heavily textured flooring. I DID NOT!!! FOR A SUPERIOR BOND A Use FloorPops™ Peel & Stick Primer, or similar bond enhacing primer. ABOVE IT STATES FOR CEMENT AND WOOD ONLY (THE BOTTLE TO)!!! Not intended for outdoor locations such as sunrooms, porches, and garages. NOPE ITS MY LAUNDRY ROOM!!! Step 2 Find the Center of Your Room Mark perpendicular guidelines to find the center of the room. Using a chalk line is a preferred tool for this step. Step 3 Lay Out Tiles Leaving the back liner on, lay tiles out from the center of the room to the walls. After laying out tiles, assess the outer edges and decide if you need to shift all tiles over to avoid trimming thin tile pieces. Step 4 Remove Backing and Apply Tiles to Floor Starting from the center of the room, remove backing from your first tile and press firmly into place. Avoid touching adhesive duh I DIDN’T!!! - dust, dirt and oils will affect its strength. Rotate next tile to find pattern match*, and install tightly against the side of the first tile. Working on one quarter of the room at a time, apply tiles in a step pattern. You may find a slight variation in design match from tile to tile. This variation should not affect the overall look of your floor. Be sure to rotate tiles for best look. Tips Installation Tips If necessary, use a straight edge and utility knife to trim tiles to fit, when you reach the edge of your walls. Use a tile roller over the entire floor to strengthen the bond between the tile and floor. I ROLLED THEM AND PLACED GRANITE COUNTER TOP ON THEM TO WEIGH THEM DOWN!!! A 75 – 100 lb roller is recommended. It is also recommended that baseboards are lifted and reinstalled over the new tiles to allow room for expansion. If tiles are laid snug against the wall, the pressure caused by expansion can cause them to lift I LEFT ROOM!!!! Cleaning Your Tiles DO Allow 5 days to clean tiles after application. HAVEN’T BEEN ABLE TO EVEN DO THAT YET!!! Use a vinyl floor cleaner. Sweep, mop, vacuum, and/or dust as desired. DO NOT Do not clean with detergents, soaps, harsh chemicals, bleach, one-step cleaners, wax, or an excessive amount of water Moral of the story, Don't bother!!!! OR go against the directions and prime everything and use lots of extra adhesive, because customer service does not do anything for you! Better yet, buy them thru somebody that has good customer service and likes their customers happy. The people that put up the good reviews, I'm jealous, you were lucky and got tiles out of a good batch. I wish I would have gotten tiles from a different batch! I only give it one star because you have to, to move on!
Trustpilot
2 months ago
3 days ago


