✨ Upgrade your edges, upgrade your space! ✨
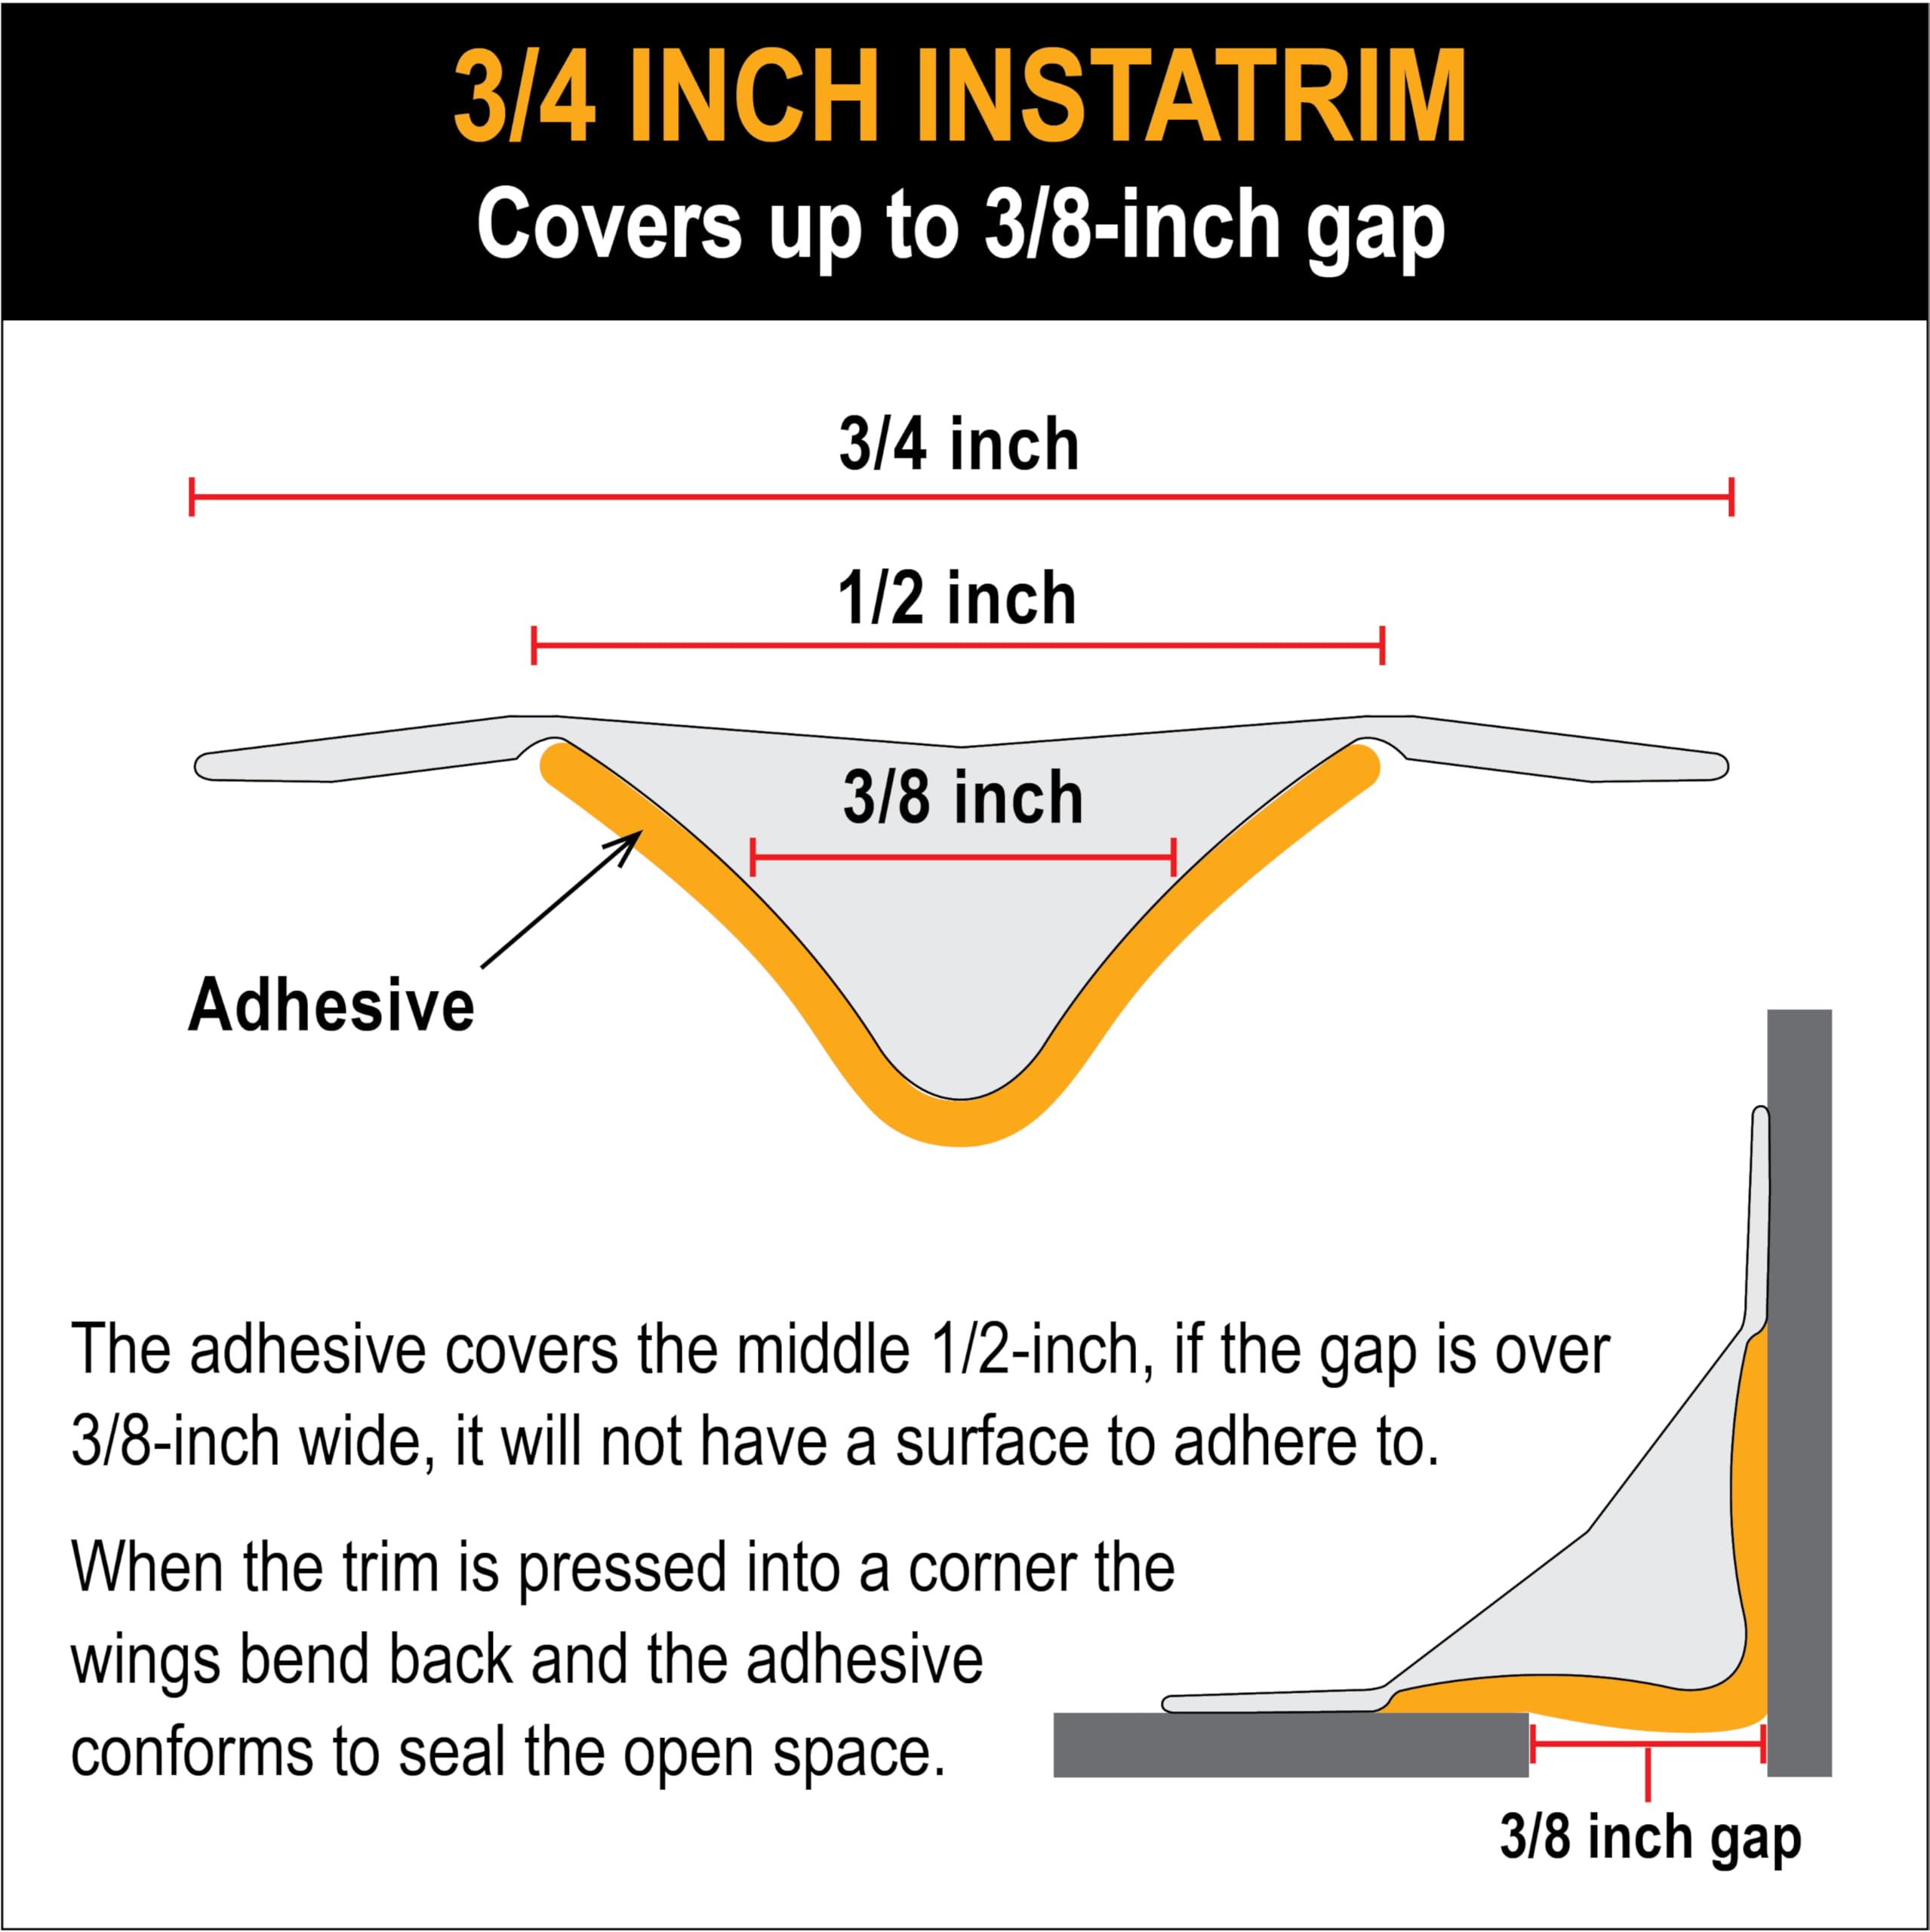
InstaTrim Original Flexible Trim is a 10-foot, 3/4-inch wide black caulk tape made from durable, non-toxic PVC. Designed for easy peel-and-stick application, it provides a waterproof, stain-resistant seal ideal for kitchens, bathrooms, and more. Made in the USA, it fits gaps up to 1/4 inch and adheres to multiple surfaces, delivering a professional, clean finish without the hassle of traditional caulking.
Color | Black |
Brand | InstaTrim |
Liquid Volume | 10 Cubic Inches |
Item Form | Strip |
Maximum Gap Fill | 0.25 Inches |
Surface Recommendation | ceramic, wood, drywall, vinyl, porcelain, metal, vinyl, glass and more |
Tensile Strength | 3500 PSI |
Water Resistance Level | Water Resistant |
Number of Items | 1 |
Manufacturer | CornerFlex, Inc |
UPC | 852849008132 |
Global Trade Identification Number | 00852849008132 |
Unit Count | 10.0 Feet |
Material | Polyvinyl Chloride (PVC) |
Part Number | IT75INBLK-FBA |
Item Weight | 9.9 ounces |
Product Dimensions | 8 x 8 x 8 inches |
Country of Origin | USA |
Item model number | IT75INBLK-FBA |
Size | 3/4 in x 10 ft |
Style | Traditional |
Thickness | 0.04 Inches |
Installation Method | Self-Adhesive |
Item Package Quantity | 1 |
Number Of Pieces | 1 |
Handle Material | Rubber |
Measurement System | English/Standard |
Usage | Cabinets |
Included Components | Caulk Tape |
Batteries Included? | No |
Batteries Required? | No |
B**D
YES, it absolutely works, however........
Don't expect great results out of the box. You will need to do some easy prep work!A few days ago the outside temperature in my city was 13 degrees! I took a reading of the draft that was coming in through the gap by the floor and I got 46 degrees. The overall temperature in this room was 64 degrees while the rest of my unit was a toasty 81. Big difference.I purchased this product to seal the gap between my hardwood floor and baseboard and hopefully put a stop to the unbearably cold drafts.These are the steps I took to install this product accurately:1) I scraped off all bits of paint or debris that was clinging to the surface I was going to cover.2) I vacuumed the perimeter of the surface really well.3) I made a solution of warm water and Dawn dishwashing liquid (Dawn cuts grease) and wiped down the entire surface area with this solution, using a sponge.4) I then wiped down the surface with a clean towel.5) I soaked another towel in clean water and cleaned off all soapy residue.6) I used a clean, dry towel to wiped down the surface and to absorb any excess moisture.7) I used my hair dryer in its highest hot setting and air dried the entire surface.8) I left it alone overnight.9) Next day I started my installation from a corner. I cut the strip at a 45 degree angle as per instructions (it actually took me a couple of tries to get it right) and I started to install the strip.10) I dabbed a little bit of Gorilla glue (with a toothpick) at the corner for extra adhesion and began to lay out the strip, carefully pressed it into position and went over it 3 or 4 times with my thumb to set it in well and then I would do the next portion. (Helpful Hint: remove the plastic backing in stages, about 8 inches or so of backing at a time, apply and repeat.)11) When I finished one entire wall, I went back to the corner and started the other wall. Here it got a little bit tricky to make as much of a seamless connection as possible at the corner. I ended up CAREFULLY removing the putty from about 1/2 inch of the strip WITHOUT CUTTING the vinyl. (You can do it, just take your time!) Then I kept placing it at the corner to see how it looked and , with a pair of scissors, kept trimming the vinyl until it aligned perfectly in the corner. Here, again, I applied a bit of glue to make sure I had great adhesion and finished the other wall.12) My walls are longer than the length of the strip so I had do a connection at a couple of spots. Easy enough, I just made sure that the connection would be hidden behind the furniture in the room.I am writing this review in the room I just finished. The temperature outside today is 29 degrees, the floor area is registering 69 degrees and the temperature in this room right now is 80 degrees! It is finally comfortable to be in here. The only difference now? That strip I so carefully installed.Bottom line: Yes, this strip will make a big difference but it depends on what surface. With wood to wood installation it appears to work like a charm. Additionally, I installed the strip on the floor area. If I needed to apply this to a ceiling or vertical wall area, I would take an added step of applying dabs of glue at intervals (every foot or so) to ensure better adhesion. I cannot speak for its application on other surfaces.
I**E
Practical and Neat Finish
Worked well to cover a gap between my kitchen counter and wall. It sticks well and gives a clean, professional look.What I like:Easy to installStrong adhesiveClean aestheticFinal Thoughts:A great alternative to traditional caulk for small gaps.
A**R
Caulk replacement
Easy to apply if careful. There is prep work to clean the application area. The rolling tool is sold separately. Just applied today so don’t know how long it sticks.
T**H
Looks great when installed - but gets worse every month!
I’ve never been a fan of messy caulk jobs - esp when at least one of the surfaces is really nice tile or stone. So after reading a story about this product & the Twin Cities company that makes it, I ordered several rolls right away. It has now been less than 1 year since I installed it. Got a ton of compliments early on & several folks even asked where I bought it. I have a strong construction background so I made sure to read the directions closely in order to determine how to prepare the surfaces & much pressure to apply when “sticking” the caulk backer into the gap between the 2 surfaces. I also knew that if I stretched it too much when applying pressure the joints would most likely separate. So I didn’t stretch the product at all. The joints around the 3 sides of my corner whirlpool & vanity sink top that meet the mosaic stone backsplashes looked awesome! But even though our basement is climate controlled - in-floor radiant heat, dehumidifier, humidifier & air quality monitor too - this product looks like crap just 9-10 months later. All the corner joints have pulled apart & there are several spots where it is pulling away from the backsplashes. And where I used it to fill a gap between a painted beam & a painted tongue & groove ceiling, it’s falling off - even though I’ve reapplied pressure several times after seeing it coming loose. So it was a complete waste of money & now I have to remove it & clean the surfaces all over again so I can use a good silicone sanded caulk that matches the grout I used for the mosaic stone. Which is exactly what I wanted to avoid & why I bought this product! What a major disappointment!
C**N
Mediocre
Hard to cut around corners. Even after I watched videos about scoring. Is small/narrow as advertised. But which also gives less area that has adhesive. I bought a different style afterwards. Thats fkat, but can be folded. That is wider too. And also can be used on inside corners or outside corners. It works 10 times better. And it was half the cost.
S**S
Holding Up Well
I am in my 60’s with no DIY experience and was able to install this product which is holding up well so far. I had to dig out the old, slightly moldy caulk first.
N**A
Like the look
Nice finish
S**L
Doesn't stick...must use glue
Absolutely zero stick. The only means to adhere this would be to add glue, which I plan on doing since I have no skills to caulk and have it look decent. If you know going in you'll need to use glue than this is the product for you! It looks good when in place, but do not count on the sticky part of this product to adhere to anything.
Trustpilot
1 month ago
1 day ago