
DOWNLOAD THE APP


Customer Services
Copyright © 2025 Desertcart Holdings Limited
DOWNLOAD THE APP

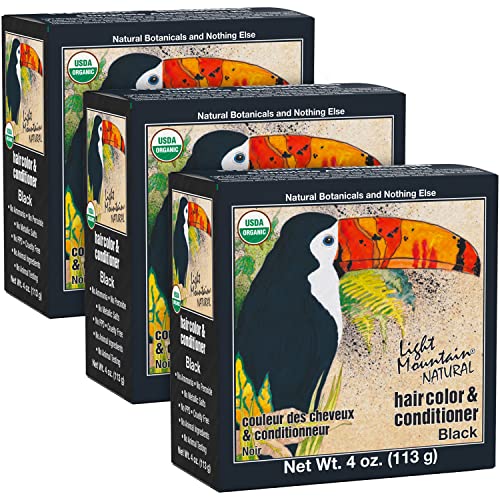


Light Mountain Natural Hair Color & Conditioner, Black, 4 oz (113 g) (Pack of 3) Review: Five Stars - Great product!!! Review: Not a good one. - Not a good one .. My hairs started getting grey after using the product .. It's not a natural one but just more like a market -product color which makes hair dull and grey


| ASIN | B001ET7L9O |
| ASIN | B001ET7L9O |
| Customer Reviews | 4.1 4.1 out of 5 stars (298) |
| Date First Available | 1 March 2012 |
| Is Discontinued By Manufacturer | Yes |
| Item Weight | 136 g |
| Item Weight | 136 g |
| Item model number | 187105 |
| Item model number | 187105 |
| Net Quantity | 339.0 Grams |
| Net Quantity | 339.0 Grams |
| Package Dimensions | 15.8 x 10.69 x 10.49 cm; 136.08 g |
| Package Dimensions | 15.8 x 10.69 x 10.49 cm; 136.08 g |
D**A
Five Stars
Great product!!!
U**R
Not a good one.
Not a good one .. My hairs started getting grey after using the product .. It's not a natural one but just more like a market -product color which makes hair dull and grey
A**R
طلبت المنتج من البائع OTCRX4U وكان موضح 3 علب وسعرها 171 ريال وتفاجأت أنه لم يرسل الا علبة واحدة فقط... فعليكم الانتباه من هذا البائع.
N**E
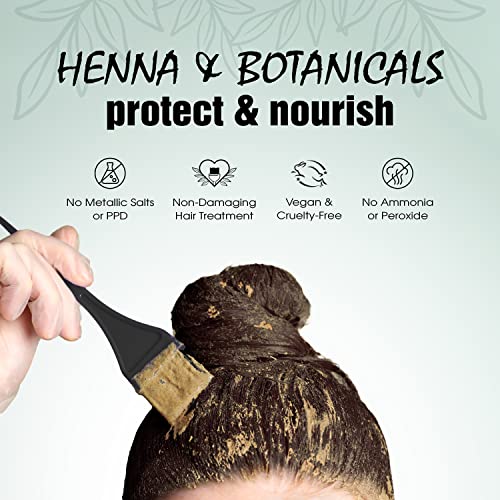
I've been using this for years to cover the grays and give my hair an overall shine. If you have gray hair, and perhaps even if you don't, you need to start with a straight henna application first. I buy Light Mountain Naturals' red and use that. If you have gray hair, you'll have to do this every six weeks or so. Here are detailed directions: 1) Mix the henna (the Red box) with hot water and let sit for at least five hours. You can even mix it the day before (or even weeks before), but if you're not going to use it for a while (say, three days or so), put it in the freezer. It freezes great. If you'll go more than 5 hours but less than a few days, put it in the fridge until you're ready to use it. 2) Wash you hair, but don't use any conditioner. Comb it through and part it so you can easily apply the color. Put vaseline (or plant-based vaseline-type jelly) on your ears, your neck and your face along the hair line. Prep your area by putting down newspaper and a drop cloth and have some rubber gloves around. 3) Use a brush to apply the red (henna) and make sure you have no metal anything touching the color. Add more distilled water if it's too thick. I like it the consistency of pancake batter to make it easier to apply. 4) You'll want to leave the red on for 10 minutes or so. While it's on, mix the black (indigo). Use hot water and mix only what you'll need. Indigo does not keep and should be used within an hour or so of mixing it. I have longish hair (below my shoulders) and I use half a package for each application. I close up the bag with the remaining indigo with tape so it stays fresh. 5) Rinse off the red when your hair has visibly turned orange (you can see it on grays for sure). Pat your hair dry, comb it out and part it for the indigo. 6) Apply the indigo, beginning at the roots and working your way out to the ends. Cover in the plastic bag they include in the box or use another plastic bag (or shower cap). I leave it on for 75 minutes, but you might need it on for less or more time. 7) While the indigo is on, I put away the unused red (henna) by putting it in the freezer. It freezes great. Since I'm only using the red on my roots, I usually get 3 or 4 applications of the red from one box. I also clean up my bathroom by getting rid of the newspaper, washing the brush and comb, and shaking out the drop cloth in the bathtub. 8) When it's time, rinse off the indigo with water, then use a conditioner rinse to get the bulk of the indigo off of your hair and scalp. It won't all come off, but most of it will. 9) Don't wash your hair with shampoo for at least 24 hours. I try to go 48. Your hair will smell like plants and if you scratch your scalp, you'll get blue gunk under your fingernails. Hang in there! It will take two shampoos to get it all out, but try to be patient and only wash your hair every other day or so the first week and only after at least 24 hours has passed since you first applied the color. 10) I get tons of compliments on my hair when I use this. Truly! It grows out great and looks natural. Just remember to use the red first.
J**I
If you're looking for something with the ease of your standard drugstore boxed color, or even the stuff from the beauty supply store, this is not for you. However, this IS a great baby step if you're just looking into using henna on your hair. The product does work well, but it's not particularly convenient, and it smells like frozen peas. That's just part of the henna experience. It's worth it to me not to have to embalm my head in a bunch of crazy chemicals. If you're already a hard-core henna user, this is pretty gritty, nothing like body-art quality henna, but it's a good fix when you're in a pinch. Here's the secret: I don't follow the package directions. I mix up half in advance, and wait for dye release (par for the course) and when it's ready, I mix in the other half with tepid water or lemon juice or cooled coffee, mix both together, and add it to my hair immediately. Sometimes I add ground cloves to make it smell a little nicer, depending on how I feel about my husband that day. ;) Henna takes time to develop. while indigo (which is what turns the red stain of henna black) develops fairly quickly. Boiling water actually makes the indigo less potent, and you don't have to wait for dye release. Anyway: I just put down some newspapers, stick my head over the bathtub, and proceed to make a giant mud pie on my head with this stuff. It's helpful to have a glass (nonreactive) bowl, a spatula that can be stained, some kind of plushy headwrap/headband, and some saran wrap. When My hair has absorbed as much as possible, I use the head band to catch drips, cover the rest of my head with plastic, clean up my hairline, and go to bed, as it is drippy and annoying otherwise. Oh: make sure to put a doubled towel on your pillow! I wake up to nicely colored hair the next morning, tons of volume and shine. Don't freak out if it seems a little redder than expected the first day or two: the color with oxidize, getting darker after that. Yeah, I am kind of a henna nerd, but I figured the additional info might help someone out: cheers!
A**N
This is natural hair color, so don't expect miracles. The color will not be as deep or long lasting as regular, permanent hair color. However, you will have no harmful chemicals on your scalp, which is worth it to me. My suggestions: dye your hair FIRST with pure, 100% henna from the same or any other company. This conditions your hair and gives it a "base" upon which to layer color. If you have light or gray hair, your hair will turn orange. Do not be alarmed. After leaving henna on hair for several hours, thoroughly covering hair, wash and THEN AND ONLY THEN apply this black natural dye. It will take quite a long time, so be prepared for this 2-step process. Leave the indigo on for 4 to 6 hours—longer is better. Then your hair will be dark. Keep doing this every month or few months and your color will intensify. Also, you may need to touch up roots if gray is an issue. Overall, natural dye takes time and patience, especially black dye. Also, you cannot later color your hair with regular dye because that might cause a reaction and surprising color results. So if you start natural dye, be prepared to stick with it. For reference, I have naturally dark brown hair that I used to highlight sometimes at high-end salons. I've also used box color to dye my hair jet black. But for the last 5 years I have been doing WEEKLY henna treatments. Every six months or so I will do the 2-step henna-and-indigo process. My hair is shiny, healthy and has a beautiful natural black color. I lose less hair and the 10 gray hairs I have are all colored. My hair grows faster than before and I get a ton of compliments. I've been told that henna will also slow down the graying process. This is all good, but sometimes I have an urge to go lighten my hair or do something crazy. I can't. I would have to let the henna'd hair grow out completely before applying regular dye. Hope this helps!
C**D
First I want to say that I have been coloring my hair with Light Mountain Henna over the last 6 months & I have loved it, I have naturally dirty strawberry blonde hair, I've used Light Mountain Henna Dark Brown which has turned out the best with color richness on my hair, & I've used the Bright Red which came out more on the orange side of red than I really care for but still was solid coverage & rich color... However, the Black did nothing for my hair - I can notice maybe a slightly darker in some sections but my roots which are the lightest color in my hair didn't even change color at all! Also, my hair seems more sticky than I have experienced with the other color henna. I'm pretty disappointed - you can't color chemical dye on henna treated hair or it has a tendency to turn green, so if I want dark hair I have to either settle for the dark brown, which is still lighter on my hair, or wait 2 months not coloring & try chemical dye hoping it won't turn green. The upside to letting it grow out, I guess, is atleast with henna it fades allover so there's less of noticible roots vs previously colored hair. If Light Mountain Black is your first experience with henna dye - don't let it discourage you from trying other henna dyes or even other colors from Light Mountain. Henna dye is a different experience than chemical dyes, it takes some practice & extra care but it is great for naturally conditioning & coloring hair & as I mentioned above it's not as drastic with grow out.
Trustpilot
2 days ago
2 weeks ago