We remain fully operational. Our teams are working around the clock to ensure your deliveries continue safely.

DOWNLOAD THE APP


Customer Services
Copyright © 2025 Desertcart Holdings Limited
DOWNLOAD THE APP
🚘 Illuminate your ride with clarity that commands attention!
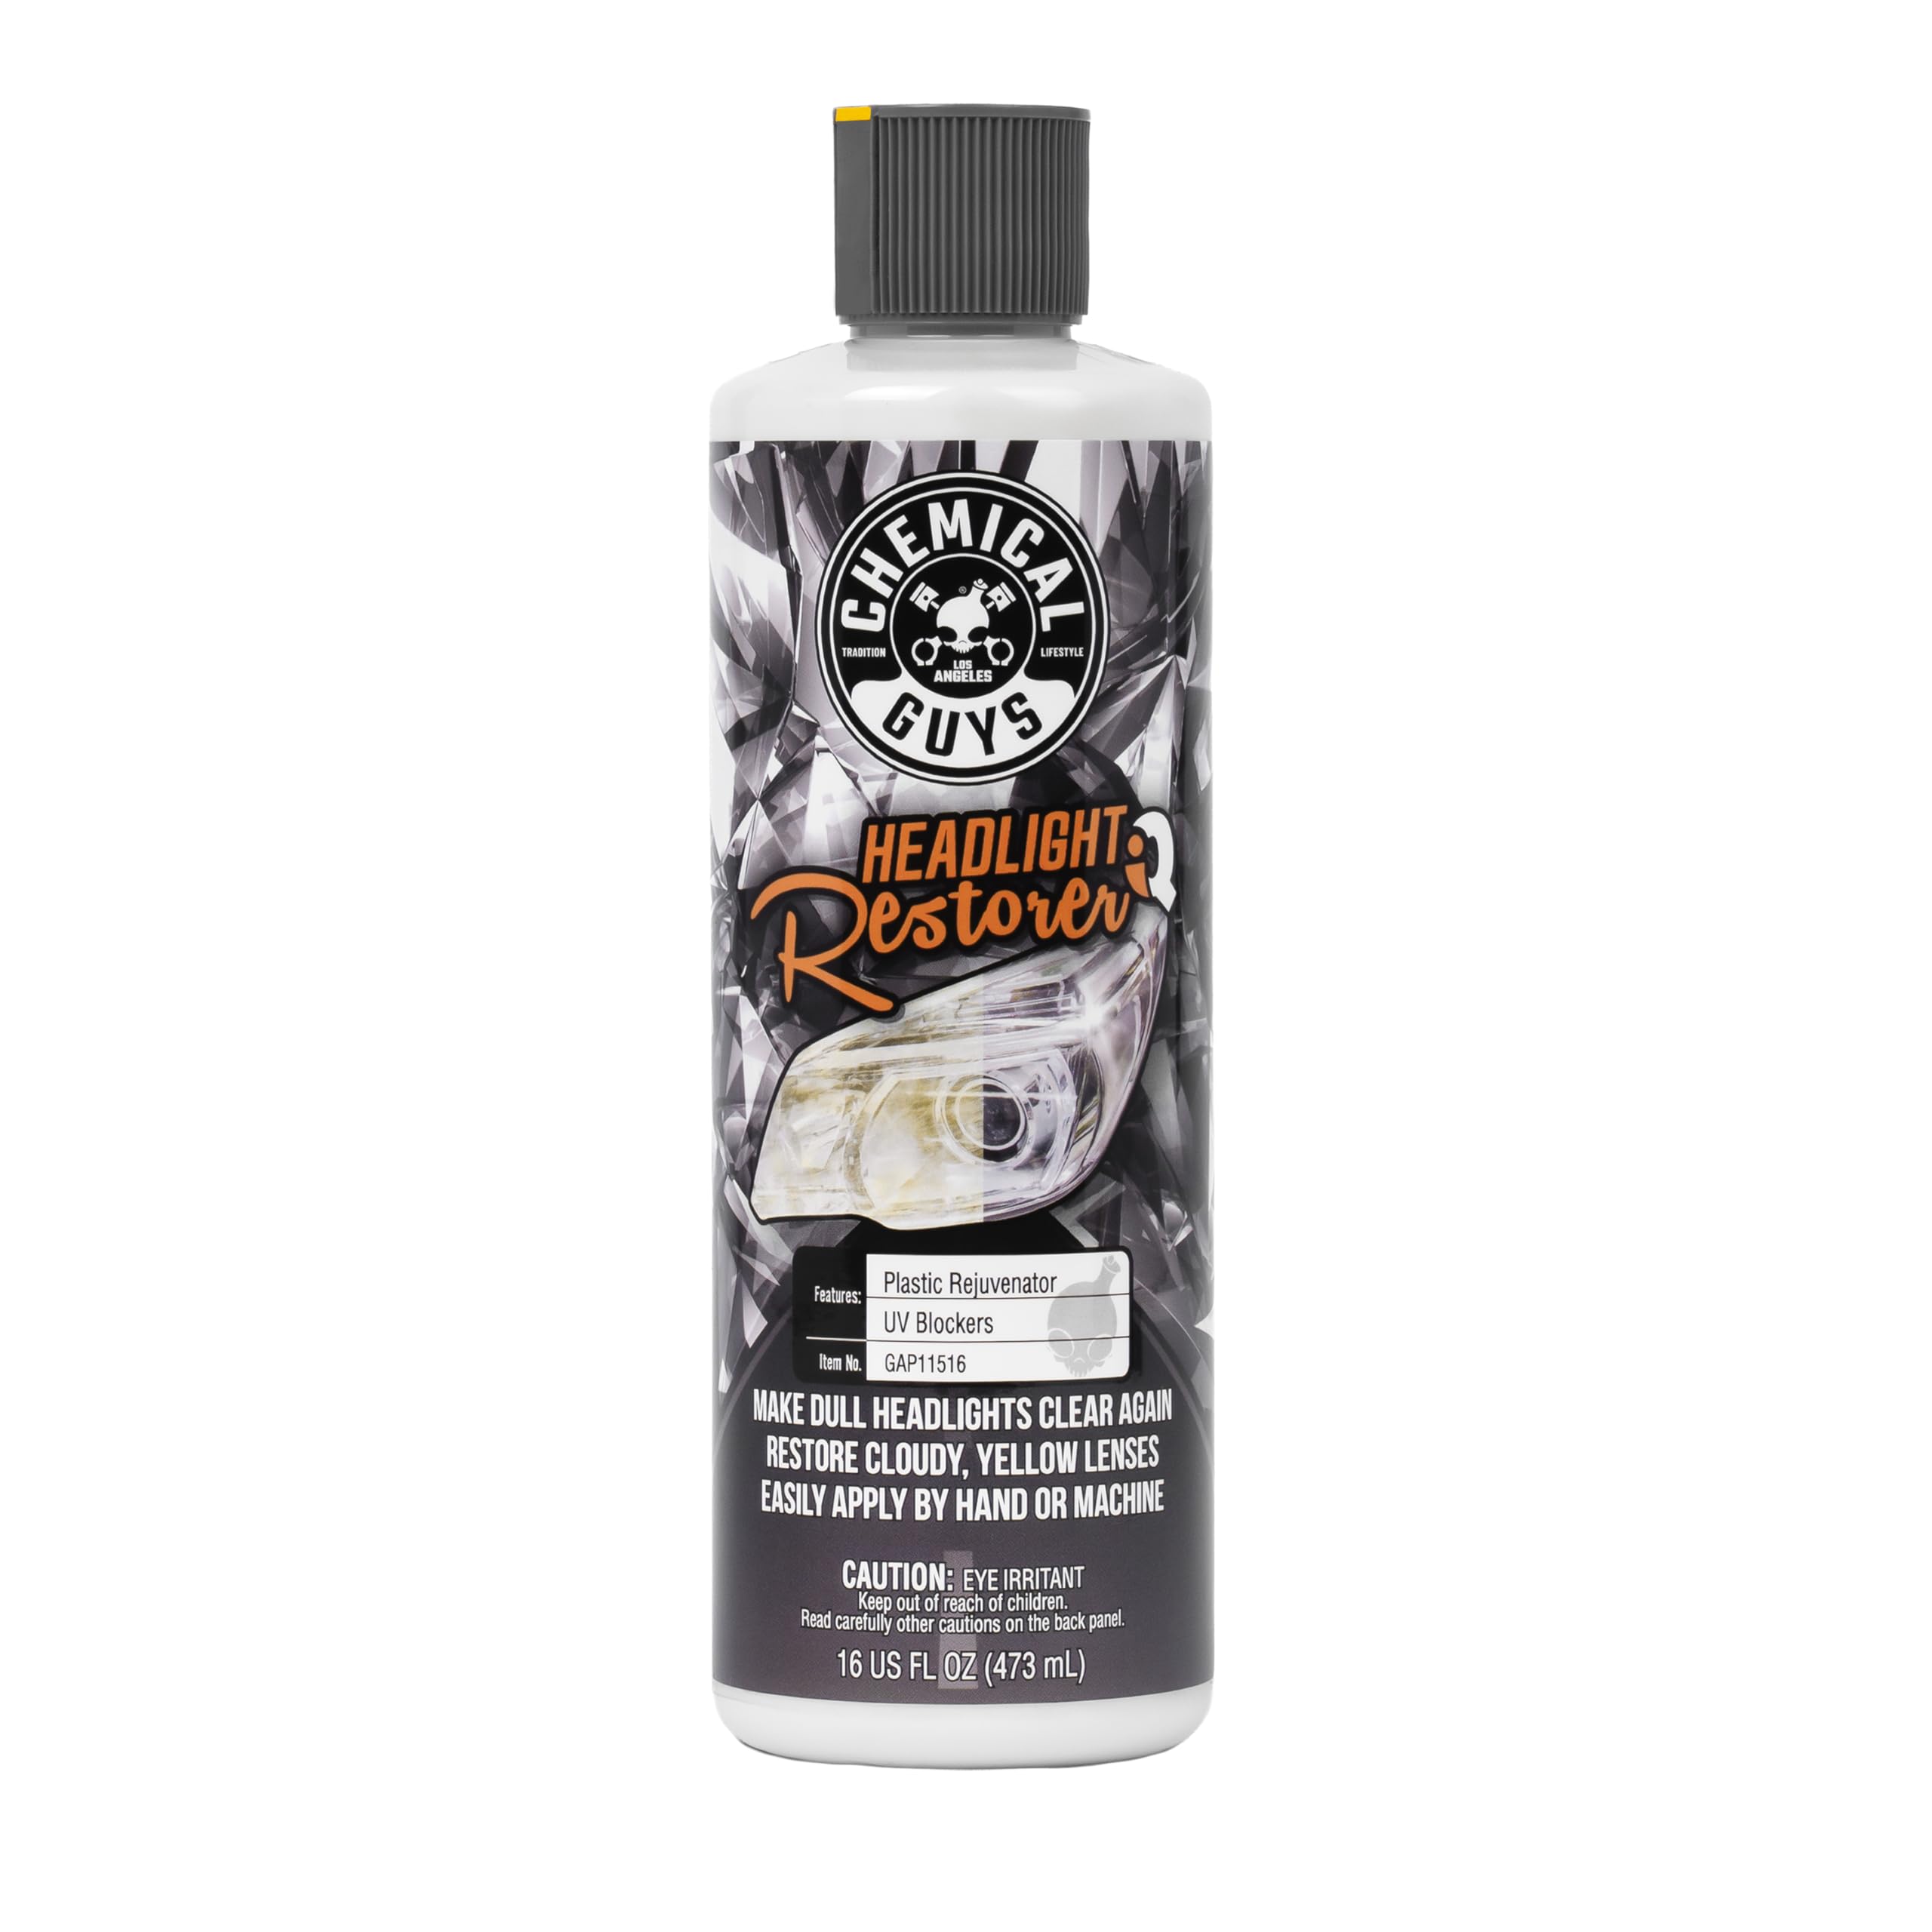
Chemical Guys Headlight Restore and Protect is a powerful 16 oz all-in-one formula that cleans, restores, and shields plastic headlights and other clear lenses from yellowing, oxidation, and haze. Safe for OEM and aftermarket parts across multiple vehicle types, it delivers professional-grade clarity and long-lasting protection with easy application, making it a top choice for maintaining peak nighttime visibility and vehicle aesthetics.


| ASIN | B06ZYGJ4W8 |
| Allergen Information | Allergen-Free |
| Best Sellers Rank | #1,404 in Automotive ( See Top 100 in Automotive ) #6 in Automotive Headlight Parts & Accessories |
| Brand | Chemical Guys |
| Brand Name | Chemical Guys |
| Cleaning Agent Formulation | Degreaser |
| Contains Liquid Contents? | Yes |
| Customer Reviews | 4.4 out of 5 stars 9,644 Reviews |
| Global Trade Identification Number | 00811339028159, 30811339028150 |
| Included Components | Product |
| Item Form | Cream |
| Item Type Name | Headlight Restore And Protect |
| Item Volume | 16 Fluid Ounces |
| Item Weight | 0.5 Grams |
| Manufacturer | Chemical Guys |
| Material Feature | Clear Plastic |
| Material Features | Clear Plastic |
| Material Type Free | chemicals free |
| Number of Items | 1 |
| Scent | Unscented |
| Special Features | Cleans and Restores Clarity |
| Specific Uses For Product | Headlight Restorer |
| Surface Recommendation | Headlights Tail Lights Turn Signals Clear Plastic Lenses |
| UPC | 811339028159 |
| Unit Count | 16.0 Fluid Ounces |
A**E
Great
Product made my headlights look new and crystal clear in seconds. My lights were maybe 35% clouded. Rubbed a few drops vigorously over about a 10” square area until the product turned clear and started to dry took a second cloth and buffed lightly to remove excess. I have a dodge with large headlights so I repeated the process 3 times to get the whole light. Change the portion of your rubbing applicator cloth each time because it will become clogged with the removed damaged layer of plastic. I recommend masking the surrounding surfaces to prevent any possible damage from any over wiping or drops even though the whole process is simple and was very clean. I was very pleased with the excellent results and could do this to another five vehicles or more with what is left in the bottle , which makes the price of purchase well worth spending. Definitely a permanent addition to my detailing chemical supply list.
K**R
Quality product to remove haze on headlights
This kit worked perfectly! I probably spent 30 mins on my headlights. I applied 3 coats of polish on each light just to be sure. They look 100 times better than before. Would 100% recommend if you’re just looking to clear everything up. It even worked on my off road light bars and light pods.
D**D
Easy to use
Easy to use good results
M**H
Let there be light.......
I've been using this product for a while, but have never written a review. This product does work, and in the world of "Polishes" and trying to figure out which grade or grit you need, this is nice cause it's just the right grit rating to do a complete job relatively easily. To Start: PREP0: Open the hood of our car or truck, that ensures you get the best access to the headlight lens, including the top. PREP1:Obviously make sure the lens is clean, which you can do just using window cleaner or after you washed the car or took to the car wash. PREP2: You want to remove the first line of "Haze" here's a trick, use WD40 or Ballistol.. Simply spray it onto a microfiber cloth and wipe down, you'll notice it takes off a layer, but not ENOUGH to make the lens clear, but it DOES help and sort of "Pre lubes" the surface a bit. ---Note -- IF the lenses are severely oxidized, like it's very rough and pitted to the touch, and almost completely faded out, you may need to do a wetsand prep using something like a 3000/5000/7000 grit sandpaper, THEN start the Chemical Guys' polishing routine with this product. This product won't remove that harsh first layer of oxidation, or it will take forever, as it's a very medium to medium fine polish. If you have to wetsand first, use a spray bottle of distilled water, wet the lens thoroughly, then first go with 3000 and work up to 5000 and maybe 7000, constantly lubing with water and wiping off the excess with a clean towel. After you go through the 3 stages then apply this Chemical Guys' polish routine. But, for most people they won't have to do this. But if you have to do this, prep3 is critical below: Masking. PREP3: TAPE: It's best to get some blue or green painters type masking tape and tape off the light from the painted areas of the car. Don't over think it, it's not like you're painting anything, you just want to mask off the painted areas from the headlight to keep the bonnet from bumping the paint. And from the material getting into areas you don't want to.. PREP4: HAND POLISH: If you're using a foam bonnet or a microfiber bonnet (or a towel) this will take longer, but you have more control of the "product" and it doesn't fling off. Simply put some on your foam bonnet and polish it in. Keep working it, and sometimes you can have a spray bottle of water to lubricate it a bit, and continue to work it in. Wipe it off, try a second coat doing the same procedure. Remove the tape, Let it DRY, then use a clean cotton cloth to remove the excess.. Cotton will not create the static like Microfiber does and it won't remove any protect layers of the product, leaving it treated, as this Chemical Guys' headlight restorer does have a UV protectant in it. If you don't have a cotton cloth, that's okay, just don't press too hard, just lightly buff it and remove the haze.. Voila.. Clear. PREP4A: MACHINE POLISHER. If you're using a rotary polisher, whether it's a large bonnet type designed to polish, or a smaller one, like a special tool that holds a 3" flat bonnet, or a smaller bonnet (Like the ones you use on Drills, the round type) you have to be a little more careful applying the product as it'll fling off and make sort of a mess. So you put it on the flat or round bonnet, spread it around on the bonnet and the lens and SLOWLY work it in, don't go full blast or you could possibly burn the plastic or the paint surrounding the headlight.. So you want to be careful not to hit the painted areas. HENCE the masking. Work it in slowly, and then gradually increase the speed.. You don't have to press real hard, as that just makes the bonnet lose control a bit.. Just a nice light pressure and allow the rotary device to do the work. Also, you can rest assured your polishing bonnet has probably absorbed some of the material, especially by the time you get to the 2nd headlight. That being said, you can continue to polish a bit without having to apply more product. This product seems to not dry too quickly and has a slight oily texture to it so you can work it in looking as though you don't always have to have a fresh "Haze" of the product on the light lens.. Again, if the bonnet is fairly saturated with product you should be good. Again, like above, you can also spray some water on it and continue you on that way as well. Be sure to avoid hitting the painted masked areas as much as possible, bumping them slightly won't really hurt it, but when you're increasing the speed just be sure to avoid them, you don't want to "burn" the paint. Remove the tape, let the product dry to a haze, and slightly wipe clean with a cotton or microfiber towel. Tip: I buy high quality paint brushes, like 2", 3" wide, the stubby kinds, which are great for after a procedure like this to wipe around the light lenses, to get any chalked product out. If you have an air compressor that's a bonus too. Just use the brush around the edges, then hit it with an air compressor.. Should look great. Like these: https://www.amazon.com/Wooster-Brush-Q3211-2-Shortcut-Paintbrush/dp/B099KL78FB/ref=sr_1_6?dib=eyJ2IjoiMSJ9.SUZ3kYDsniTGpWjAgfwOX1LQJ_Yq8wMpc0b83Zaw7faaGpmqa2xEHA1lQlXw8WCpNNesowQGa4tnPmKzSFUxH4WeQ-PxOS2JiXDG5OTNhlJEeCY26NFkoXBmclsJqhfi_V40EU8qRkS1Ma1pG7dJj_YrBToUPaKAtvF_K_rStd0c9Nw1bx6ZzDcodmc5RYwWr35jsUugVCnPN4B1GPu0DDxfKqTf9zxIzakWAGvtjGiZbORcA_bS276zEYyIe-AowBrSuZC0KrZ29lePdIzQagGLolWCuvOC7LTBLINBWe4.wRl7tSfIBoecdoW846dL8XItJGA-99c2tpA8mgHC09c&dib_tag=se&keywords=stubby+paint+brushes&qid=1733415295&sr=8-6
N**M
Solid
Pair this with the orange hex pad that chemical guys sells and a power drill for it and you have the perfect one step headlight restoration kit. This is definitely worth the asking price and perfect for oxidized headlights. If you hit it with a one step and the orange pad, it wont be a permanent solution, but it definitely will last several months and is perfect results to effort ratio. Definitely a buy.
A**.
Works only half way - one cannot reach full clarity of headlight, and repair does not last long.
I used a different brand before, one of those which come with a set of polishing disks, a polishing solution, and you use a drill to gradually get rid of surface roughness. That one worked very well but it was quite of a chore. The idea of this one was attractive. Indeed, it works very clean to get rid of initial haze. However, it seems to be unable to reach a perfect clarity of headlights, and the effect of surface refurbishing fades away in 4-5 months. In a way, it is a quick and easy fix which takes you half way to full clarity of the headlights and does not last long. I am going to order a more reliable and proven replacement rather than using what I have left in the bottle of this one (which is almost the full bottle...).
S**E
Great Results
Great product. I only spent about 10-15 minutes per light on a car that had been sitting for two years
G**O
Headlight restoration
I gave this headlight restoration 5 stars it made my ugly foggy headlights like new very easy to apply need a bit elbow rub on it and I applied it on twice a it worked amazingly I do recommend this product chemical guys got it going on! Love their products
Trustpilot
5 days ago
1 month ago